
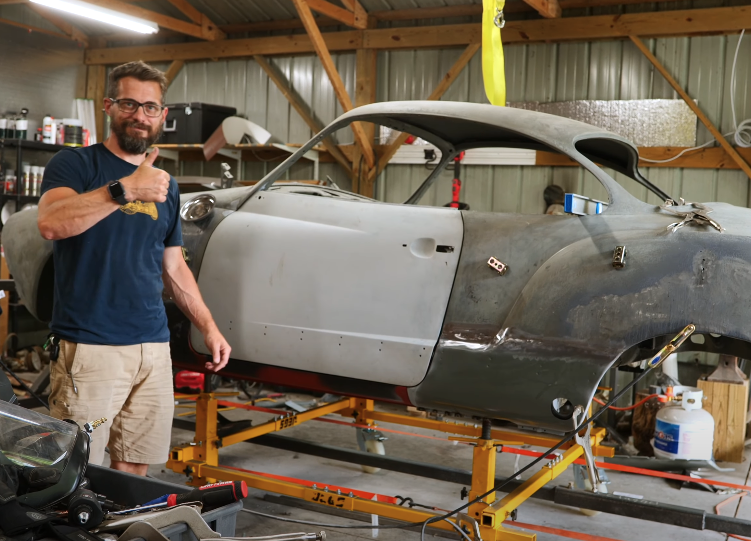
I have turned a corner and started adding new body panels to the Karmann Ghia! I’m cautiously optimistic about the progress I’m making and becoming more comfortable with the tools. I’m so excited that it looks like a non-rusty version of itself!
1. Order New Panels
If you’ve been following along with the Karmann Ghia saga, you’d know that I have been removing rusty panels from the car. I have felt all along the way that I am in over my head. There was a point where I thought I ruined the Karmann Ghia past the point of repair. That remains to be seen, but in this project, I am starting to replace the panels that I had removed.
If you are rebuilding an old Volkswagon, there are a few suppliers that are crucial to success; JBugs, M&T Manufacturing, & Cip1. I ordered many of the new replacement parts and pre-stamped body panels from them. In this video, I used a spot welder to attach some of the panels and some cool sheet metal clips called Clecos.
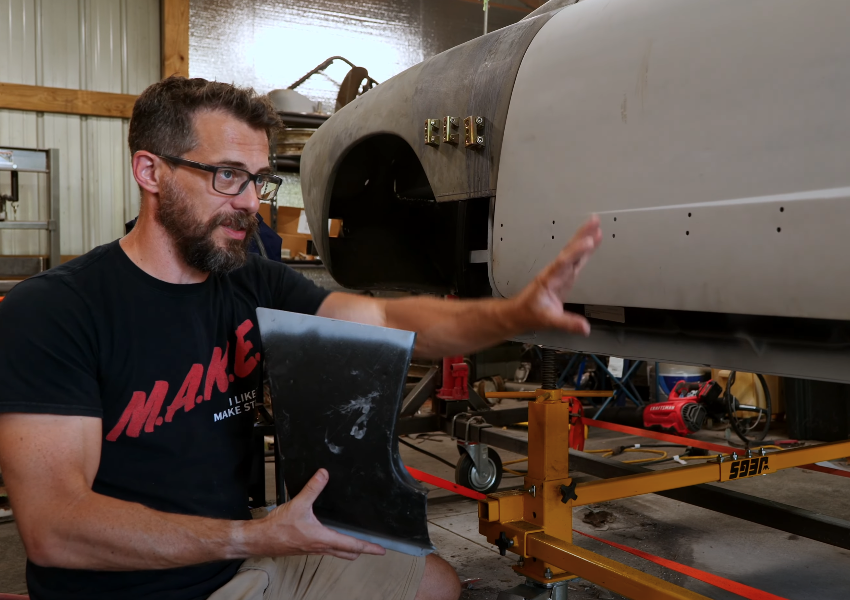
2. Confirm Panel Placement
Using the Cleco clamps, I positioned the new sheet metal panels around the edge sof the installed door. I was previously worried that my reference lines were off. Well, this was caused by DIY Rotisserie that I made. It was causing the body to buckle slightly in the middle which made all of my panels misalign. I replaced the rotisserie with a proper car support which evenly lifted the body from underneath.
Once I had the panels in place, cut away the car’s existing sheet metal overlap, & primed the panels with a weld-through primer, I could weld the pieces together. Welding sheet metal is different from any other welding I’ve done. You have to be extremely careful not to apply too much heat along the joint. That means tack welding the piece together in several places, allowing the part to cool between welds.
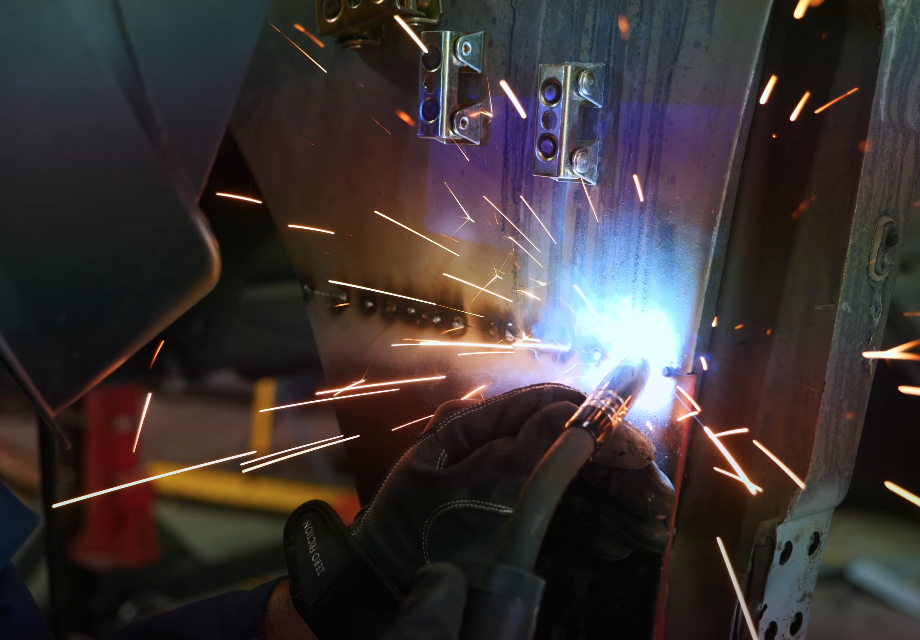 3. Spot Welding
I continued to tack weld the panels in place until I had completely covered the seem. Once cooled, I could grind the weld flat and the panels were permanently in place! I used this method on the rocker panels, but the panel above the heater channel is a little different. The manufacturing plant uses a machine called a spot welder to attach mating pieces together. The two flat surfaces are pinched together and a super hot electrode welds the pieces together at a little spot (hence the name).
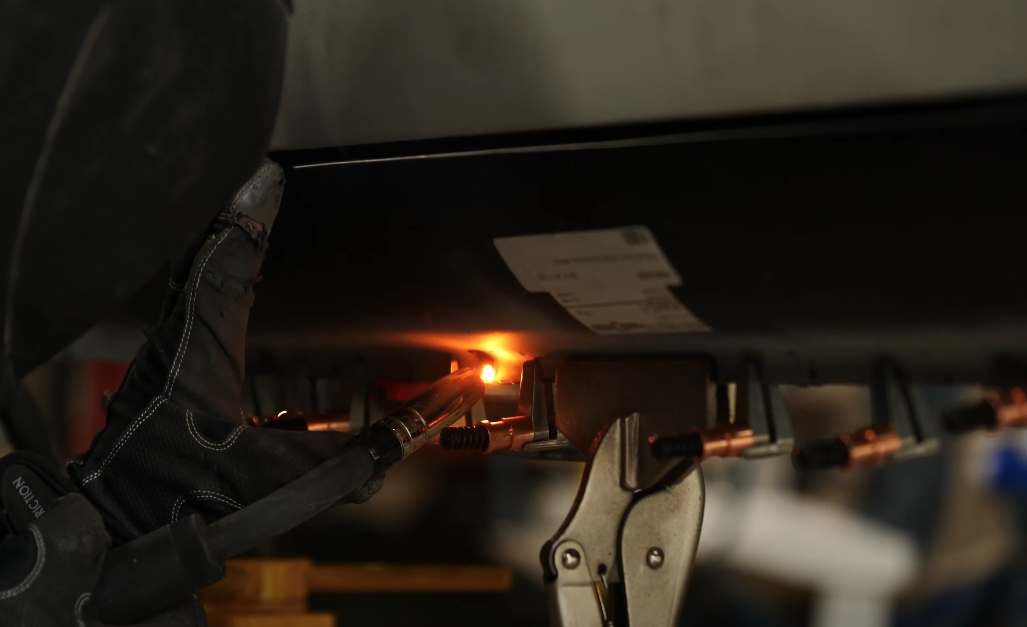
I covered the pieces in weld-through primer which worked perfectly on the MIG welded panels, but it wouldn’t work while spot welding. Armed with this knowledge, and not wanting to remove the protective primer coating, I drilled holes along the mated surface. I could fill these holes with a MIG weld, essentially creating tons of tiny, and laborious spot welds.
 It’s Starting to Come Together!
I am really motivated by the progress on the Karmann Ghia. Rebuilding a classic car is a massive undertaking. I love this process; the back and forth, progress and failure, the sweat and the smiles. While it may seem from the outside that I am making slow visual progress, which may be true, I am learning a lot about something that I am passionate about. I am exercising my mind, growing my skills, and gaining confidence. I hope there is something out there that you can connect with despite outside influence. Keep going, it’ll be worth it.
Tools List:
(purchasing via these affiliate links supports ILTMS)
Finishes & adhesives I like:
Welding:
- MIG welder *
- Spot Welder
- Welding mask (auto darkening)
- Welding gloves
- Angle grinder *
- Cut off wheels
Other Stuff: