

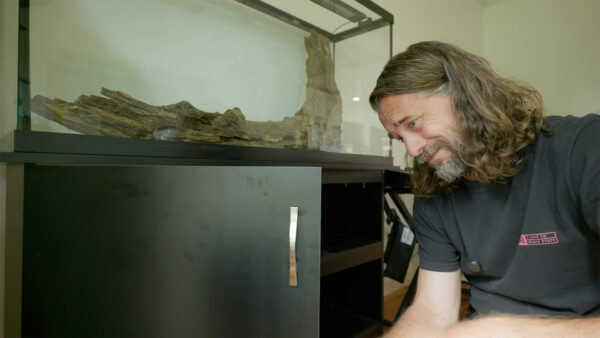
Recently I got a really good deal on a 60 gallon, and the only condition attached to it was that I had to take the stand it was sitting on too. It was a package deal, so there was no picking and choosing. To be fair to the thing, it was not terrible. It was brand new and it was built to hold this tank, which is going to weigh somewhere over 600 pounds once it is full. But it was chipboard, and mostly not waterproof, which is a rough material to park under something whose entire job is holding water. So before I put any water in it, I decided to build a new stand out of metal.
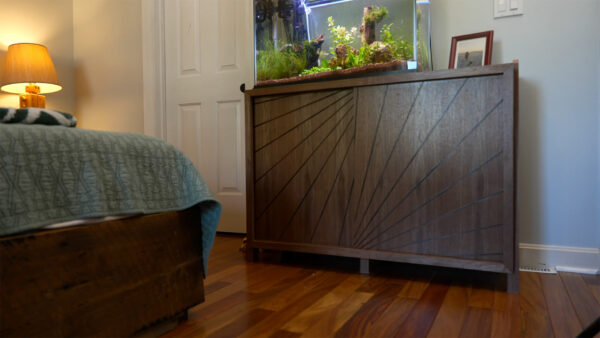
I had another reason why I got it, and it goes back a couple of years to the walnut stand I built for my 30 gallon. That thing looks great, and I still like it, but walnut and aquariums are a bad pairing. Aquariums need maintenance, which means water leaves the tank on a regular basis, and every time it does I have to be careful about where it lands. Wood does not forgive that for long. There is also the slower problem that nobody warns you about, which is that aquarium stands stick around for fifteen or twenty years and the look you picked on day one does not stay current for anywhere near that long.
So I had four things on the list. It had to be strong, because a gallon of water weighs 8.34 pounds and sixty of them is roughly 500 pounds before you add rocks, wood, gravel, and fish. It had to give me somewhere to set wet things down during maintenance. It had to survive water contact without slowly falling apart. And the outside of it had to be changeable, so that in ten years when the room looks different I am not tearing the whole thing out and starting over. Strength came first, and strength meant steel.
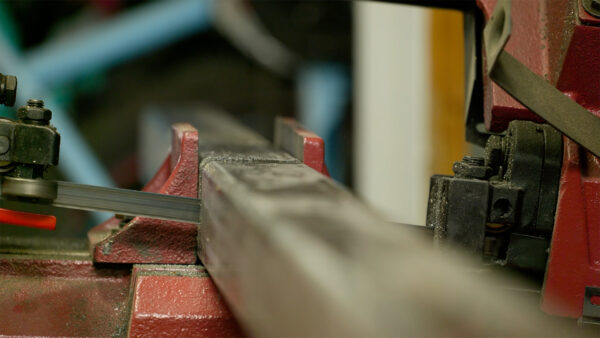
The steel I used is two inch square tubing about an eighth of an inch thick, which is aggressively more than this job requires. A two by four would have handled it. I used the square tubing because I already had it, left over from a car rotisserie I built a long time ago, and material sitting in the shop is cheaper than material at the store. Four legs out of the tubing, angle bracket running between them to tie everything together, and a load path that runs from the tank down through the top surface, straight into the legs, and into the floor.
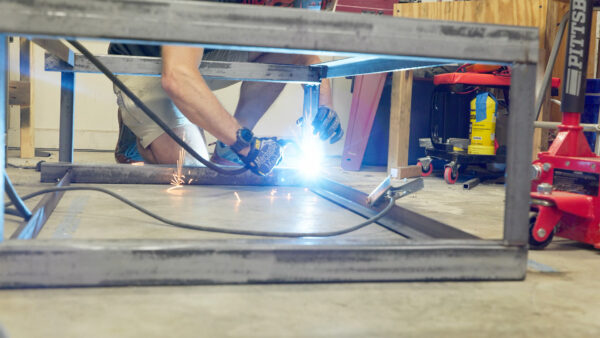
My welding philosophy here was simple. Butt joints, big beefy welds on the inside of everything where nobody can see them, which means nothing to grind. If you go build a metal table like this, here is the thing to watch. Welding is heat, and heat pulls metal toward the weld or pushes it away depending on where you put it, so every bead you lay changes the angles of everything you already did. Things go out of square. That absolutely happened to me. I did not care much at the time, because the only surface that truly had to be right was the top, and all four top rails landed on the same plane.
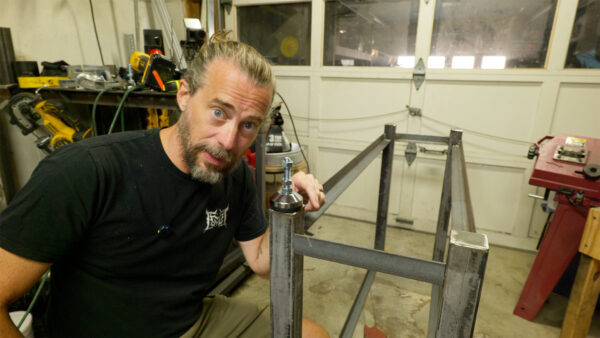
The bottom was going to get sorted by leveling feet anyway. The ones I picked up can handle around 1300 pounds each, which is plenty, but a foot is only as good as what it threads into. I welded a nut into a hole drilled in the bottom of each leg so the feet could turn up inside the tube, and added thick plate at the bottom of the legs for a solid connection. The feet turned out to be oversized, because when I ordered them I was still planning on two and a half inch tubing and then discovered I did not have enough of it. Easy fix. I offset the holes inward instead of centering them, so the feet would not hang out past the perimeter of the legs, which matters later once panels go on the outside.
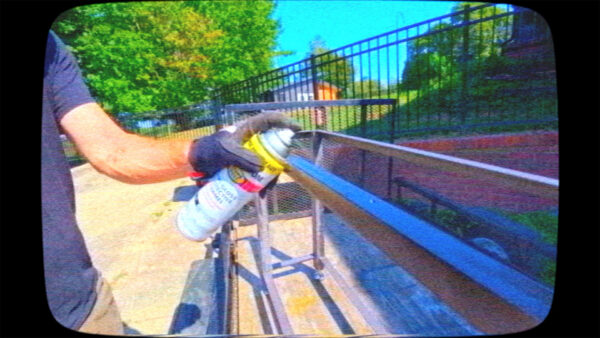
Worth saying out loud, because this kind of project scares people off: you do not need much to do this. Any welder will get it done, whether it came from a pawn shop or Harbor Freight or Facebook Marketplace, and even a cheap one is fine for a frame like this. You do not need a bandsaw either. An angle grinder with a cutoff wheel and a grinding disc will handle all the cutting and cleanup. I drilled some holes through the top rails so I could pull a top down onto the frame from underneath, painted the whole thing black, and moved on to wood.
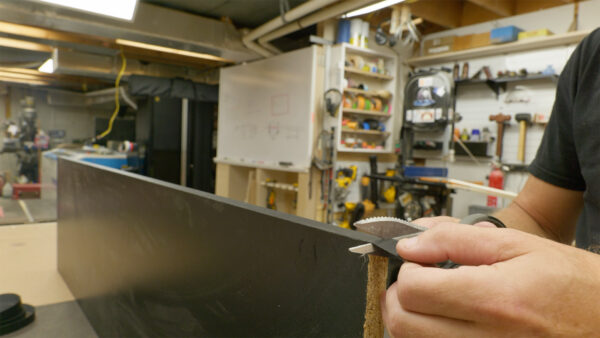
The top is melamine, which is funny given that I have been known to complain about chipboard. The difference is what the chipboard is covered with. Melamine is a waterproof surface over that core, and I am only using it for the one horizontal panel the tank sits on rather than building the whole piece of furniture out of it. Cut edges needed covering, and melamine edge banding exists for exactly that, in black no less. When I set the frame down and checked it, it did not rock at all without touching the feet, which made me suspect my old floor was more of the problem than anything I built.
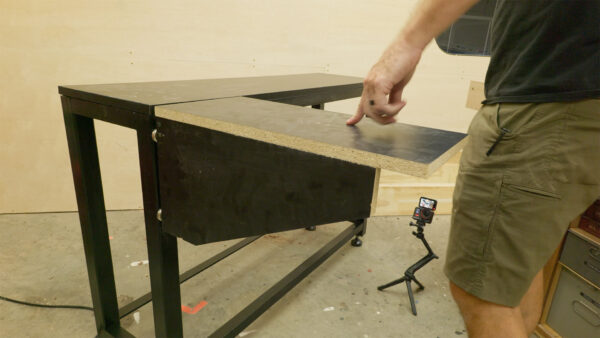
Then came the magnets, and there were two completely different jobs for them. The first was the maintenance problem. I wanted a work surface I could attach and remove at will, so I built a shelf roughly sixteen by ten with a leg that reaches back and lands on the frame, held on with a pair of very large rare earth magnets. I did not fully trust magnets alone to cantilever a shelf off the side, hence the leg. It is not made to hold much weight, just to give me somewhere to set a net or a hose or a bucket lid while I am elbow deep in the tank. The magnets turned out to be strong enough to pick up the entire stand, and when I want it off, I push down and it releases. When I am not using it, it sticks to the underside of the stand and disappears.

The outside was the part I had not figured out, which is a little backward for me. I usually model everything in detail before I start so there are no open questions, and this time my planning stopped at the idea that it should be metal so magnets would stick to it. So I went into Fusion and modeled a simple frame that reads like a shaker door, just an outline with an inset panel. The inset is where it got interesting. Instead of a flat painted panel, I used a free Fusion add-in called Image to Surface, which takes a grayscale image and turns the light and dark values into 3D geometry. If you want to get comfortable doing this kind of thing yourself, my Fusion For Makers course walks through the modeling fundamentals that make add-ins like that useful instead of confusing. I started with terrain, cut the polygon count way down for a faceted look, and added a lip around the back so the panel could drop in from behind and get screwed in place.
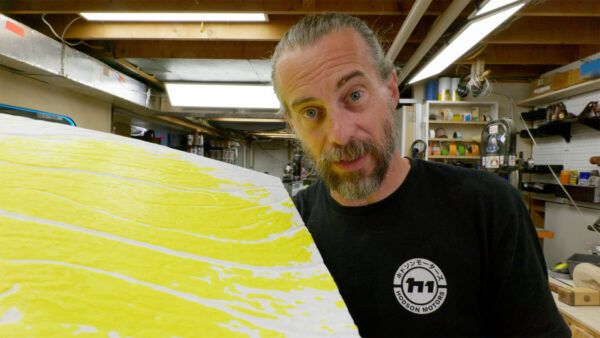
The terrain version looked flat once I got it into the slicer, so I swapped in an image of wood grain instead, and that is what went on the printer at about twenty-one and a half hours per panel. The irony is that the print layers gave the wood grain image so much relief that it came out looking more topographical than the actual terrain did, which is exactly what I wanted in the first place. The panels came off thin, so I glued each one to a piece of quarter inch underlayment with spray adhesive plus some CA dots for good measure. PLA prints get fine fuzzy hairs all over them, which look terrible under paint, and a heat gun takes care of those. One panel needed a whisker trimmed off on the table saw to drop into its frame.
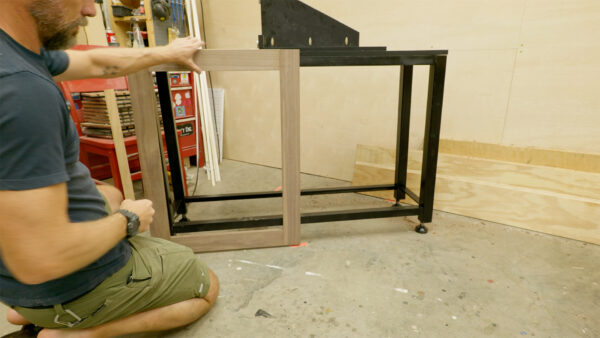
The frames themselves are walnut plywood cut into strips with simple panels on the outside, edge banded because plywood edges are plywood edges. Mounting them was where I got humbled. I countersunk small magnets into the back corners with a forstner bit, sitting just proud of the surface so the magnet could actually touch steel, and they were not strong enough. Doubling them up was not strong enough either. Then I found a stash of tiny screws I forgot I had, short enough to hold a magnet embedded in three quarter plywood without poking through the front, and suddenly the panels were nearly impossible to pull off.
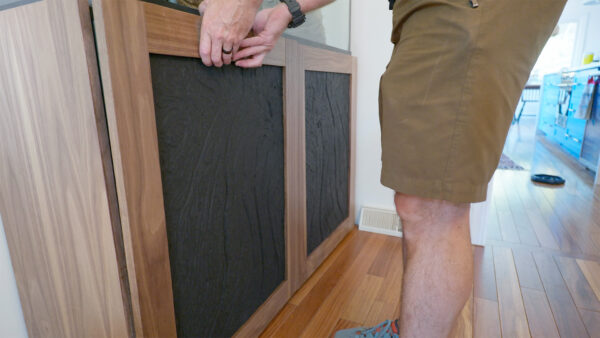
Four magnets per panel became two at the top, which holds fine and still lets me pry a panel loose without wrecking the frame. Somewhere in there I also cut a few welds off camera, squared the frame properly, welded it back together, and added 45 degree gussets in the corners to keep it that way, because once panels start going on, square stops being optional.
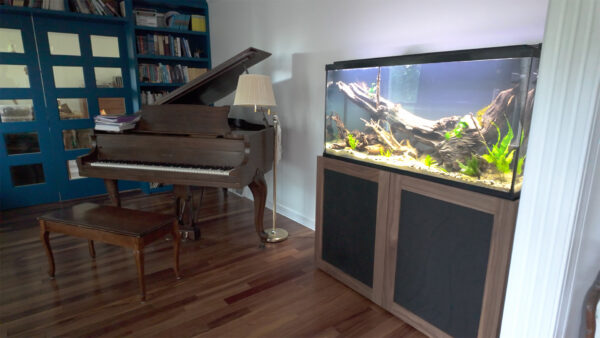
I wish I could show you a lush, fully grown in tank, but that is not how aquariums work. You plant them and then you wait months or years while everything fills in. Even freshly set up with barely anything in it, I think it looks fantastic sitting on this thing. And the whole point is still ahead of it. When this room changes, and it will, the panels come off and different ones go on, and the stand underneath never has to move. Thanks for following along with the build. Now, go make something awesome!
TOOLS
(purchasing via these affiliate links supports ILTMS)
Woodworking
- SawStop cabinet saw
- 8″ Dado stack
- Skil circular saw
- Dewalt 20v drill driver combo
- Dewalt Miter Saw
- Jet Wood Lathe 12×21
- Carbide lathe tool set
- Countersink drill bits
- Dewalt DW735 benchtop planer
- Orbital Sander
- Pancake compressor/nail gun combo
- Dremel tool
- Incra box joint jig
- 54″ Drywall T-Square
- Push Blocks
- Jigsaw
- Shop Fox 6″ Jointer
- Grizzly 14″ Bandsaw
- Grizzly Drill Press (WAAAAY overpriced (3x) on Amazon, buy from Grizzly directly.)
- Jet Drum Sander
- Kreg Rip Cut (circular saw guide)
- Kreg R3 pocket hole jig kit
- Shop Fox Hanging Air Filter
- 2HP Dust Collector
- 1 Micron bag
- Speed square
- 11″ Digital protractor
- Digital Angle Gauge
- Classic steel ruler (cork backed)
- Taper jig
- Flush cut saw
- 90˚ corner clamp (4 pack)
- Box Cutters (for eva foam)
Finishes & Adhesives
- Spray lacquer
- 100% pure tung oil
- Formby’s tung oil finished (tung oil/varnish)
- Danish oil
- CA Glue (medium)
- CA Activator
- Barge Contact Cement
- Critter Spray Gun
- Polycrylic
- Polyurethane
- Spar Urethane
3d Printing/CNC/Laser
- Glowforge (laser)
- X-Carve (CNC)
- Ultimaker 2 Extended 3D printer
- Ultimaker 3
- Original Prusa i3 MK 3
- Form1+ SLA 3D printer
- Silhouette Portrait (vinyl cutter)
- All filaments, 3d printing supplies from MatterHackers
Welding
- MIG welder *
- TIG welder
- Welding mask (auto darkening)
- Welding gloves
- Welding magnet
- Angle grinder *
- Cut off wheels
- Metal cutting bandsaw *
- 10″ Evolution Miter Saw for cutting Steel, Aluminum, Wood, etc.
Electronics
- Arduino Uno (just the Uno)
- Arduino Uno Kit
- Arcade buttons
- Raspberry Pi 3
- Multimeter
- Wire
- jumpers (Male to Female)
- Soldering iron
- Third hand kit
- Wire strippers (not the ones I have, but good ones)
- Thin solder
- Anti static mat
- Fiskars cutting mat
- Plastic parts cabinet (24 drawer)
- Plastic parts cabinet (64 drawer)
- Precision Screw driver kit