
We wanted a cool looking room divider that could block out bright light. Using our CNC and some rollers, we made a sliding room divider straight out of Star Wars!
1. Model with Fusion 360 for FREE!
When we got the new building, Josh measured each room and made a simple floor plan in our favorite, free 3d modeling program, Fusion 360. We teach an online course on how to get started modeling digitally. Go to www.fusion360formakers.com and use the offer code MAKECOOLSTUFF10 to get started! Using his model, we were able to measure the huge window wall in the front room and plan out the room divider.
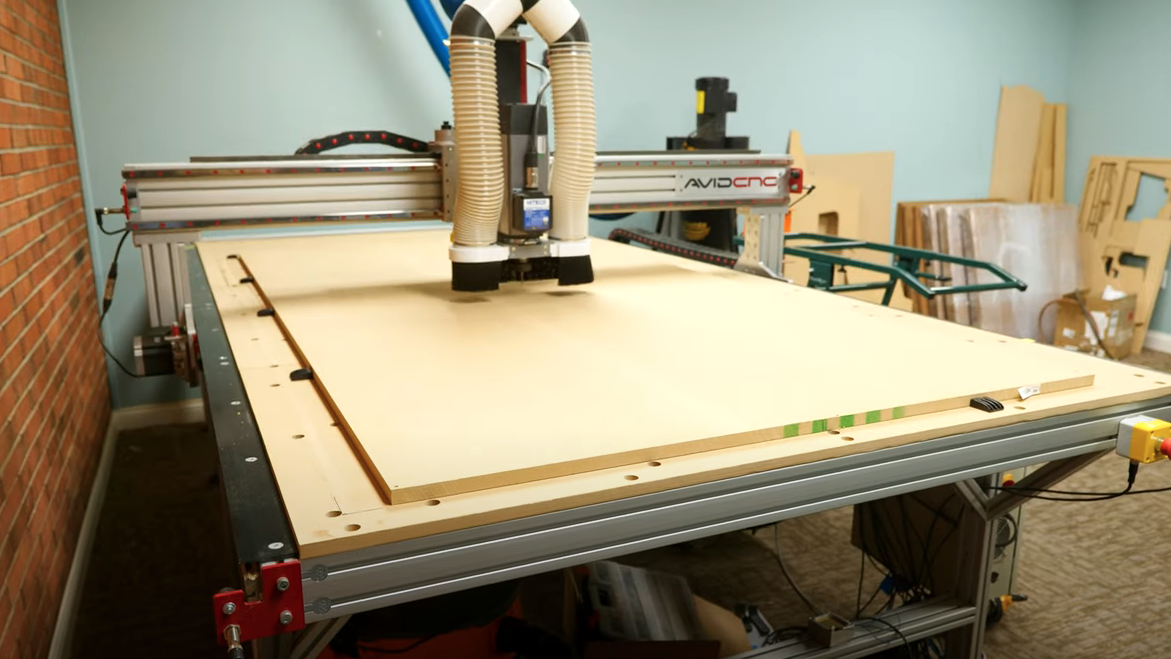
Once we settled on a Death Star design, Josh figured out the sliding panel mechanism and we were ready to get cutting. Because he used Fusion 360 to design the wall digitally, he could then send that design straight to our CNC machine. It made cutting all of those pill shapes really easy. It is so handy doing all of the prep and planning work in Fusion 360 so we didn’t waste time or material.

2. Cut Out Panels
This Sliding Room Divider is made of a stationary front panel and a matching sliding panel captured inside a frame. The stationary panel will be cut from full size 3/4″ MDF sheets. To save weight, the sliding panels are cut from 1/2″ plywood sheets. The sliding panels are slightly more narrow than the stationary ones to allow them to slide. The CNC made quick work of the panels and we biscuit joined the larger sections together. Meighan then painted the huge pieces and we were ready to assemble.
3. Add Frames & Rollers
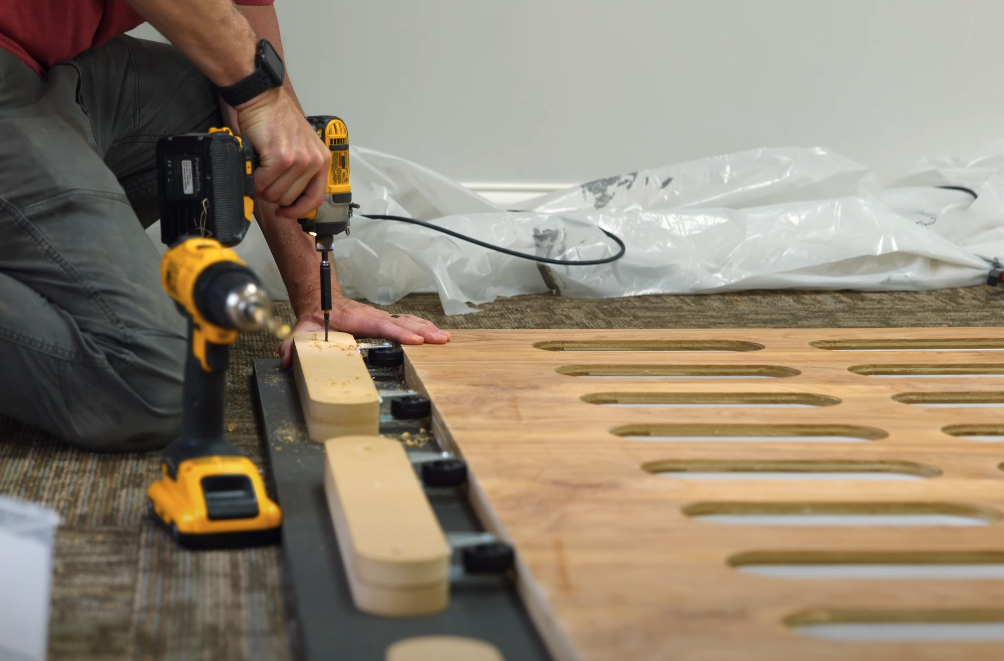
Now that the huge panels are assembled into a larger and smaller section, we can assemble the two walls. We cut header and footer pieces and attached them to the stationary panels. Next, we lined up the holes in both panels and attached the rollers. Lastly, we enclosed the whole assembly with another set of header and footer pieces as well as some side supports to stop the sliding panels. Josh and I lifted the two walls in place and secured them to the window frames on the front wall.
The smaller wall was set back away from the front door so we didn’t block the exit. Using some 1×4 pieces and some angled brackets, we secured this wall in place so it doesn’t move. The plywood panels slide on the rollers so easily we didn’t think it was necessary to add a bulky handle or motorized carriages. After a quick round of touch-up paint, the sliding room divider was all finished.
Sliding Room Divider
This project is amazing! We wanted a cool-looking feature wall that could control the light in the room. I think we achieved that perfectly. It adds to our overall nerdy aesthetic while being very functional. This project would have taken a lot longer and would have been less clean if we did it all by hand, but it’s possible. I love how we are able to integrate digital design into our workflow. Measuring, designing, testing, and manufacturing our ideas is sooo much easier using Fusion 360. Again, check out www.fusion360formakers.com and use the code MAKECOOLSTUFF10 this month, to get a discount on the online course.

Tools List:
(purchasing via these affiliate links supports ILTMS)
Woodworking:
- Dewalt 20v drill driver combo
- Countersink drill bits
- Orbital Sander
- Pancake compressor/nail gun combo
- Jigsaw
- Shop Fox Hanging Air Filter
- 2HP Dust Collector
- 1 Micron bag
- Speed square
3d Printing/CNC/Laser:
Other Stuff: