
I wanted to make a progress tracker using some simple sensors and LEDs. Come see how we make a practice seat that tracks your progress!
1. Electronics Components
This project may seem overwhelming at first glance if you’re not into electronics. But trust me, it is not difficult. The system is designed to have two inputs communicate to a visual display. Because I want to encourage myself to play music more, I decided to sensors need to be a volume sensor and a weight sensor for my practice seat. These two trigger points must be met together for the system to gage my practice time. These sensors already exist and are easy to find, I’ve linked them in the list of items to the right.
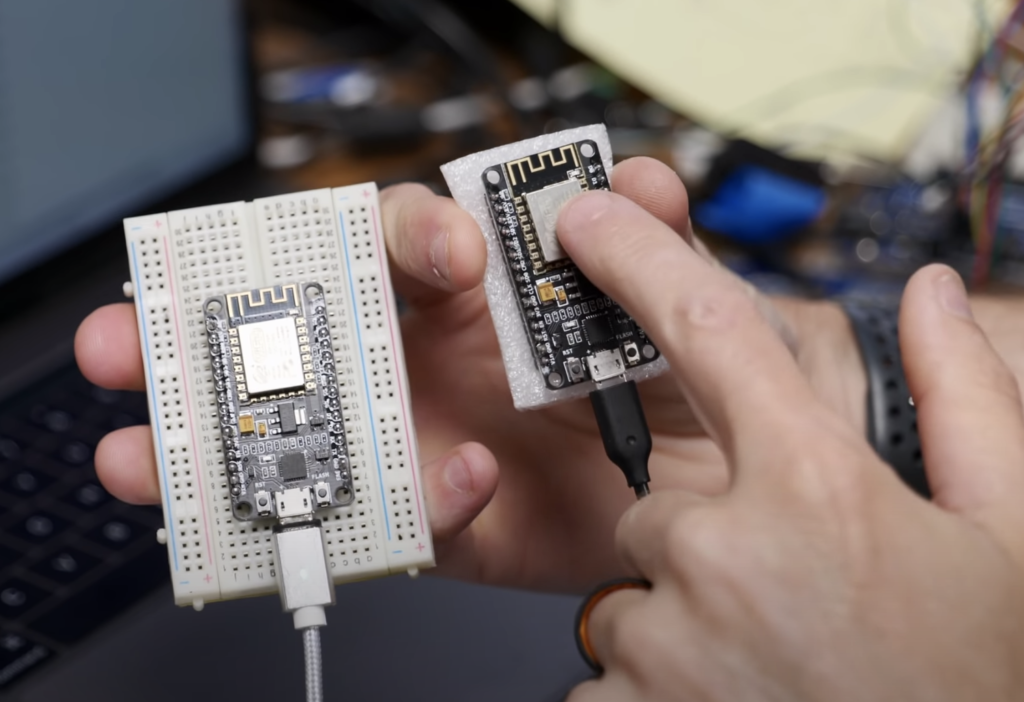
Sensors themselves are dumb, they only provide a detection signal. I need a micro-controller like an Arduino or a micro-computer like a Raspberry Pi to take that signal and do something with it. In this case, I’m using the ESP8266 module, which is an Arduino-compatible board with built-in wifi and bluetooth. For this project, I’m using two of those boards; one in the seat that will receive the input signals and one in the visual display to control the LED progress strip. I put all of the code I used on GitHub for anyone to use and alter.
2. Build a Tracking Display
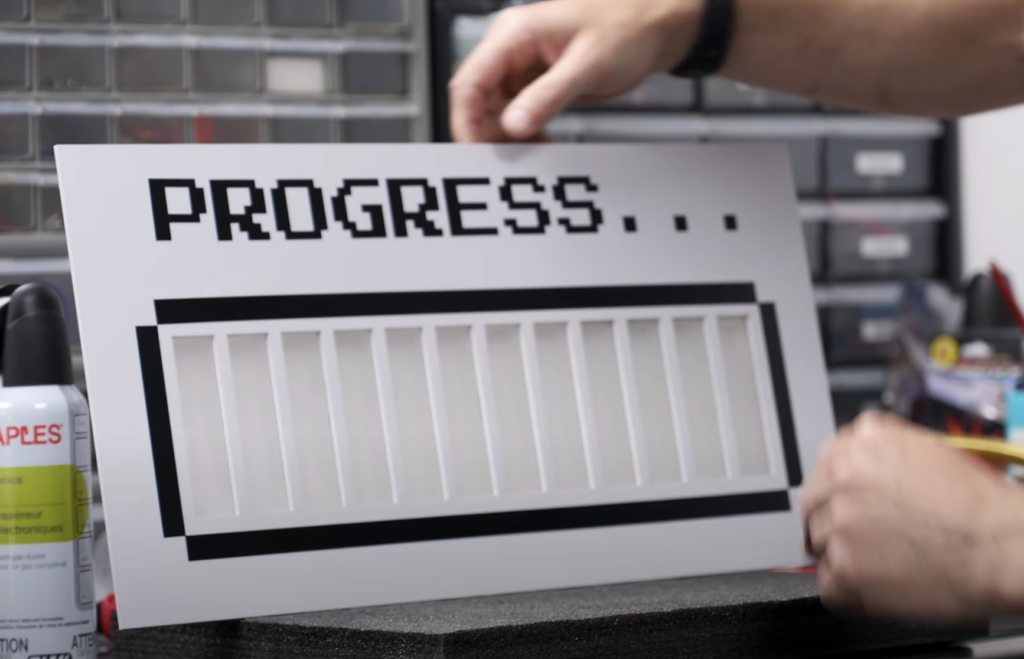
In order to see my progress, I wanted a display board with little lighted segments that glow as I play. Because I wrote the code for the sensors, I can easily adjust the time required to practice. this amount of time is divided among the 12 lighted segments and they glow as I sit and play. Josh modeled up a segmented tray in Fusion 360 that would hold a strip of LEDs. He printed it out on our Prusa i3 Mk3s 3d printer. Using the Glowforge laser cutter, I cut some acrylic to cover the panel and diffuse the bright LED light, making it glow.
I mounted the tray on a piece of MDF and painted it all white. To enhance the loading bar feel of the display, I cut out some vinyl decals that said, “progress.” The progress tracker looks like a cool 8-bit battery and I’m so excited to see it light up! But first, we have to make all the components talk to each other.
3. Make Them All Communicate
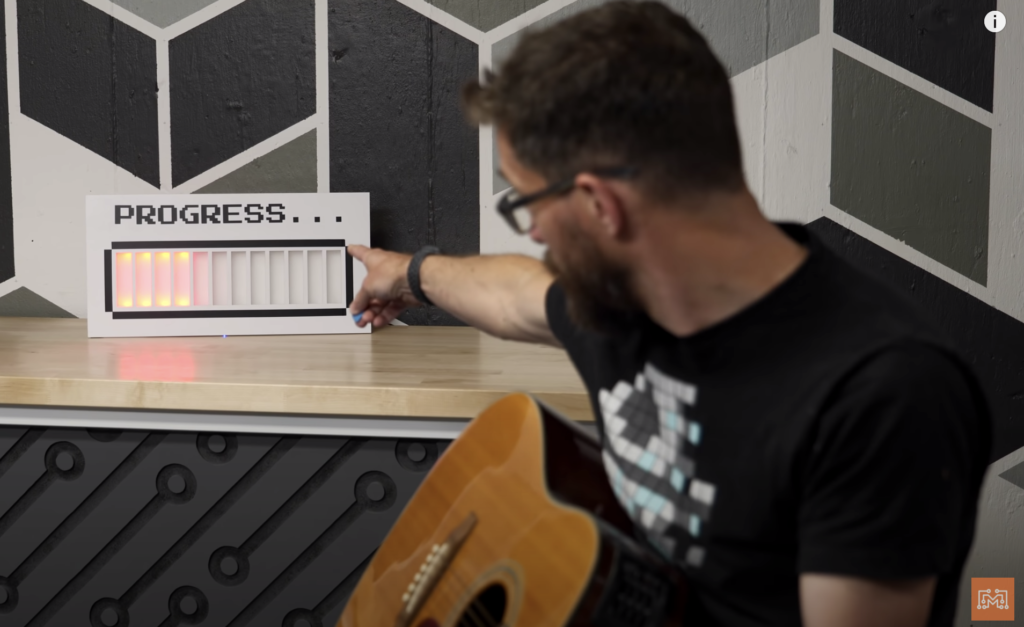
To get the progress tracker to work as one cohesive unit, I have to sync them together and send information over bluetooth or wifi. After connecting the seat components together with the “sender” ESP module, I mounted it in a piece of dense foam and covered it with seat fabric. I then connected the “receiver” ESP module to the LED strip in the display. No to test the two input sensors and how they interact with the output lights. I placed the foam seat on top of a stool and sat down. After adjusting the volume sensor’s threshold, I could strum my guitar and the display started glowing. It worked!
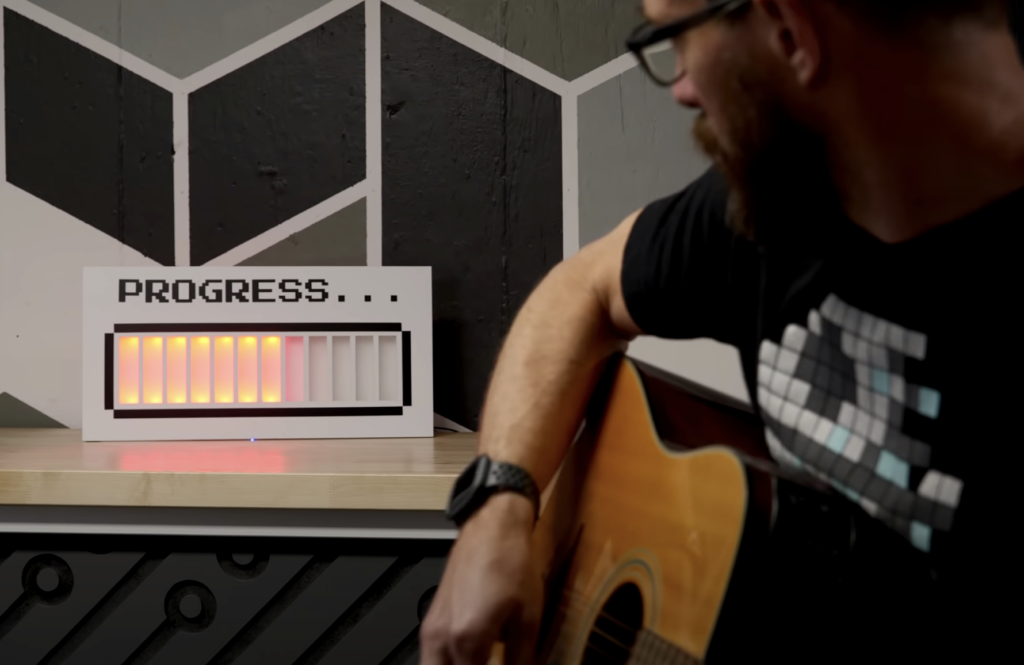
I set the progress tracker system for a 20 minute practice time. Again, I had to be sitting down and actively playing for it to register progress. If I got up, the progress bars slowly faded away. Once I met the 20 minute timer, the display made a cool green flashing animation and I was done for the day! It works soo well!
This System Could Work For Anything!
I hope this project inspired you to find a way to make your life better. If you need motivation to practice a skill, you can use any combination of simple sensors to track your progress. We have a list of the components we used as well on this page, and the code is available on GitHub so you can make your own. If you think this would be a fun project kit that you’d like to receive from us, sign up so we can see if it’s a good idea!
Tools List:
(purchasing via these affiliate links supports ILTMS)
3d Printing/CNC/Laser:
- Glowforge (laser)
- Original Prusa i3 MK 3
- Silhouette Portrait (vinyl cutter)
- All filaments, 3d printing supplies from MatterHackers
Electronics:
- ESP8266
- Seat Sensor
- Audio Sensor
- Arduino Uno Kit
- Arcade buttons
- Raspberry Pi 3
- Multimeter
- Wire
- jumpers (Male to Female)
- Soldering iron
- Third hand kit
- Wire strippers (not the ones I have, but good ones)
- Thin solder
- Anti static mat
- Fiskars cutting mat
- Plastic parts cabinet (24 drawer)
- Plastic parts cabinet (64 drawer)
- Precision Screw driver kit
Other Stuff: