
In this fifth installment of Making R2-D2, I weld up his feet and connect the drive motors!
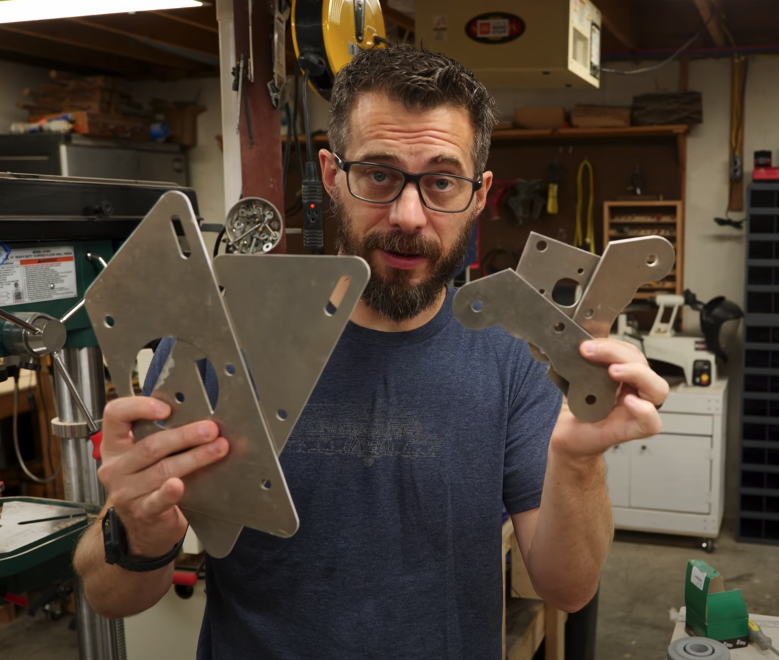
1. Cut Out Feet Panels
Like all the rest of the R2-D2 build, I am using files, templates, cutpaths, and instructions from astromech.net. The feet are made of a structural unit that houses the axels, wheels, and drive chains. That unit is then covered by decorative shoes that covers the drive mechanisms. You can use any material to make these feet assemblies. Because I want to take my R2 unit to gatherings and events, I want the drive system to be robust. I decided to cut the pieces out of thick aluminum stock using the Wazer water cutting machine.
Again, I am using the cutpaths from the astromech.net forums, converted to vector files and loaded up in the waterjet. This machine works by blasting the metal with a thin stream of water mixed with tiny particles of garnet. This messy process is captured inside of a desktop machine that produced custom metal parts. These files were designed so that the finished pieces fit together with a finger-joint notch, making it really easy to rough assemble before welding.
2. Connect the Drivetrain
Now that I have the aluminum panels, I can assemble the structural unit that houses the wheels. This unit comes together using bolts and spacers to make room for the drive wheel, the omni-directional wheel, and the drive motor & chain. These three drive units were pretty easy to assemble because the waterjet made beautiful cuts. Once the drive units were completed, I attached them to R2-D2’s feet with a through bolt. After connecting the drive motor power wires, I could power up the central brain and use the remote to test the units.
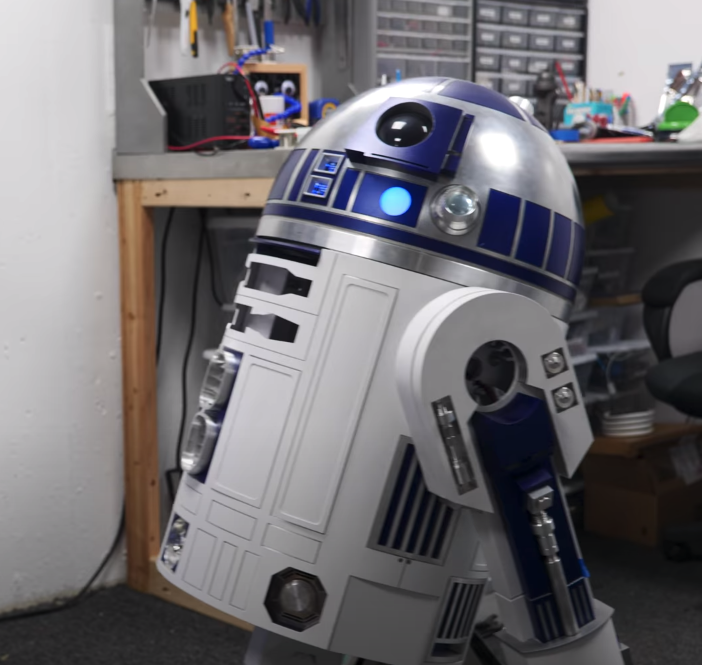
Now that R2-D2’s feet are installed, I took him off of the support stand and set him on the floor where he stood under his own power. It was here that I realized that I needed to shore up the connection points in the shoulders, as well as beef up the connection of the center leg. Once those points were more secure, he wobbled a lot less. There is still some movement in the ankles, but I will correct that once the feet covers are welded and installed.

3. Cover with Decorative Shoes
Now that R2-D2 has functional feet that move with remote inputs, he really has that iconic feel. It is so satisfying to have him roll around the office and interact with the team here. One thing that is kinda creepy is that his feet are very bare and skeletal. In the movies, his feet are more robust and covered with panels, so I have to make those. Conveniently, there are files for these panels on the astromech.net forums and I cut them out of aluminum using the Wazer.
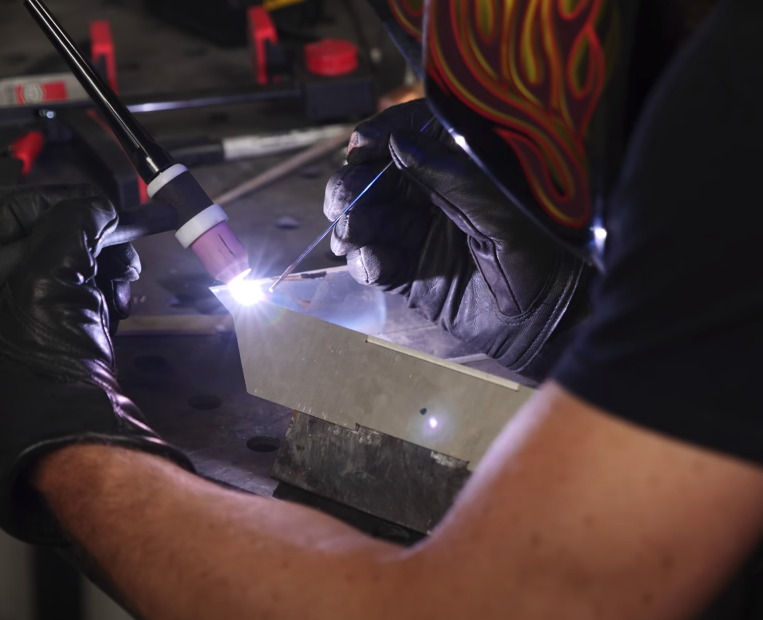
Because this is aluminum, I could not use my MIG welder like many of our other projects. Aluminum needs to be welded with a TIG welder and the technique is totally different from MIG welding. I am still learning how to TIG weld, so my welds look terrible. Luckily, the finger-joint design made it easier to maintain its structure even with my novice welds. I had to cover some of the seams with joint compound and sand them smooth. The shoes also have removable access panels that I mounted using some tabs and rare-earth magnets.

Not Done Yet
I know a lot of you want this project to be wrapped up in a single video, but that isn’t the case. I am purposefully taking my time and going piece by piece to get this right. It’s been a dream of mine to have my own R2-D2 and now that it’s possible, I’m putting in the effort and giving it the detail that he deserves. Thank you for following along on this build and I look forward to seeing you again soon.
Tools List:
(purchasing via these affiliate links supports ILTMS)
3d Printing/CNC/Laser:
Welding:
Electronics:
- Multimeter
- Wire
- jumpers (Male to Female)
- Soldering iron
- Third hand kit
- Wire strippers (not the ones I have, but good ones)
- Thin solder
- Anti static mat
- Fiskars cutting mat
- Plastic parts cabinet (24 drawer)
- Plastic parts cabinet (64 drawer)
- Precision Screw driver kit
Other Stuff: