
We were asked by the team at Mortal Kombat 11 to make a retro cabinet for the game release! We took this opportunity to make a leveled-up version of our original arcade cabinet that you can make too!
- Break Down Sheet Goods
- Assemble the Base Section
- Build the Control Section
- Construct the Screen Section
- Mounting the Monitor
- Combine all the Sections
- Install the Electronics
1. Break Down Sheet Goods
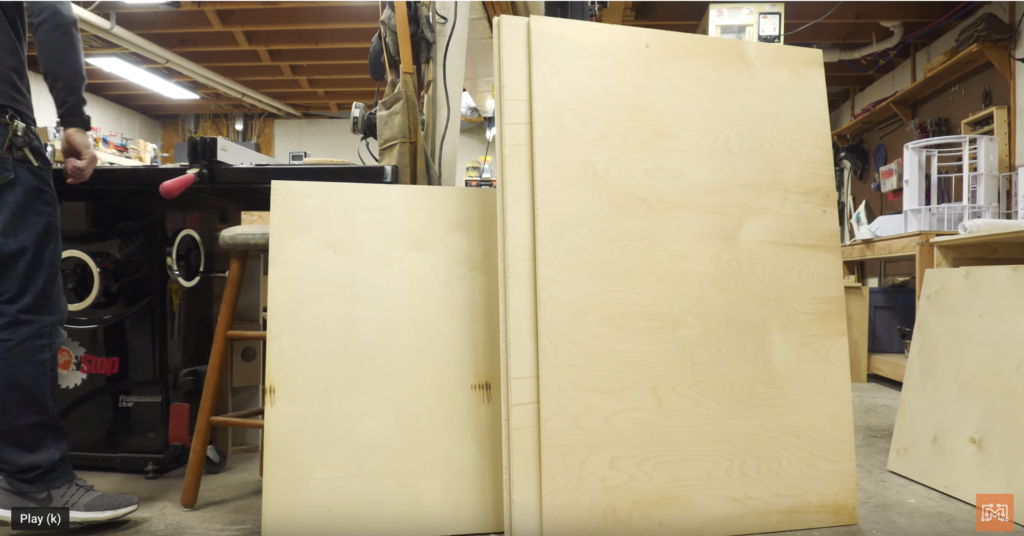
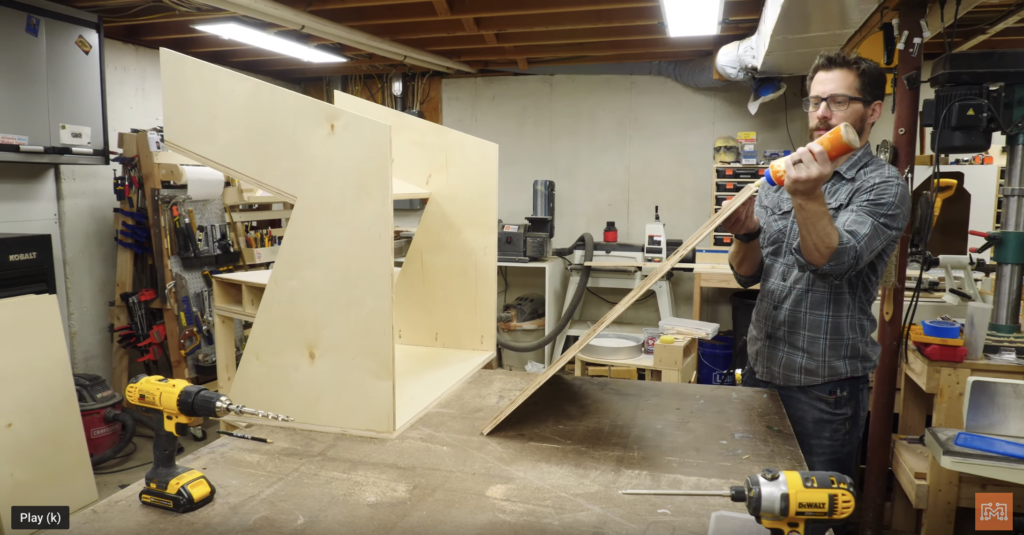
Josh made the 3d model for the arcade cabinet in Fusion 360. We used a special plug-in that allows us to make a materials list and a cut sheet. Armed with these essential pieces, I began to break down 4 sheets of 3/4″ plywood, labeling the parts as I went. We were very careful to group the items together into boards that could be rough cut to larger sizes. Some of the bigger side panel pieces were going to be cut on the CNC, or you could use a jigsaw and the provided templates (plans are linked below!).
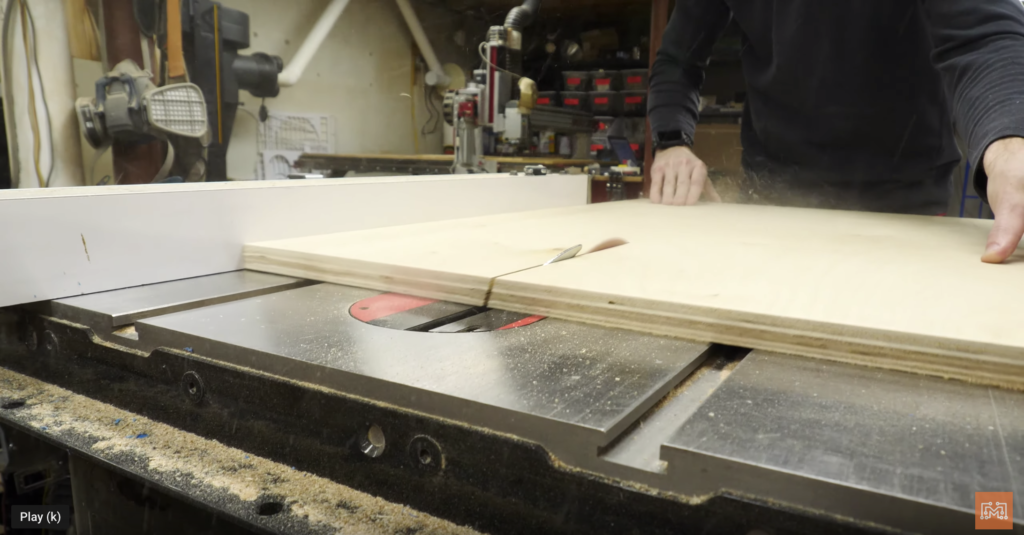
Once all of the individual components were cut I began adding pocket holes to the appropriated faces. This cabinet is based on modular construction and using pocket holes allows you to build/break down the cabinet easily. I also added the miter cuts to the pieces that needed them. It was very important to follow along with the cut sheet because, at this point it was difficult to see the cabinet as a whole, I just had to trust our plan.
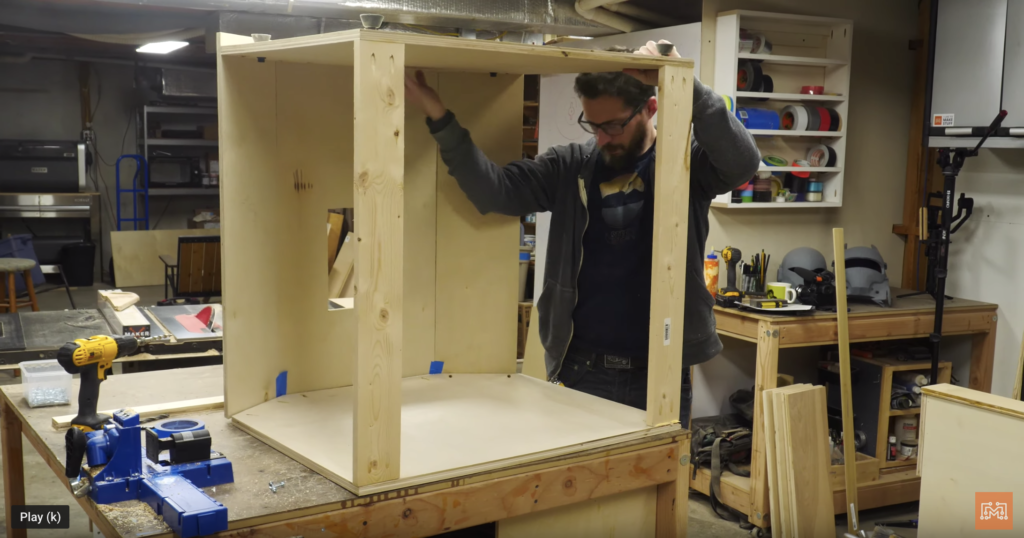
2. Assemble the Base Section
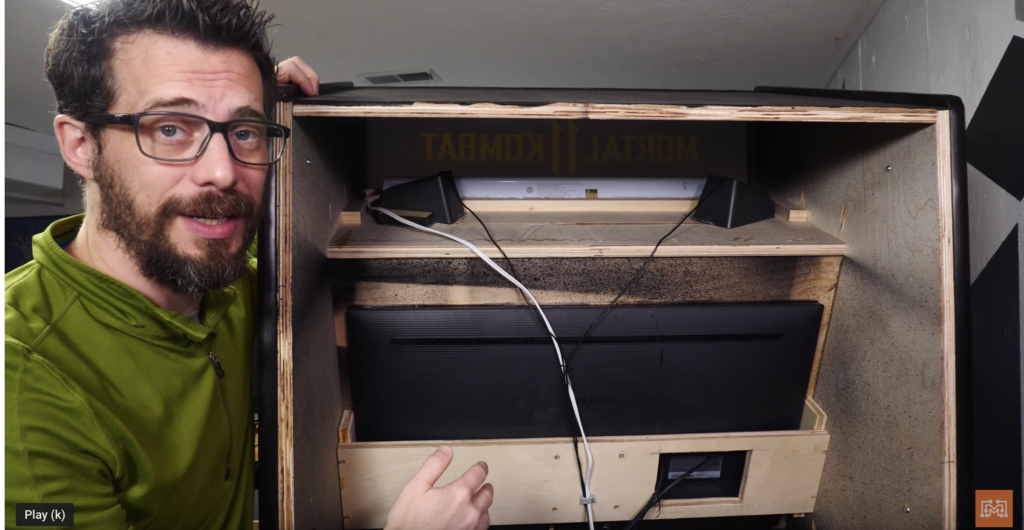
Because this arcade cabinet was designed to come apart so you can move it easier, we started assembling the base section first. This area will hold the Playstation 4 console which will run the game, or any game for that matter, as well as the subwoofer and a power strip to plug in the rest of the electronics.
The team at Mortal Kombat wanted this new game to be showcased in a retro cabinet, so we modeled its construction off of the original Mortal Kombat arcade cabinet from the 90s. Josh added the angled front and the extra side accents to the model to really set this cabinet apart. The angled front panels were attached to the bottom, shelf, and top of the base section with pocket screws. Instead of a back panel, the back of the cabinet was left open so that all of the electronics could be easily accessed.
To really drive home the feeling of the 90s cabinet, we ordered an actual coin slot found on real cabinets. I cut a hole in the front panel and set the coin door in place. Josh removed the coin slot guts and replaced them with a simple 3d printed channel that would return any coin to the door below. The little red coin return button also holds a cool little slip of paper that you can take out and customize to your liking.
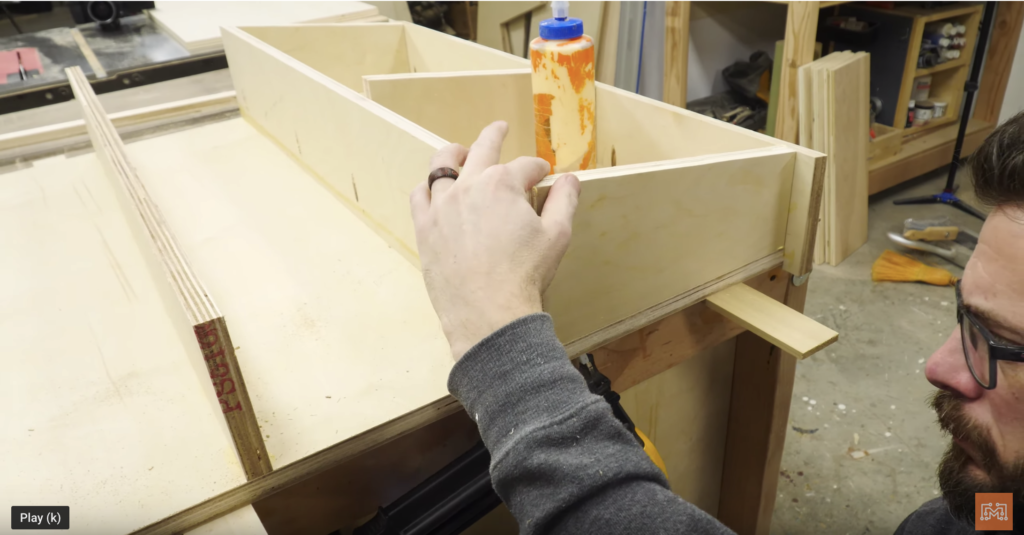
3. Build the Control Section
This area is the meat of the cabinet sandwich. It is a shorter section that will hold the game controls, the joystick and buttons, in a tray hanging off the front of the cabinet. The control section is also a platform for the upper, Screen Section, to sit on. The rear of this section is mostly empty space, which was great for hiding the extra lengths of cables and wires.
The control board will be attached to two vertical supports so it resembles a “breakfast in bed tray,” that you can slide down into the tray on the front. You could take this section out of the cabinet and set it on a coffee table to play games on your TV if you wanted to. It is also handy if you needed to access the wiring or the actual electronics boards for any reason.
4. Construct the Screen Section
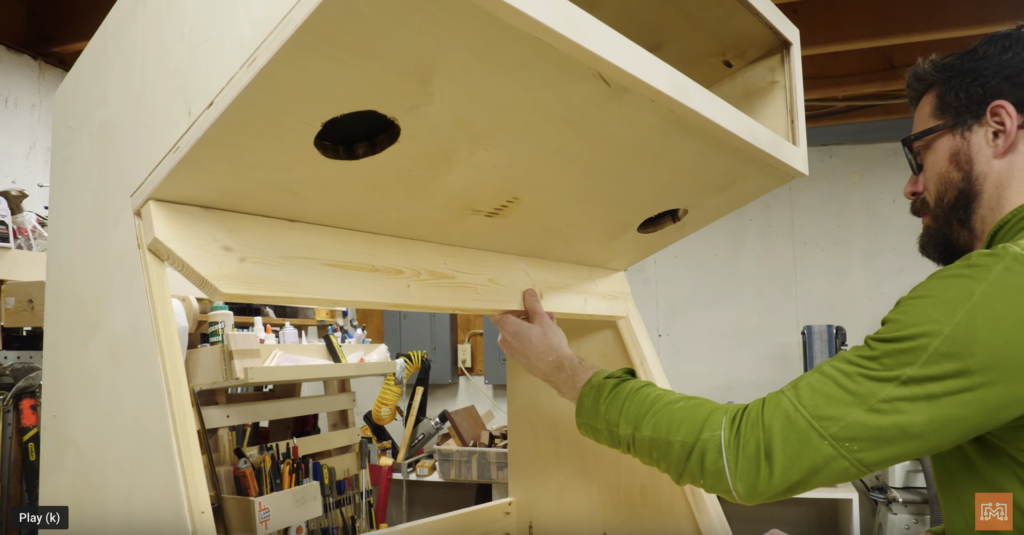
The Screen Section is where all the action happens. It is where the computer monitor will be mounted, where the speakers are, and where the lit marquee resides. This area also has some tricky bevels and miters, so go slow. I cut out the side panels for this area using the CNC (or the provided templates) and used pocket holes to attach the bottom and the top. The platform that holds the speaker and the light bar was also attached with pocket holes after I cut the two holes for the speakers to project through. Those holes will later be covered with some round speaker grates.
The tricky part is the bezel that covers the screen. To make it, you must start with the size of the screen you plan on using. We have linked the one we used in the links to the right, but begin this process by measuring your tv/monitor. Once you have the screen’s viewable area, the bezel is just like making a picture frame. I matched the inside of our “picture frame” bezel to the are inside the monitor’s own bezel, which was inset about a half inch on each side. The outside of the “picture frame” was equal to the opening on the Screen Section. You may find that in order to get your bezel to fit within the side of the cabinet, you may have to cut off some width from the sides.
5. Mounting the Monitor
To match the angle of the side panels, I had to cut a bevel on the bottom so that it sat flat against the top of the control section when assembled. To hold the TV up against the back of the bezel we made, I made a bracket that acted like a bridge. I cut two small 1×4 the same thickness as monitor and pocket holed them to the back of the bezel, being sure it could still fit inside the side panels. I cut another 1×4 to bridge the span between these to additions and wedged the tv under it. Earlier, I drilled holes through this bridge piece that matched up to the screen’s mounting bracket holes.
With the screen pushed up to the bezel and held in place by a wooden bridge…bracket…thing, I mounted the whole assembly onto the front of the Screen Section. We secured the upper speakers and the light bar using some scrap wooden blocks and a few beads of hot glue for insurance. All of the wiring for these pieces was routed behind the monitor, through the holes in the Control Section and down into Base Section and plugged in.
6. Combine All of the Sections.
At this point, all of the 3 sections were sitting comfortably onto of each other with their major components secured. I locked the three tiers together with some screws and make one solid tower. Josh cut the larger side panels on the CNC (again, the templates work too) and the whole cabinet was ready to assemble. I used a router and a special T-molding bit to carve in the groove that the black T-molding would snap into once we got the graphics on.
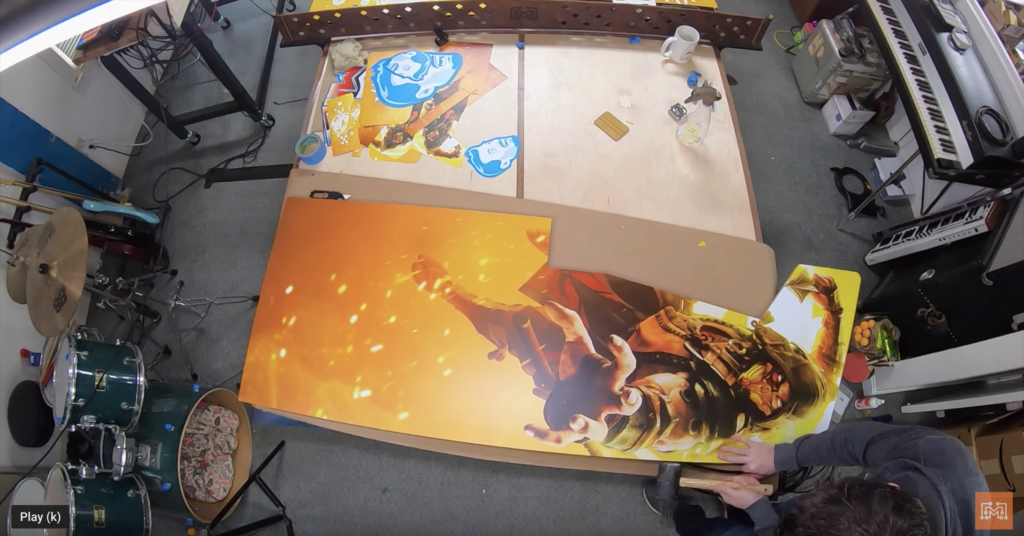
Just like in our previous arcade build, I got some vinyl graphics made using artwork from the team at Mortal Kombat 11. We attached all of the pieces of artwork and then installed all of the T-molding using a rubber mallet. The cabinet looked amazing! The retro style matched with the modern artwork looked so amazing together. All that was left was to drill the holes through the graphic on the control board and add the buttons and the joysticks.
7. Install the Electronics
Believe it or not, this was the easy part of this build. Because the game was running off of a Playstation 4, I simply purchased an emulator board called a Fight Stick and plugged in the buttons and joysticks with a pre-made wiring harness. There was absolutely no coding required because the entire button setup plugged into the console with a USB and it recognized it as a controller.
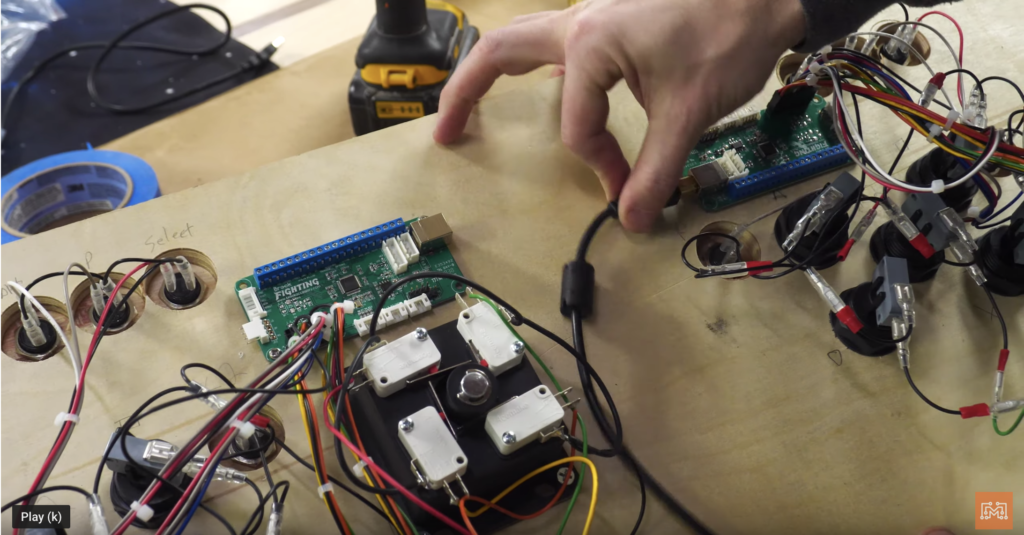
We matched out button layout according to the most frequently used buttons for the game. The lesser important buttons were actually smaller so that the layout wasn’t cluttered and confusing. Once everything was plugged in, I slid the control board down into the Control Section tray and it the cabinet was all done.

This Cabinet Is So Awesome!
Full disclaimer, Mortal Kombat 11 sponsored this project. That arrangement has no bearing on my feelings toward the game itself. My content is family-friendly so I won’t show any of the game play, because it is for mature audiences. I am super proud of this build and happy to be working with the awesome creative team at Mortal Kombat 11, but understand that this game is for mature audiences only.
But the cabinet design is for anyone! This set up can be used just like the older cabinet I made, to run a Raspberry Pi with RetroPie, a Playstation, or any other console. There are emulator boards available for all consoles. If you want to make one for yourself, get out the link below for some amazing plans!

Tools List:
(purchasing via these affiliate links supports ILTMS)
Woodworking:
- SawStop cabinet saw
- Skil circular saw
- Dewalt 20v drill driver combo
- Dewalt Miter Saw
- Countersink drill bits
- Orbital Sander
- Pancake compressor/nail gun combo
- Jigsaw
- Grizzly Drill Press (WAAAAY overpriced (3x) on Amazon, buy from Grizzly directly.)
- Kreg Rip Cut (circular saw guide)
- Kreg R3 pocket hole jig kit
- Shop Fox Hanging Air Filter
- 2HP Dust Collector
- 1 Micron bag
- Speed square
- 11″ Digital protractor
- Digital Angle Gauge
- Classic steel ruler (cork backed)
- Flush cut saw
- Box Cutters (for eva foam)
3d Printing/CNC/Laser:
Electronics:
- Bigger Arcade Buttons
- Smaller Arcade Buttons
- Joysticks
- PS4 FightStick
- Wiring Harness
- Speakers
- Speaker Covers
- Light Bar
Other Stuff: