
My studio, or as I like to call it, my TRON Room, has a lot going for it. The lights run around the ceiling, there are 3D printers and machines everywhere, and there is even a light-up space window. It looks pretty great. But it also had something kind of dumb sitting right in the middle of my main studio shot. Every time I filmed a course, I had to deal with a wall of open storage shelves stuffed with stuff I did not want anybody to see.

My fix up to that point was a giant piece of black fabric snapped over the shelves. It got the job done in the sense that it hid the storage, but it was never meant to be permanent. The fabric was oversized, floppy, and there was no good way to hold it up. It worked, technically, the same way a tarp over a couch technically counts as upholstery. So I figured it was time to build something that actually looked like it belonged in the room.
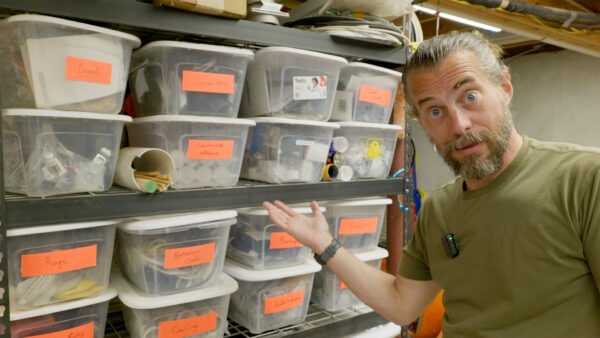
While I was kicking around ideas, I looked up and realized I have a ton of these same metal shelves. If I have SO MANY, plenty of other people probably do too, since these shelves are basically the same no matter which company you buy them from. They usually come 36 or 48 inches wide in two stackable sections. So instead of solving my problem once, I decided to make a cover that anybody could build for the same kind of shelf.
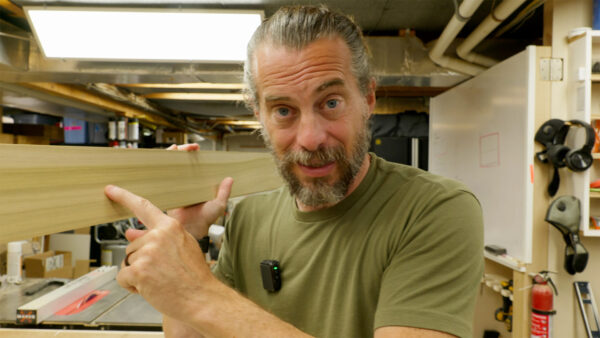
The plan was a face frame that covers the entire front of one half stack, with sliding panels behind it so I could still get to my stuff while keeping it hidden. For the material, I grabbed some 1×4 Poplar because Poplar paints really well, and all of this was going to get painted black anyway. The first step was ripping every board down the middle so I had twice as many pieces. There was a reason for that, and it made the whole frame stronger in the end.
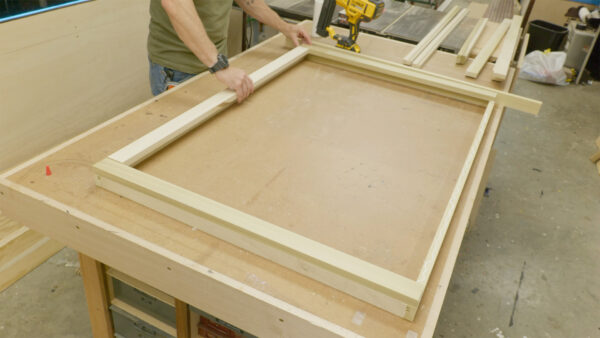
I cut each board into a thin piece and a wide piece. The wide one became the face frame, and the thin one got glued and brad nailed onto it to create a track for the sliding doors and some lights. Joining the two pieces in that L shape also made the frame a lot more rigid across the four foot span, which means it should not sag over time. Normally you would miter the corners of a face frame so it looks clean, but since the whole point was to hide everything, I didn’t bother. The back piece got some slots cut on the table saw to hold the doors.
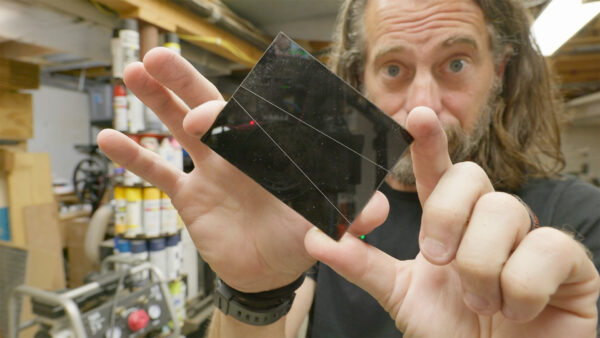
For the doors themselves, you could keep it simple and use eighth inch MDF or Luan cut to fit. I went with acrylic instead, because I genuinely enjoy making things more complicated than they need to be. I cut the acrylic on the laser so I could also engrave a pattern into it, the idea being that light could shine through. You might be thinking the acrylic is clear, so light would come through the whole thing anyway. Not once we paint it black. I had never tried lasering through paint onto acrylic, so I made a small test piece first to avoid ruining the big ones. The lasered side looked rough, but the back side looked great. The only catch was that spray paint went on too uneven, so I switched to rolling the paint instead.
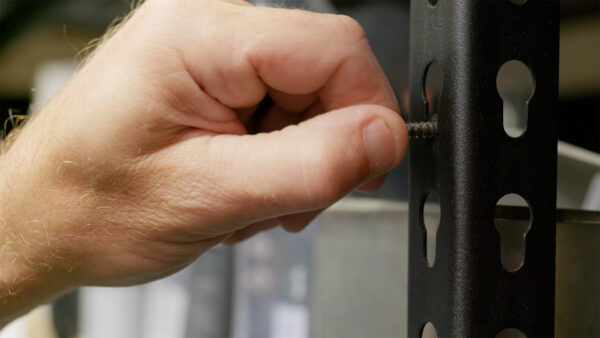
Mounting the cover turned out to be the easy part. There is a keyhole slot built into the upright of pretty much every one of these shelves, which is how they hang together in the first place. So I put a screw through that hole, dropped the frame down, and it hung right there. To take it off, you just lift the whole thing up. I held it in place, marked through one of the holes, measured up to the top, and matched that on the other side so it would hang level. I did goof one measurement by marking to the outside of the frame instead of where the screws actually land, but a little glued-in scrap gave me enough wood to drive into and still leave room for the doors to slide.
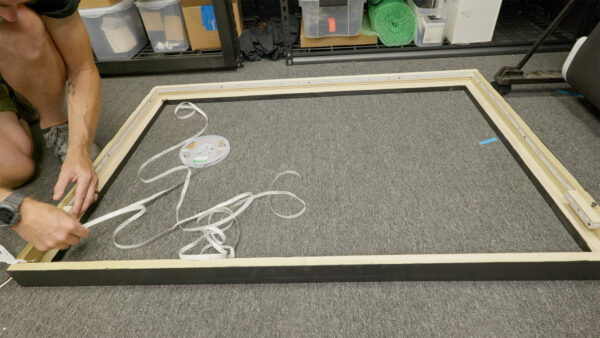
Before dropping the doors in, I added LEDs to the inside of the frame so the light would shine through the engraved cuts. I usually wire up a microcontroller and program my own animations, but I already had a controller with two LED lines that just plug in, so I used that. Filming something that is entirely black is nearly impossible, but I bent the acrylic, dropped it into the slot, and flipped the lights on. The thin acrylic is a little floppy and wants to sag, so thicker stuff would hold up better if you do not mind spending more. But it works, and the stuff behind it is not stuff I reach for often.
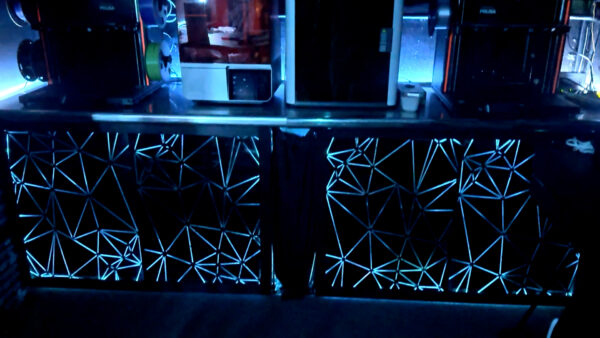
Best of all, the cover hides everything in my locked studio shot. It’s not always so visible that well on camera but I really love the look of it personally. If you just need to dress up some utility shelves in your own shop, this is a simple way to do it with a few tools and some basic materials.

Thanks for hanging out with me on this one. Now, go make something awesome!
TOOLS
(purchasing via these affiliate links supports ILTMS)
Woodworking
- SawStop cabinet saw
- 8″ Dado stack
- Skil circular saw
- Dewalt 20v drill driver combo
- Dewalt Miter Saw
- Jet Wood Lathe 12×21
- Carbide lathe tool set
- Countersink drill bits
- Dewalt DW735 benchtop planer
- Orbital Sander
- Pancake compressor/nail gun combo
- Dremel tool
- Incra box joint jig
- 54″ Drywall T-Square
- Push Blocks
- Jigsaw
- Shop Fox 6″ Jointer
- Grizzly 14″ Bandsaw
- Grizzly Drill Press (WAAAAY overpriced (3x) on Amazon, buy from Grizzly directly.)
- Jet Drum Sander
- Kreg Rip Cut (circular saw guide)
- Kreg R3 pocket hole jig kit
- Shop Fox Hanging Air Filter
- 2HP Dust Collector
- 1 Micron bag
- Speed square
- 11″ Digital protractor
- Digital Angle Gauge
- Classic steel ruler (cork backed)
- Taper jig
- Flush cut saw
- 90˚ corner clamp (4 pack)
- Box Cutters (for eva foam)
Finishes & Adhesives
- Spray lacquer
- 100% pure tung oil
- Formby’s tung oil finished (tung oil/varnish)
- Danish oil
- CA Glue (medium)
- CA Activator
- Barge Contact Cement
- Critter Spray Gun
- Polycrylic
- Polyurethane
- Spar Urethane
3d Printing/CNC/Laser
- Glowforge (laser)
- X-Carve (CNC)
- Ultimaker 2 Extended 3D printer
- Ultimaker 3
- Original Prusa i3 MK 3
- Form1+ SLA 3D printer
- Silhouette Portrait (vinyl cutter)
- All filaments, 3d printing supplies from MatterHackers
Welding
- MIG welder *
- TIG welder
- Welding mask (auto darkening)
- Welding gloves
- Welding magnet
- Angle grinder *
- Cut off wheels
- Metal cutting bandsaw *
- 10″ Evolution Miter Saw for cutting Steel, Aluminum, Wood, etc.
Electronics
- Arduino Uno (just the Uno)
- Arduino Uno Kit
- Arcade buttons
- Raspberry Pi 3
- Multimeter
- Wire
- jumpers (Male to Female)
- Soldering iron
- Third hand kit
- Wire strippers (not the ones I have, but good ones)
- Thin solder
- Anti static mat
- Fiskars cutting mat
- Plastic parts cabinet (24 drawer)
- Plastic parts cabinet (64 drawer)
- Precision Screw driver kit