There have been tons of resin & wood projects that have been flooding social media lately, so I wanted to try my hand at a resin & wood lamp. This is a lathe project that I’ve had in my head for a while, let’s see if it meets my expectations.
1. Make a Mold
I knew that I wanted the lamp to be, for the most part, a cylinder that is about 6 inches in diameter. Josh and I went back and forth on what exactly would go inside of the resin cylinder, maybe a diorama or a color blended rainbow, but I ultimately decided on a set of spiral stairs made out of walnut. The idea being that the clear resin would help project the light down through the cylinder and the walnut stairs would add an interesting shadow pattern while projecting the endgrain through the edge of the lamp.
For the mold to hold the resin and the set of stairs, I used a small section of 6 inch PVC pipe from the gardening section of our local Lowe’s. The length of pipe would be dictated by the vertical space available in my pressure pot, a tool necessary for shrinking bubbles in the curing resin. I turned a plywood plug for the bottom of the PVC pipe and added a metal pipe that would cary the lamp wire from the base up through the resin to the top.
2. Cut the Wooden Stairs
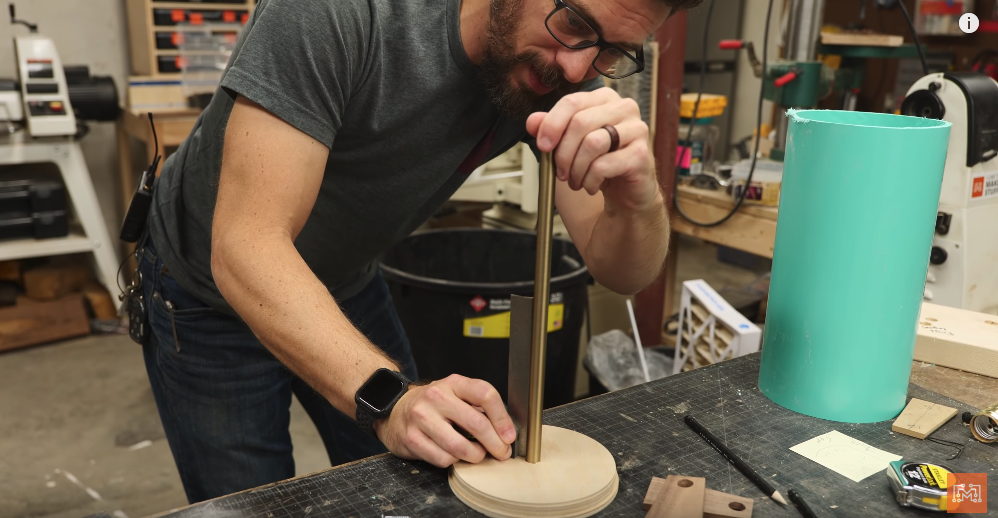
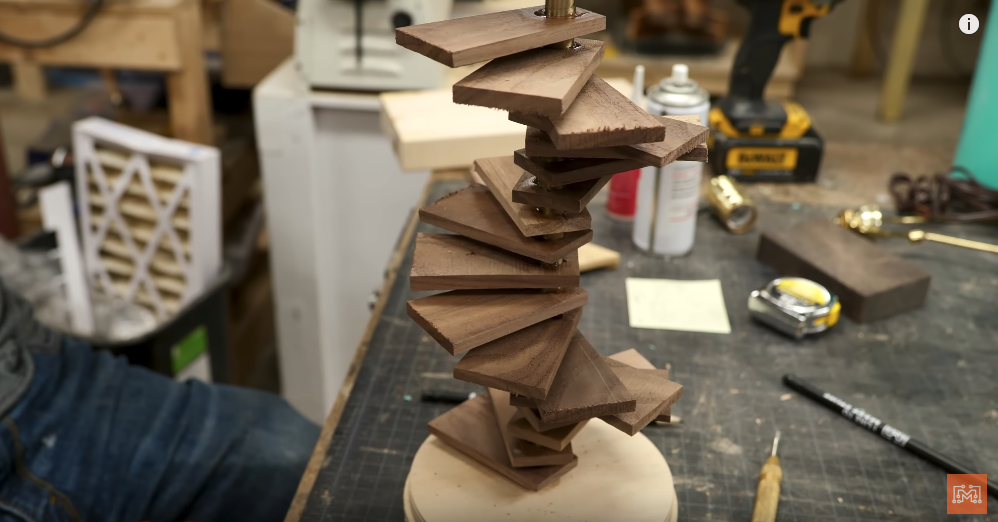
To make the staircase, I cut many, many little fans out of 3/4″ walnut. I cut the main wedge shape and then re-sawed each piece into thinner pieces. Using a bit that matched the diameter of the metal pipe, I began to arrange the steps along a spiral pattern, gluing each piece to the center pipe as I went. Josh made up a simple MDF jig to help align each piece so that the distance and height of each piece would be consistent.
This is where I should have done something that would have helped the end product. I should have added finish to the walnut steps prior to pouring the resin. I believe some of the walnut oil may have interacted with the resin later on. Sealing the wood before pouring the epoxy could have stopped this reaction and helped with the final result later on.
3. Pour A Lot of Epoxy
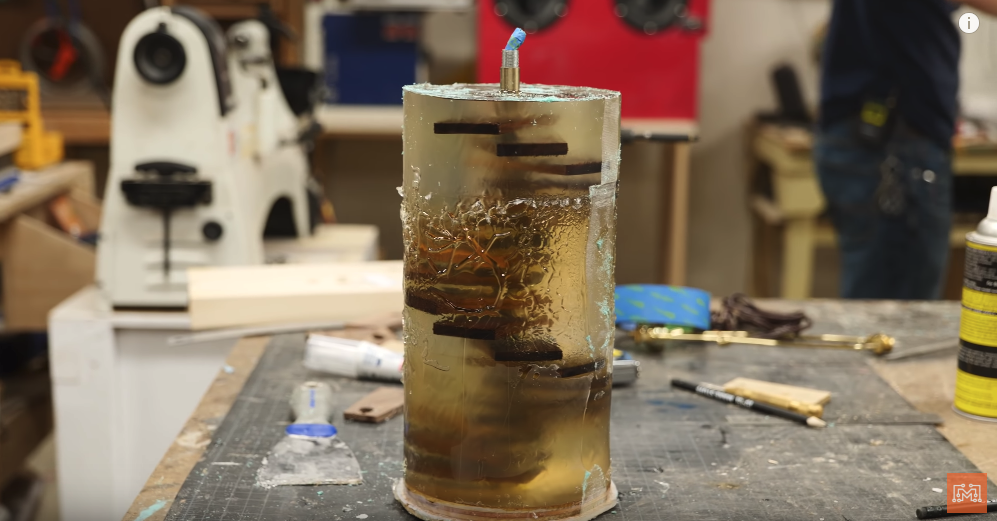
We are using Thickset Epoxy from TotalBoat for this massive resin pour. They recommended that we didn’t pour more than 5 inches at a time and allowing that layer to cure before adding more. Staying true to their recommendations, I poured 5 inch layers, 3 different pours, and let the resin cure in our pressure pot for about 24 hours each. I made sure to rotate the mold around to prevent bubbles from being trapped under the stairs, but I should have done it more.

Once the last layer of epoxy was set, I used the band saw to cut the PVC jacket apart. I was surprised to see a thin uncured layer of resin between the mold and the hardened cylinder. This think layer of resin was, most likely, some of the top layer that may have weeped down the side of the second after some of the heat may have distorted the PVC mold. Either way, the uncured layer wiped off easily with alcohol and the remainder of the cylinder felt nice and solid. One glaring issue I saw was that the epoxy was not clear. The first layer looked alright, other than some trapped bubbles (not swirling the resin around enough). But the other two layers had a distinct brownish tint surrounding the walnut stairs. As I mentioned earlier, I believe this was caused by the walnut oil reacting with the resin.
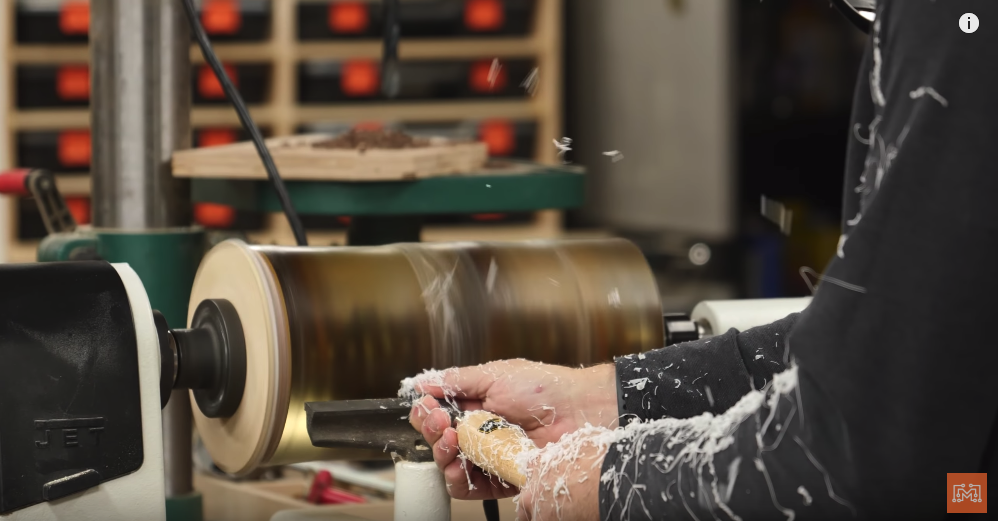
4. Turn it on the Lathe
The mold was purposefully larger than the diameter of the walnut staircase; I planned on having extra material to turn off on the lathe. Using the mold’s wooden plug and a face plate, I mounted the lamp cylinder on the lathe and started turning it down. If you’ve never turned resin, it is a unique experience. The ribbons of plastic fly off like Spider-Man webs and cover everything in sight. Once I reached my preferred diameter and I could see the walnut endgrain poking through the edges, I began to hand sand. I went through many, many layers of sand paper including a few rounds of micromesh sanding pads.
To get a clear finish, I used some glossy varnish offered by Totalboat but I believe that I should have mixed up another batch of the same resin that I had been using and poured it over the lamp instead. The lamp looked nice, but not as glossy and clear as I was hoping.
5. Connect the Lamp
To make this resin art an actual lamp, I used a simple lamp kit that I’ve had on the shelf for a long time and painted it a flat black color. It consists of a wire, a bulb holder with attachment threads, and a lamp shade bracket. I fed the wire up through the lamp’s center pipe that we installed early on, and had to Dremel out a channel on the bottom so the lamp could sit flat. The wire was attached to the bulb holder and the threads were epoxied into the top of the existing pipe. After adding a bulb and a lamp shade, the project was finished.

Wow, I Learned A Lot
The resin & wood lamp is currently sitting on my nightstand, and of course there are things that I wish were different; finishing the walnut, choosing a different clear coat, getting rid of the bubbles. But each step on this project was critical to the success of the next step. When you are faced with a situation where each process must be done precisely before the next step can succeed is stressful and filled with risk. I took a big risk on this project mainly because each element was pretty expensive to redo.
Hindsight is the worst critic and I hoped that you learned some things through this process. I gave every step the amount of attention and forethought that I could with my limited knowledge, and there were unforeseen complications. Of course I could remake this lamp and try to get it perfectly clear, but resin isn’t cheap. If you do a project using expensive materials, make sure you research and plan out each step to ensure a beautiful final product.

Tools List:
(purchasing via these affiliate links supports ILTMS)
Woodworking:
- Dewalt Miter Saw
- Jet Wood Lathe 12×21
- Carbide lathe tool set
- MicroMesh Sanding Pads
- Countersink drill bits
- Dremel tool
- Grizzly 14″ Bandsaw
- Grizzly Drill Press (WAAAAY overpriced (3x) on Amazon, buy from Grizzly directly.)
- Shop Fox Hanging Air Filter
- 2HP Dust Collector
- 1 Micron bag
- Speed square
Finishes & adhesives I like:
Other Stuff: