
It’s no surprise that I love LEGO. I am always looking for an excuse to make LEGO props, so I decided to make a life-size LEGO Walkie-Talkie. Besides being a fun prop, I wanted the buttons to be able to wirelessly control some functions on my live Twitch Stream.
1. Make a Template
Because I wanted this life-size prop to match the dimensions of the original tiny toy, Josh made a 3d model of the LEGO piece and scaled it. You can also do this on paper by mathematically calculating the ratios and drawing out the shape. He measured the walkie talkie with some calipers and scaled the model to fit an adult hand.
Now that the shape of the full-sized toy was made, he used a plug-in for Fusion 360 made by Shaper to get a 2-d image of the faces. We printed out those templates on sticker paper and placed them on our material.
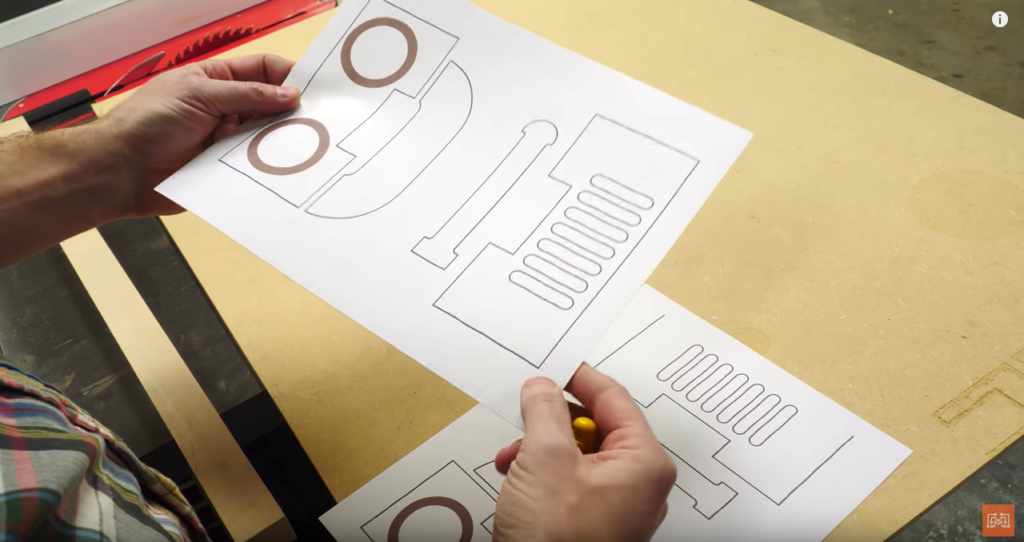
2. Cut Out the Pieces
I know, I know, you made be asking, “why did you use a 3d model to make a paper template to cut things out by hand?” And the easiest answer to that is, because not everyone has access to 3d printers or CNC machines, and honestly, I think it is faster to cut the layers out of thinner wood. The model was scaled so that we could make this toy out of 3 layers of 1/4″ MDF. I cut the blocky shapes with the bandsaw, but a jigsaw would work just fine.
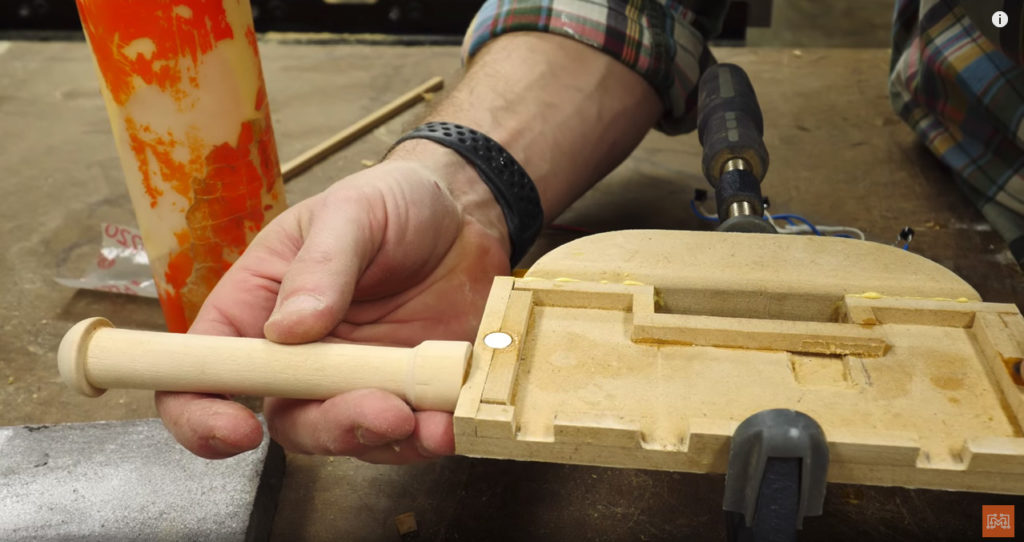
The antenna was made from 3/4″ scrap wood turned on the lathe to match the toy’s profile. This could have also been done in the same sandwiching method as the rest of the body and rounded-over with a router bit. The larger LEGO studs were cut from 3/4″ MDF using the drill press. I clamped the board down to the drill press table and first hogged out the middle with a 1-1/4″ forstner bit. The outsides were cut using a 2-1/8″ hole saw. All of these pieces were simply CA glued together and the face snapped on with some small, but strong, magnets.
To make the toy buttons actually work, I planned on adding some small microswitches inside the walkie talkie. To press them, I planned on using some squishy EVA foam that looked like the actual buttons. I punched out the circular buttons with a metal piece of scrap pipe, pressed into the foam. I simply cut a rectangular piece of foam for the larger paddle button.

3. Hook Up the Electronics
In order to make this prop remotely control a Twitch stream, I had to add some electronics with Bluetooth capability. I used the Adafruit Feather microcontroller to act as a simulated keyboard that would send key commands wirelessly to the computer running our Twitch setup. There is a really simple code setup on our Github page if you are interested in recreating this on your own. Also
I soldered three separate small, tactile buttons (for the three walkie talkie buttons) onto the board as inputs and connected a small LiPo battery to power the whole thing. Using hot glue, I mounted the board, battery, and buttons inside of the painted Walkie Talkie and snapped the lip closed. I hot glued on the foam buttons and the Bluetooth life-sized LEGO Walkie Talkie Twitch stream controller was ready to test.

4. Test it Out!
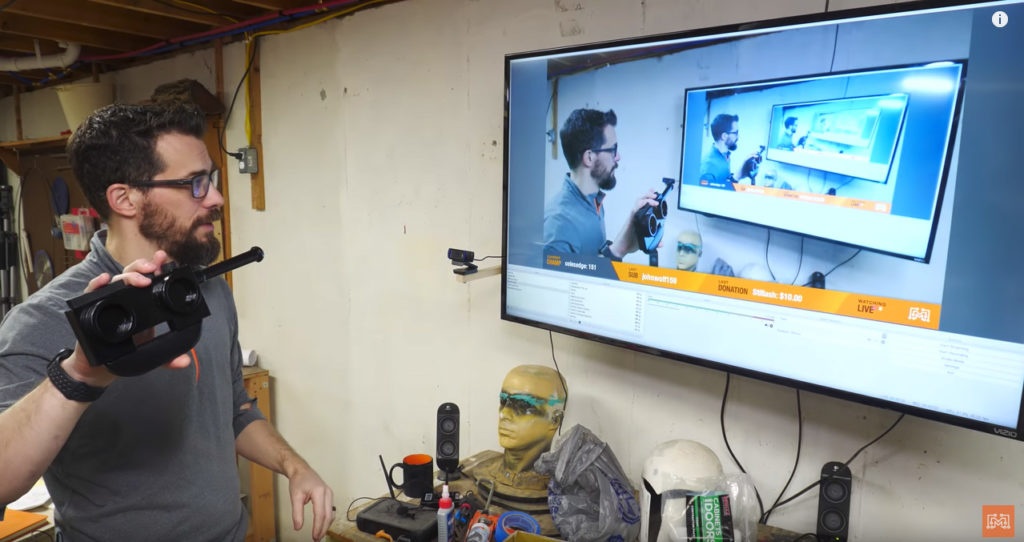
The basic concept for this controller is quite simple. I used a piece of software called OBS to capture video feeds from separate cameras set up in my shop. This software allows you to switch from camera to camera by using hotkeys. I can assign a random keyboard button to control individual cameras. So, if I were to press the letter A, then I can make a camera in the metal-working area the live image. This LEGO Walkie Talkie and its three buttons will send those keyboard commands to OBS instead of pressing the buttons on my keyboard.
During our weekly live shop build on Twitch, I assigned the hotkey commands to the three LEGO buttons and it worked…kinda. The small tactile buttons I soldered to the board weren’t responding consistently, so I swapped them out with some larger microswitches. These new input switches worked much better and the toy remote was super responsive and switched the cameras around perfectly!
Silly, but Functional!
This project was an exercise in, “why not.” I thought having a wireless setup to change cameras during my Twitch livestream would be a cool idea that would enhance the viewer’s experience, so why not? I’ve also always wanted to make some silly LEGO props, why not? It would also be cool if I could combine those two ideas into one outrageous project, why not?
Problem-based engineering can be as simple or as fantastic as your mind allows. You can solve a problem while making the final product fun and whimsical. This project was really simple to make; the code is really basic (here’s a walk-through video of the code for novices), the construction was beginner-level, and it scratched two mental itches I had. I hope this project inspired you to take a project a step further by not only considering function, but playing around with the form…because why not?
Tools List:
(purchasing via these affiliate links supports ILTMS)
Woodworking:
- Jet Wood Lathe 12×21
- Carbide lathe tool set
- Dremel tool
- Grizzly 14″ Bandsaw
- Grizzly Drill Press (WAAAAY overpriced (3x) on Amazon, buy from Grizzly directly.)
- 2HP Dust Collector
- 1 Micron bag
- Flush cut saw
- Box Cutters (for eva foam)
Finishes & adhesives I like:
Electronics:
- Adafruit Feather Bluefruitt Microcontroller
- Lithium Ion Battery
- Limit Switches
- Tactile Buttons (set)
- Wire
- jumpers (Male to Female)
- Soldering iron
- Third hand kit
- Wire strippers (not the ones I have, but good ones)
- Thin solder
- Anti static mat
- Fiskars cutting mat
- Plastic parts cabinet (24 drawer)
- Plastic parts cabinet (64 drawer)
- Precision Screw driver kit
Other Stuff: