
Josh’s wife is really into gardening and planting beautiful greenery leading to her desire for a greenhouse. This way, she can keep her plants alive during the winter months and incubate some new plants so they’re ready for the spring.
1. Frame Out the Structure
Josh began the design with a 3d model in Fusion 360. We got our bill of materials and the cut list then headed to our local Lowe’s to get the supplies to begin framing the structure. I chose to use pressure treated lumber for this exterior addition to resist the moisture and humidity that may build up inside the greenhouse. Using Josh’s measurements, we nailed together the floor and added the front and back wall studs.
Before adding a structure to your yard, you may chose to grate and level the area beforehand. Josh didn’t want to tear up the yard, and here in Kentucky, the clay is super hard. In lieu of digging into the ground to level it, we chose to level the floor frame by adding 2×4 posts semi-driven into the ground. This way, Josh and i could level the floor and nail it to those posts along the span of the greenhouse. Now that we had a level surface to work from, we continued to build out the frame by connecting the front and back studs and then connecting those two walls with some ceiling joists.

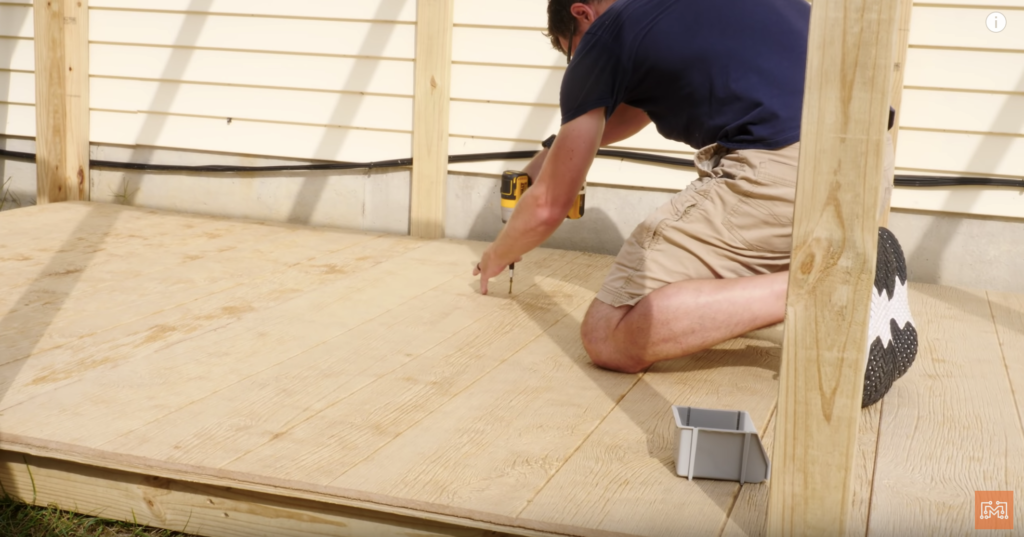
2. Add a Floor
For the greenhouse floor, Josh wanted something that could resist any standing water that would fall down from the plants. We found some engineered siding panels at Lowe’s that are weather-resistant and come in large, 4′ x 8′ sheets. These panels are only 3/8″ thick, so we added another layer of pressure treated 1/2″ plywood to ensure the floor was strong enough to walk on. We fit three of these double-layered panels on top of the floor frame, making sure to cut around the wall studs and secured them with screws.
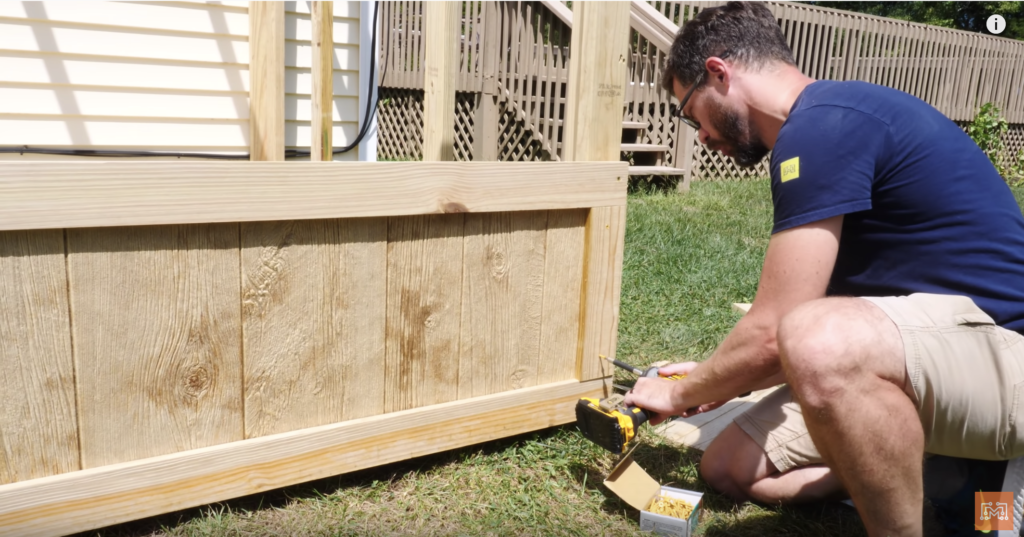
3. Option Side Panels
For the greenhouse’s exterior, it is possible to simply cover the bare frame with the clear polycarbonate sheets, but because of this greenhouse’s size, that would take more than the 10 panels we allotted for this project. We had to order the sheets from Lowes.com and the came in a pack of 10. So rather than sacrificing the size of the greenhouse, Josh got creative and added a decorative element to the outside that helped use less polycarbonate.
We decided to use the cutoffs of the engineered, exterior sheeting to make a skirting of wood panels that wrapped around the greenhouse. To cover any seams and to give the element some definition, Josh cut up some 1×4 trim pieces that really set the decorative element apart. It looked really nice and flowed super well with the overall design. Again, these step is optional, but it does look fantastic and it helps save on the more expensive material later.
4. Install the Sheeting Material
At this point in the project, we have a nice looking frame of a greenhouse. To make it functional as a greenhouse, we need a way to trap the radiant heat from the sun inside the structure. We found many ways to do this from using reclaimed windows, rolls of plastic tarp pulled tight, glass panes, and sheets of acrylic. We decided to land in the sweet spot between a material that is light-weight, cuttable, affordable, and insulative; what we found were sheets of corrugated polycarbonate. The clear polycarbonate sheets met all of our requirements and we could get a pack of 10 from Lowes.com. While this definitely wasn’t the most inexpensive option, it was the most appropriate.
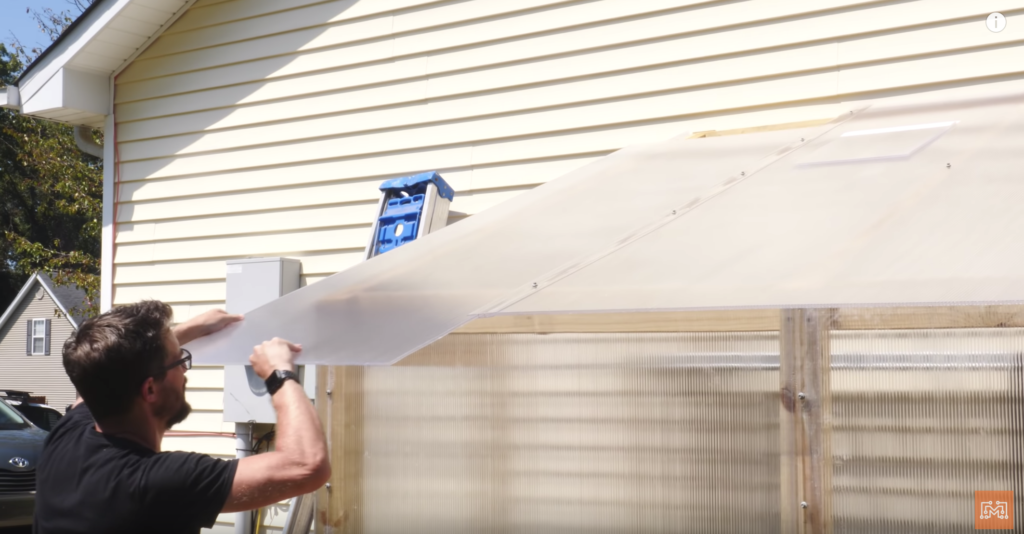
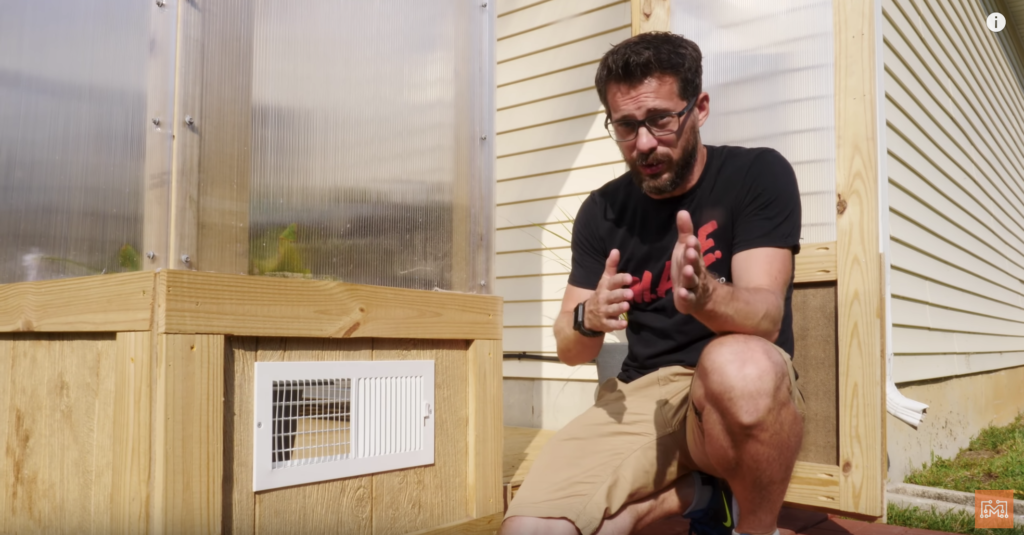
Josh and I measured, cut, and hung each panel in place and joined the panels together with a special plastic strip made for the job. Each strip was secured to a stud or a joist, just as Josh had planned. We had just the right amount of panels for the job, including a door that matched the outside aesthetic mounted to spring hinges. We also used some cutoffs to make some vents in the roof to release access heat and added some inlet registers along the bottom to help circulate air.
Add Some Plants!
After Josh’s wife moved in some modular shelving, hung plant hangers on the wall studs, and relocated her stash of succulents, the greenhouse was all finished. Josh and his wife added some decorative landscaping outside the greenhouse to tie it into their existing yard and it looked really nice. I’m super happy with how this project turned out, and so is Josh’s wife. She is really knowledgeable about the subject, so we took most of the design cues from her. We’d like to thank Lowe’s for sponsoring this project and look forward to hearing what you think about it! You can check out the products we used in the side bar to the right.

Tools List:
(purchasing via these affiliate links supports ILTMS)
Woodworking:
- Skil circular saw
- Dewalt 20v drill driver combo
- Dewalt Miter Saw
- Jet Wood Lathe 12×21
- Carbide lathe tool set
- Pancake compressor/nail gun combo
- Bostitch Framing Nailer
- Jigsaw
- Kreg Rip Cut (circular saw guide)
- Kreg R3 pocket hole jig kit
- Shop Fox Hanging Air Filter
- 2HP Dust Collector
- 1 Micron bag
- Speed square
- Flush cut saw
- Box Cutters (for eva foam)
Other Stuff: