

In the last video I covered the simple version of a climbing wall. Framing it, laying out the hole pattern, adding the T-nuts, getting the sheets on the wall, and screwing in some holds. That is really pretty much all you need, and I have built walls like that for my kids in the past. This one is different, because this one is for me, so I wanted geometry that would stay interesting to climb on for years. That meant an overhang, a section running across the ceiling, and a paint job to keep the whole thing from looking like a stack of plywood leaning against a wall.
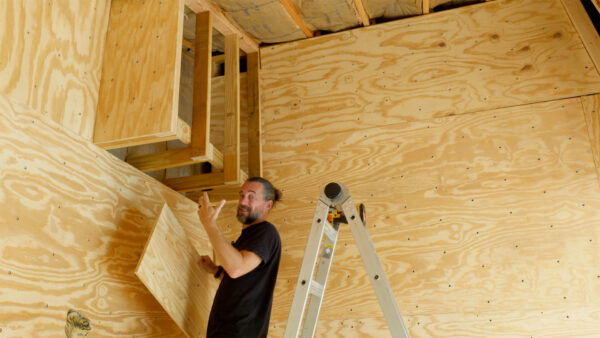
The overhang was not harder than the flat wall, it was just a different set of problems. I wanted a sheet covering the underside so I could put holds down there, which means my entire body weight ends up hanging off that panel. It had to be attached extremely well, so I ran it into the front face right at the edge to lock everything together, with blocks in the corner so you could screw up into the panel and then through the front. And don’t forget to use construction screws, not deck screws. Construction screws have more shear strength and will not shear off as easily. Deck screws were never really made for that.
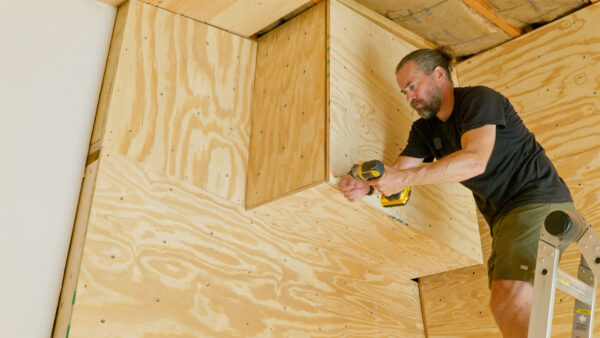
This is where thinking several steps ahead actually matters. Before I closed in the front face, I left a small gap above the side to create a slot, so that when the time came to lift the ceiling panel I could slide its edge in and let the slot carry some of the weight while I got screws in. I also had to add a piece next to an existing joist to give that panel something to land on. Neither was a big deal in the moment, but both would have been a real pain to fix later. Nothing here is complicated. It is just a list of things that have to happen in a specific order.
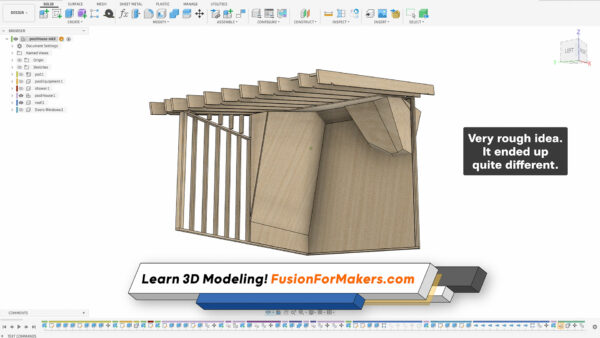
You could absolutely model an entire climbing wall in Autodesk Fusion, and normally that is exactly what I would do, because I love modeling things. For this one I got the general shape I wanted in Fusion but never modeled the framing or the sheets, because I wanted it to be a build-as-I-go project. The tradeoff showed up immediately. I needed that extra support piece I had not planned for, and nothing was perfectly square, which is entirely on brand for me. If you want to get comfortable enough with Fusion to decide when a project is worth modeling and when it is not, the Fusion For Makers course covers that ground.
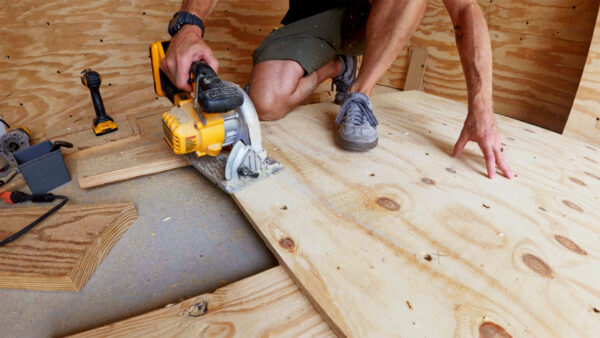
Because the framing was not square, every panel turned into a trapezoid I had to reverse engineer. I measured off the framing, transferred the shape onto plywood, and used a digital angle finder to pick up the angle of the wall so I was not eyeballing it. I had already drilled the hole pattern into several full sheets at once, which saves an enormous amount of time, but it means checking that your holes will not land on the 2x4s behind them once you cut a sheet down. I didn’t sweat the fit much either way, because a flush trim router will run along the bottom edge and make both surfaces line up. I mentioned that I used screw-in T-nuts for this build, since the hammer-in kind can get pushed out behind the wall and become useless. They stay put, but you have to drive every single one of them, and there are a whole lot of them. (So many…)
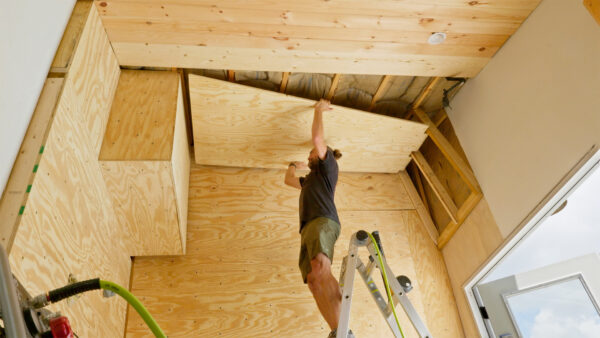
The ceiling panel was the part I had been dreading. I said on camera that it was eight feet wide, which was wrong, it is 81 inches, and it is three quarter inch material, which is to say it is HEAVY. The plan was to have my wife help me lift it, but she was not home, so I went with the rule that I would try it and stop if it didn’t feel safe (don’t do what I did, get someone to help). I got it into the slot, shot a nail into one side to hold it while I got screws going, and it worked. The angled cut on that panel is partly because the two surfaces it connects come out to different depths, but mostly because the pads only cover about eight feet of floor. Pulling the panel back toward the wall improves your odds of landing on padding instead of concrete.
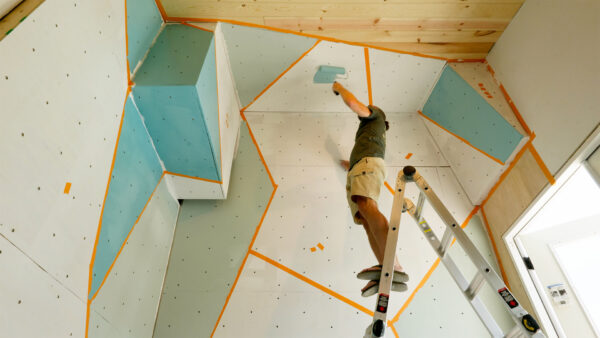
Paint was new territory for me. I have always left my walls bare plywood, so I had to go look into what people actually use, and the options run from climbing-specific paint with texture mixed in to floor paint for its durability and grip. I went with regular flat paint in the most durable version I could get, because for me the paint is about making the wall look interesting, not about grip. Getting two colors to meet cleanly on rough plywood is the hard part, since tape can never fully seal against a surface like that. My workaround was to paint over all the tape lines in white first, retape exactly where I wanted the colors to meet, seal those edges with white again, and then roll the color over the top. When the tape came off there was a clean white line between the two colors.
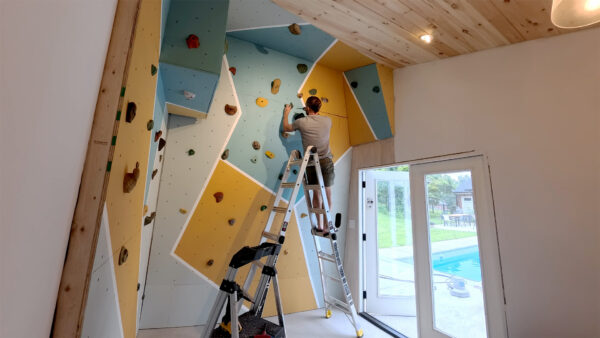
After that came the fun and genuinely tedious part, getting all of the holds on the wall, and then I finally got to climb. I am absolutely out of climbing shape, which is fine, because being out of shape is the entire reason this thing exists. I am in my late 40s, and any muscle group I stop using makes sure I know about it the next time I need it.
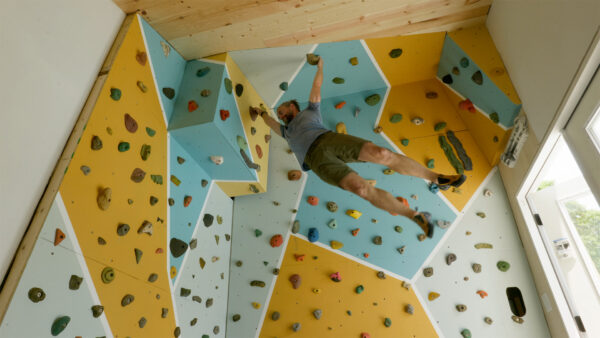
Climbing is a full body workout that I actually enjoy, and the gym has never done a single thing for me. One of my kids said the other day that it would be cool if I turned into an old grandpa who still climbs on the wall, and that is genuinely the goal. Whatever your version of that is, go find it, because the alternative shows up whether you plan for it or not. Thanks for hanging out through this one. Now, go make something awesome!
TOOLS
(purchasing via these affiliate links supports ILTMS)
Woodworking
- SawStop cabinet saw
- 8″ Dado stack
- Skil circular saw
- Dewalt 20v drill driver combo
- Dewalt Miter Saw
- Jet Wood Lathe 12×21
- Carbide lathe tool set
- Countersink drill bits
- Dewalt DW735 benchtop planer
- Orbital Sander
- Pancake compressor/nail gun combo
- Dremel tool
- Incra box joint jig
- 54″ Drywall T-Square
- Push Blocks
- Jigsaw
- Shop Fox 6″ Jointer
- Grizzly 14″ Bandsaw
- Grizzly Drill Press (WAAAAY overpriced (3x) on Amazon, buy from Grizzly directly.)
- Jet Drum Sander
- Kreg Rip Cut (circular saw guide)
- Kreg R3 pocket hole jig kit
- Shop Fox Hanging Air Filter
- 2HP Dust Collector
- 1 Micron bag
- Speed square
- 11″ Digital protractor
- Digital Angle Gauge
- Classic steel ruler (cork backed)
- Taper jig
- Flush cut saw
- 90˚ corner clamp (4 pack)
- Box Cutters (for eva foam)
Finishes & Adhesives
- Spray lacquer
- 100% pure tung oil
- Formby’s tung oil finished (tung oil/varnish)
- Danish oil
- CA Glue (medium)
- CA Activator
- Barge Contact Cement
- Critter Spray Gun
- Polycrylic
- Polyurethane
- Spar Urethane
3d Printing/CNC/Laser
- Glowforge (laser)
- X-Carve (CNC)
- Ultimaker 2 Extended 3D printer
- Ultimaker 3
- Original Prusa i3 MK 3
- Form1+ SLA 3D printer
- Silhouette Portrait (vinyl cutter)
- All filaments, 3d printing supplies from MatterHackers
Welding
- MIG welder *
- TIG welder
- Welding mask (auto darkening)
- Welding gloves
- Welding magnet
- Angle grinder *
- Cut off wheels
- Metal cutting bandsaw *
- 10″ Evolution Miter Saw for cutting Steel, Aluminum, Wood, etc.
Electronics
- Arduino Uno (just the Uno)
- Arduino Uno Kit
- Arcade buttons
- Raspberry Pi 3
- Multimeter
- Wire
- jumpers (Male to Female)
- Soldering iron
- Third hand kit
- Wire strippers (not the ones I have, but good ones)
- Thin solder
- Anti static mat
- Fiskars cutting mat
- Plastic parts cabinet (24 drawer)
- Plastic parts cabinet (64 drawer)
- Precision Screw driver kit