

If you have been following along, I have been building a pool house in my backyard for several months now, and this part of it is the piece I have been thinking about since the very beginning. There is a wall in that room that is twelve feet tall, and twelve feet is close to perfect for an indoor climbing wall. It’s tall enough to be interesting and short enough that you do not need ropes, as long as you have good padding underneath. So the whole space is becoming a climbing wall, and I have been excited and anxious about it in roughly equal amounts.
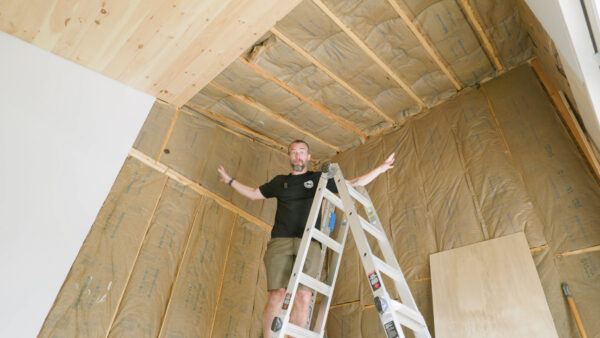
Here is what I am picturing: a short kicker at the bottom, which is a flat piece against the wall that gives you somewhere to get your feet before you start. From the top of that kicker, the big wall runs all the way up to the ceiling at a slope, giving me a huge climbing surface at an angle that is challenging without being brutal. Off to the side there is a flat wall, and from the top of that, another angled section connects up into the ceiling. Then some angled sections on the opposite wall. I fully expect all of this to change as I go, but that is the shape of it.
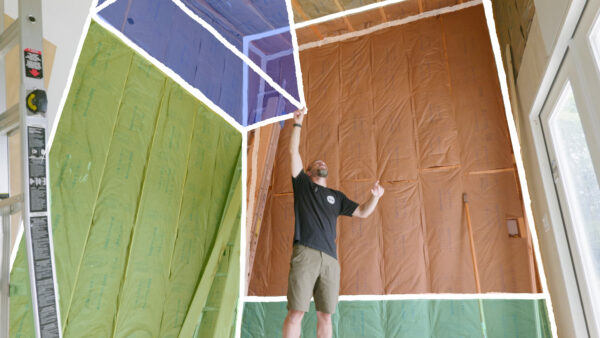
The one decision I did make early is how it attaches. I want to minimize the load on the existing framing of the building, so I am building all of this inside the room as its own structure and then fastening it to the walls. That keeps it removable and spreads the load between the new framing and the old framing instead of hanging everything off the building itself. I do not really know what I am doing with the complicated parts yet, so I started with the basics and worked up from there, which is more or less how every project in that building has gone.
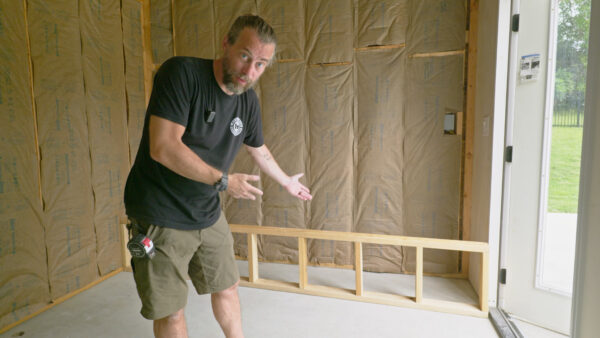
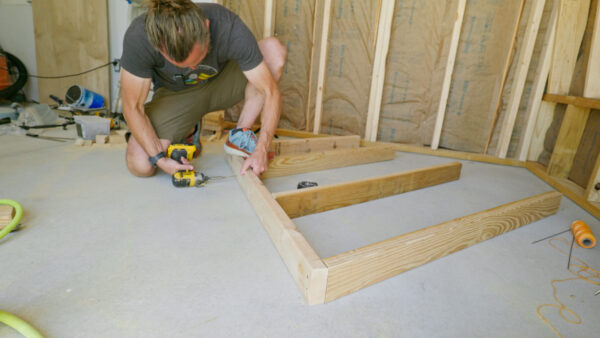
The kicker is about as simple as framing gets. It is essentially a short stud wall laid out sixteen inches on center, so plywood goes right across it the same way drywall would. I built it out of pressure treated wood, not because a kicker needs to be pressure treated, but because I had it left over from framing the building. It is also sitting directly on concrete, and any time wood touches concrete you want a foam barrier underneath. That is the same barrier I put under all the framing in this building, and it stops water from wicking up out of the slab and into the wood.
That kicker and the flat wall next to it are held in with construction screws driven from the top, from the underside of the top, and down at the bottom plate. I want to be specific about the screws, because it matters here. Use construction screws, not deck screws. Deck screws look plenty beefy and they will hold a deck together just fine, but they shear differently, and shear is exactly the kind of load a climbing wall puts on fasteners. Somebody is going to be hanging off this thing and moving around while they do it, so this is not the place to grab whatever box is closest.
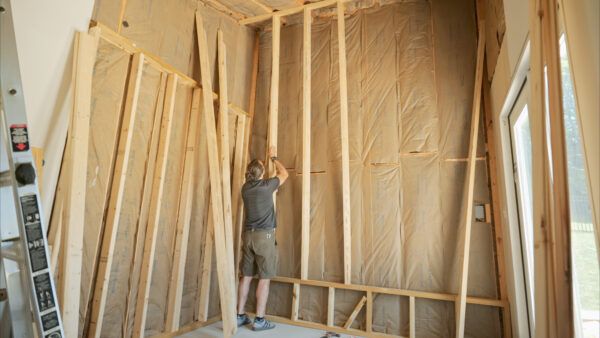
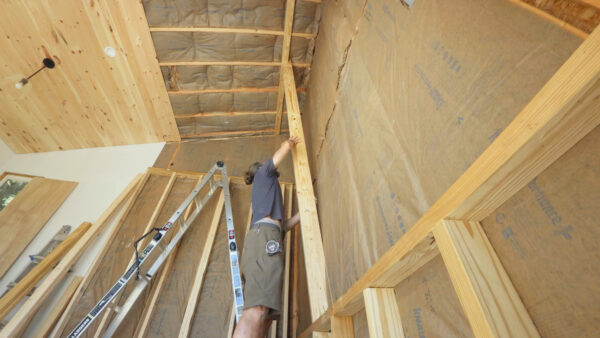
The first genuinely interesting part was the angled wall. I needed a run of framing sitting on the kicker at the bottom and landing on the ceiling twelve feet up, which meant I needed something to hold the pieces in place while I fastened them. A two by four run across as a temporary cleat did the job. Getting that first piece up was the moment the whole thing became real, because I could finally see the span and the actual angle. I had planned for fifteen or twenty degrees. It came out at about six. Less dramatic than I expected, but still a big, fun surface.
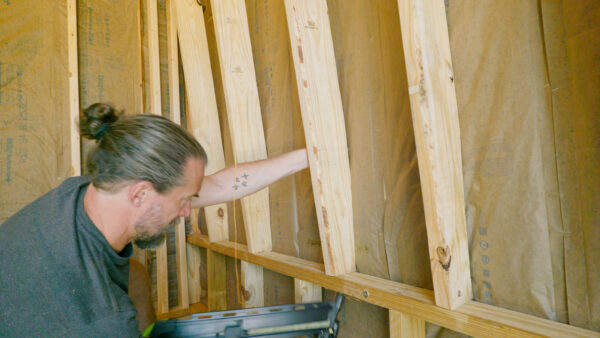
Once that first piece was right, I took it back down and used it as a template for the other eight, since it already had every angle and length on it. The reason those are two by sixes is a small piece of luck. When I ordered the roofing for this building, the panels were too long for me to haul home, so they were shipped, and the shipping company built a simple two by six crate around them. The wood was in good shape and the pieces were the right length, so I took the crate apart and kept them. There were exactly eight. I needed exactly eight.
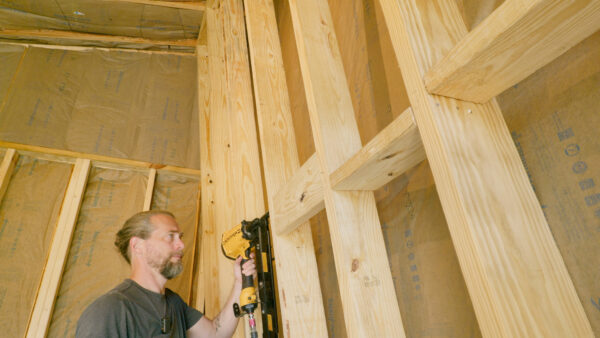
That worked out, but I would have used two by sixes anyway. You can frame a climbing wall out of almost anything if you think about the forces, and the forces here are not the same as a regular wall. This is a wall that holds a person while that person is jumping, swinging, and shifting their weight around. Two by fours are fine for a short vertical section attached to an existing wall. For a long angled span, thicker framing bows less and feels far less bouncy underfoot, and once you get blocking tying it all together, it turns into a very solid surface.
The corner is the part I am still working out. I want to climb up a vertical wall and then have to reach around a shelf that sticks out where you cannot see over it, which is basically an overhang. Building that means building a box, and this box has to tie into a sloped ceiling on one side and two other planes running off in different directions. As much as I love modeling my projects in Autodesk Fusion, I did not model this one. I did use Fusion to rough in big panels and get a feel for the angles, which is exactly the kind of quick sketch modeling I walk through in Fusion For Makers. If you’d like to learn 3D modeling, check out the course!
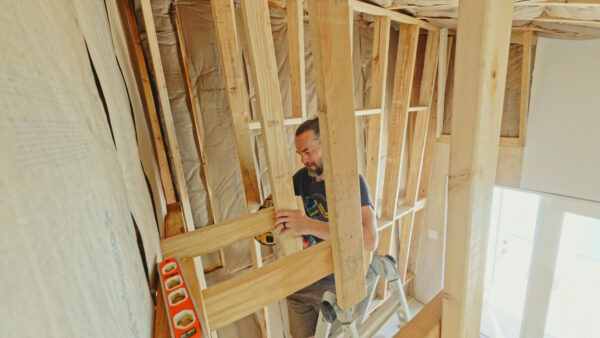
For the corner pieces I cut them all long on purpose, ran them out past where they needed to land, and planned to trim the excess once everything was connected. The other thing I have learned about a project like this is that the framing is never actually finished. Even on a flat wall, you can lay a sheet of plywood down and find that the end of it does not land on a stud. Where two different volumes meet, there is often nothing at all behind the seam to catch the ends of three different sheets. All of that infill blocking has to get built to fit as the sheathing goes on.
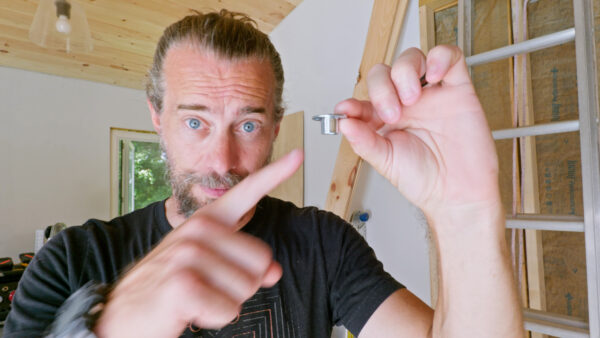
With the major framing done, it was time for plywood and T-nuts. A T-nut is a threaded insert. You drill a hole, drop it in from the back, drive a few small screws through the flange, and now you have threads you can bolt a hold into from the front. There are a few varieties. Some take two screws instead of three, some have teeth that you just hammer in with no screws at all. The hammer-in kind are much faster, but they can pop off behind the wall and let the hold spin. The screw-in style holds up longer and stays put, which is why people kept recommending them to me.
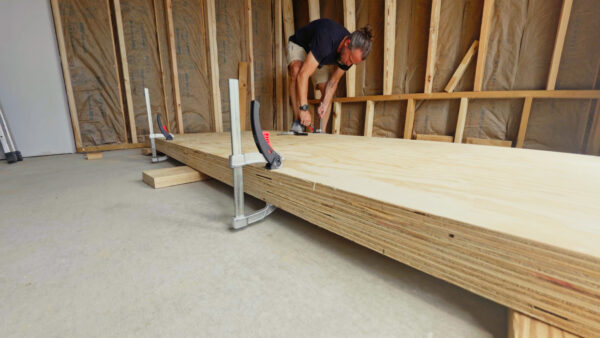
For the sheathing itself, use plywood and skip the OSB. OSB is a bunch of scraps glued together in layers with no real grain structure, and it is going to be weaker around seventy-something little holes. Whatever you pick needs to be at least half an inch thick, because that is the height of the T-nut itself, and three quarters is better. I used 19/32 BC plywood, which lands right between the two. Honestly it is already heavy enough that going thicker started to feel like a bad idea, especially with a ceiling section coming that I have not figured out yet.
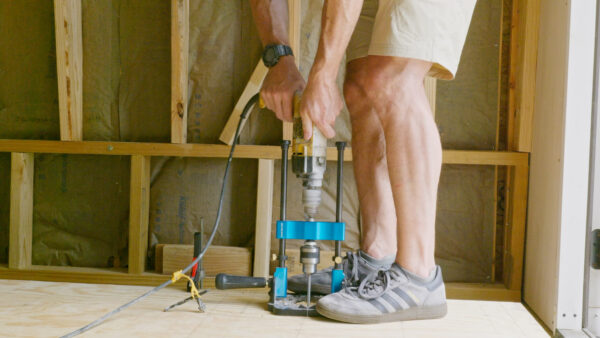
Each sheet needs 78 holes, so I clamped five sheets together and tried to drill all of them in one pass with a half inch spade bit sized to the T-nuts. I used a drill guide so I did not have to fight to keep the bit vertical in both directions, and it worked better than I expected. The only real downside is that the bottom sheet has nothing behind it and tears out on the back side, which a sacrificial sheet at the bottom of the stack would solve. I probably could have added two or three more sheets to the stack. A CNC would have done all of it and my back would be happier about it. (Seriously, if you have a CNC router, use it!)
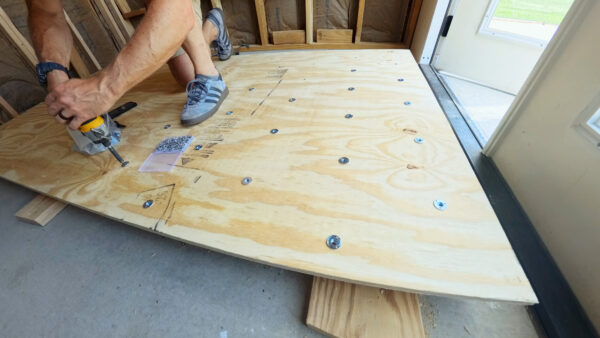
Then came the T-nuts, which I installed from the ugly side of the plywood. BC plywood has one decent face and one with printing and knots all over it, so the hardware goes on the side nobody sees. This part is tedious in the extreme. One sheet took me somewhere between thirty and forty minutes of bending over and driving tiny screws, and that got me exactly one sheet ready to hang. When I went to place it, I found the last row of holes landed directly over a stud, which meant the whole panel had to rotate and go up the other direction.
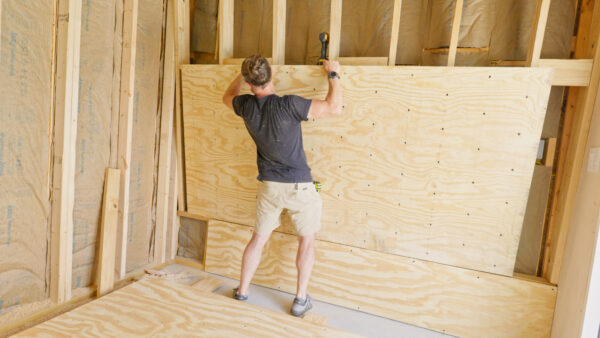
Getting that first panel up also taught me that these things are big, heavy, and not perfectly flat, so from here on I am measuring where each one goes before I try to hold it in place, and I am getting help. After the panels come the holds, which is the easy part. You pick a hold, get the right bolt for it, and thread it into the T-nut. I’ll put an Allen key in my drill for that later, because doing a whole wall of them by hand takes forever. The small footholds usually have screw holes instead of bolt holes, which means those can go anywhere you want.
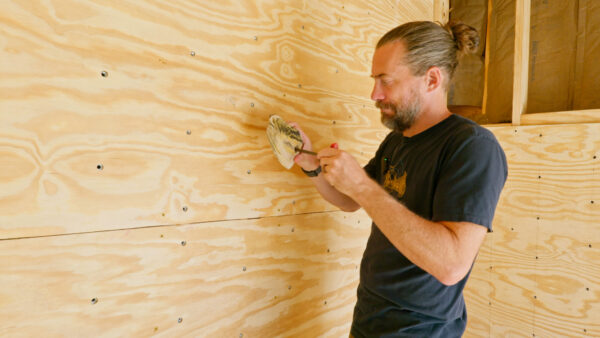
I couldn’t finish putting holds on because I ran out of screws and T-nuts. There is a reason I am doing all of this beyond just liking to climb though. I am getting older, and getting older makes new habits harder to start. Building this is an act of defiance against settling in. If it is twenty steps out my back door, I have no excuse not to go use it, get stronger, and have fun doing it with my kids and my friends. If that sounds familiar, go find your own version of it.
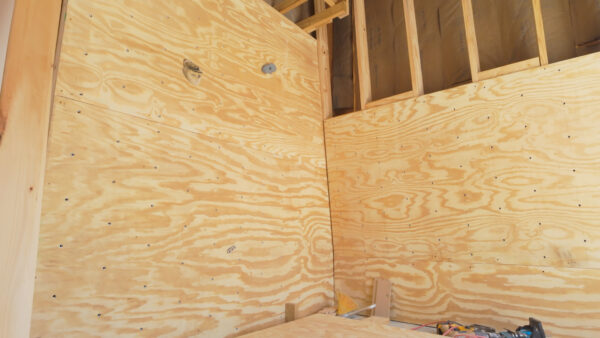
Next time I am tackling the ceiling and the rest of the hard parts. Thanks for hanging out with me on this one. Now, go make something awesome!
TOOLS
(purchasing via these affiliate links supports ILTMS)
Woodworking
- SawStop cabinet saw
- 8″ Dado stack
- Skil circular saw
- Dewalt 20v drill driver combo
- Dewalt Miter Saw
- Jet Wood Lathe 12×21
- Carbide lathe tool set
- Countersink drill bits
- Dewalt DW735 benchtop planer
- Orbital Sander
- Pancake compressor/nail gun combo
- Dremel tool
- Incra box joint jig
- 54″ Drywall T-Square
- Push Blocks
- Jigsaw
- Shop Fox 6″ Jointer
- Grizzly 14″ Bandsaw
- Grizzly Drill Press (WAAAAY overpriced (3x) on Amazon, buy from Grizzly directly.)
- Jet Drum Sander
- Kreg Rip Cut (circular saw guide)
- Kreg R3 pocket hole jig kit
- Shop Fox Hanging Air Filter
- 2HP Dust Collector
- 1 Micron bag
- Speed square
- 11″ Digital protractor
- Digital Angle Gauge
- Classic steel ruler (cork backed)
- Taper jig
- Flush cut saw
- 90˚ corner clamp (4 pack)
- Box Cutters (for eva foam)
Finishes & Adhesives
- Spray lacquer
- 100% pure tung oil
- Formby’s tung oil finished (tung oil/varnish)
- Danish oil
- CA Glue (medium)
- CA Activator
- Barge Contact Cement
- Critter Spray Gun
- Polycrylic
- Polyurethane
- Spar Urethane
3d Printing/CNC/Laser
- Glowforge (laser)
- X-Carve (CNC)
- Ultimaker 2 Extended 3D printer
- Ultimaker 3
- Original Prusa i3 MK 3
- Form1+ SLA 3D printer
- Silhouette Portrait (vinyl cutter)
- All filaments, 3d printing supplies from MatterHackers
Welding
- MIG welder *
- TIG welder
- Welding mask (auto darkening)
- Welding gloves
- Welding magnet
- Angle grinder *
- Cut off wheels
- Metal cutting bandsaw *
- 10″ Evolution Miter Saw for cutting Steel, Aluminum, Wood, etc.
Electronics
- Arduino Uno (just the Uno)
- Arduino Uno Kit
- Arcade buttons
- Raspberry Pi 3
- Multimeter
- Wire
- jumpers (Male to Female)
- Soldering iron
- Third hand kit
- Wire strippers (not the ones I have, but good ones)
- Thin solder
- Anti static mat
- Fiskars cutting mat
- Plastic parts cabinet (24 drawer)
- Plastic parts cabinet (64 drawer)
- Precision Screw driver kit