
I have been thinking a lot about hobbies. Not side hustles or the stuff you do with family on weekends—I mean real hobbies. The things that are just for you, the stuff that happens in the cracks between everything else. For me, that’s planted freshwater aquariums. I get to do a lot of things I love for work, and most of it ends up on camera. But the aquariums are kind of just for me. They’re always waiting there when life settles down. The problem with hobbies, though, is that they’re low priority. They happen around everything else, which means the time you put into them is pretty precious. So I wanted to figure out if a 3D printer could make hobby time more efficient—but mostly more enjoyable.
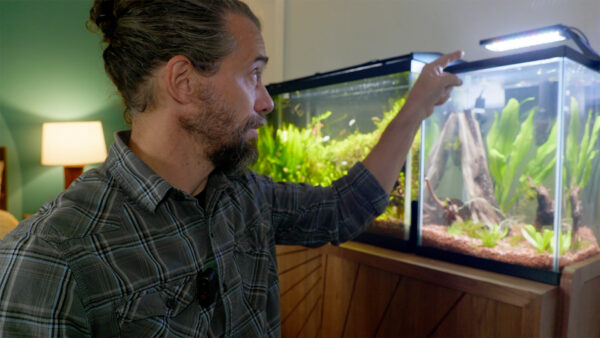
When I think about 3D printing for hobbies, I’ve started breaking it down into three categories: structural elements, organization, and maintenance. Structural doesn’t mean physically structural—it means structural to the hobby itself. These are the pieces that make the hobby possible in the first place. Like, if you 3D printed a pickleball paddle because you play pickleball, that would be making it possible for you to play the thing. My first project fell into this category. I have a 30-gallon tank that’s been running great for years, and I recently set up a new one. The tank came as a kit with all the parts, including a junky light. The light itself wasn’t the problem—the hood was. It’s molded plastic designed to hold the light that came with it, not the better one I wanted to use. The most frustrating part was that my light almost fit. Almost. But not quite.
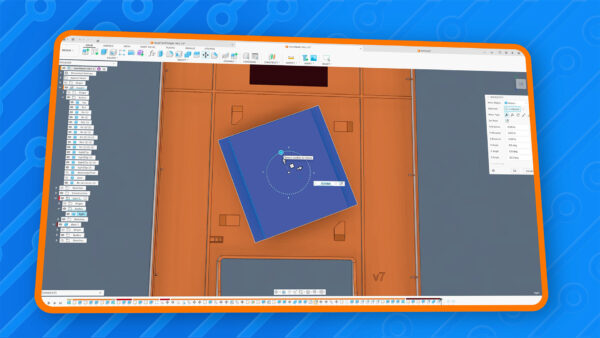
I tried hot glue and epoxy to get the light to stick to the plastic, and nothing worked. So I decided to rebuild the entire hood in Autodesk Fusion and make it hold my light properly. I also wanted to design it so the light could come in and out easily in case I ever needed to swap it. The solution I came up with was a twist-lock system. I modeled the light, then designed four little clips that go on the corners. The idea was that you could drop the light in at a 45-degree angle and then twist it into place, locking it into those clips. The whole print took about 16 hours, which gave me plenty of time to wonder if it would actually work. I changed the door design from hinges to a removable panel, which I liked better, and I printed it on a textured build plate using PETG. The texture came out looking really cool on the outside.

After the print finished, I tested the twist mechanism and it worked way better than I expected. The light dropped in, twisted, and clicked into place like it was supposed to. I was honestly expecting some kind of problem, but it just worked. That said, when I brought it upstairs and put it on the tank, it was slightly looser than when I tested it downstairs. Maybe the plastic cooled and shrunk a bit. Either way, I added a small dab of hot glue to stop it from twisting accidentally—I didn’t want the light falling in the water. But overall, it worked ridiculously well. And the good news is, if something goes wrong down the road, I can always just print another one.
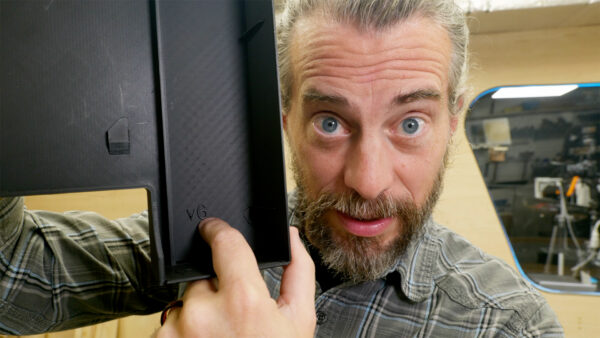
I wanted to mention a little plugin I made for Autodesk Fusion. When you’re working on 3D printed projects, there are always multiple test prints and versions, and it gets hard to keep track of which print came from which version when they all look similar. So I made a plugin that takes the version number of your file and creates a parameter in Fusion that’s synced with it. Then you can embed that version number right into the print itself. When I get a print off the bed, I can look at it and know exactly which version it was. It’s a small thing, but it’s been really helpful for my workflow. If you’re interested in learning more about working in Autodesk Fusion, check out our online course called Fusion for Makers—it’s been completely updated for 2025.

The next category is organization. Every hobby comes with stuff—supplies, tools, things you bought that you didn’t actually need to buy. Obviously, you don’t need a 3D printer to organize things. You can go to the store and buy plastic bins that may or may not fit your stuff and may or may not fit your space. But if you 3D print it, it’s going to fit exactly. I looked at Gridfinity, which is an open-source grid system started by a guy named Zach Friedman. It’s a really cool system where you print base grids and then print containers that snap into those grids.
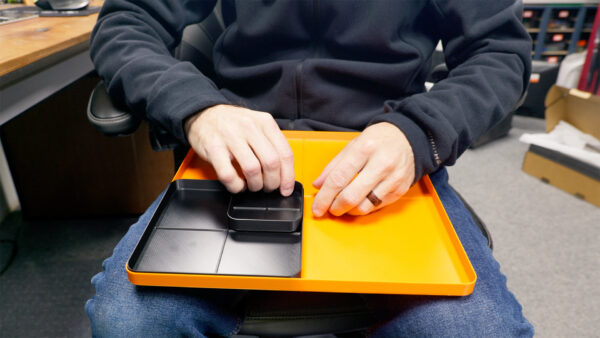
There’s a huge library of things people have designed for it. I printed some out and tested them in my shallow shop drawers. It works great for a lot of people, but honestly, it’s not for me. Printing a grid just to set a container on it felt like an extra step I didn’t need. But what I did find useful was a free tool called Bento 3D. It lets you put in dimensions for a bin, segment the inside however you want, and then download the STL file to print. I made several bins—some big and open, some with a few dividers, and some with lots of small compartments for tiny stuff.
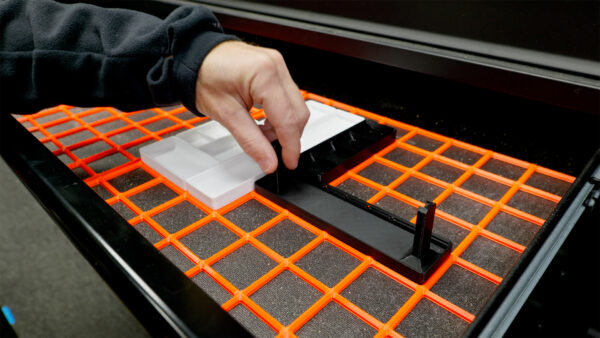
For custom solutions, I designed a simple parametric tray in Fusion. The cool thing about parametric models is that the whole design is driven by numbers. If I change the dimension from 12 inches to 6 inches, it creates another version of the exact same tray at the new size. I can nest smaller trays inside larger ones just by changing a few values. It’s a really powerful way to build organization systems that fit exactly where you need them. And honestly, once you understand how parametric modeling works, it opens up a lot of possibilities.
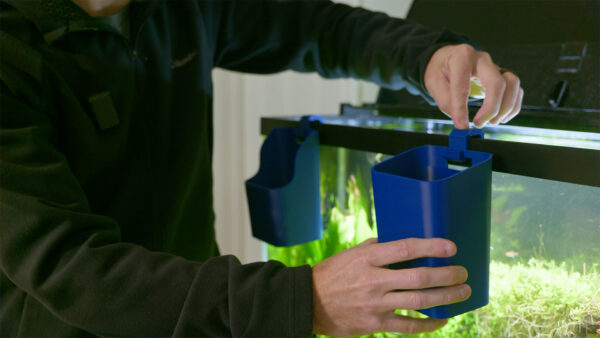
The last category is maintenance. Every hobby has stuff you have to clean, or things you need to move from one place to another. A lot of those tools are things you can buy, but sometimes it’s not worth it. At pet stores, they have these little containers that hang on the side of the tank—they cost about fifteen bucks for what’s basically a piece of plastic. I use one for holding plant clippings when I’m trimming things down. But I also have a bunch of stainless steel aquascaping tools that get wet, and I didn’t want to keep dripping water on my walnut cabinet. So I designed a dual-purpose container in Fusion. One version has a lower scooped front for plant clippings, and a taller version holds all the tools. The trick was separating the hook from the container so I could print each piece in the strongest orientation. The hooks print on their side, and the containers print standing up with almost no support material. They just snap together, hang on the tank, and when I’m done, I can take the container off the hook and set it down on a table or store it away.
Thanks for following along with the build. I’d love to hear what your hobby is and how a 3D printer has helped—or could help—make that time even better. Now, go make something awesome!
TOOLS
(purchasing via these affiliate links supports ILTMS)
Woodworking
- SawStop cabinet saw
- 8″ Dado stack
- Skil circular saw
- Dewalt 20v drill driver combo
- Dewalt Miter Saw
- Jet Wood Lathe 12×21
- Carbide lathe tool set
- Countersink drill bits
- Dewalt DW735 benchtop planer
- Orbital Sander
- Pancake compressor/nail gun combo
- Dremel tool
- Incra box joint jig
- 54″ Drywall T-Square
- Push Blocks
- Jigsaw
- Shop Fox 6″ Jointer
- Grizzly 14″ Bandsaw
- Grizzly Drill Press (WAAAAY overpriced (3x) on Amazon, buy from Grizzly directly.)
- Jet Drum Sander
- Kreg Rip Cut (circular saw guide)
- Kreg R3 pocket hole jig kit
- Shop Fox Hanging Air Filter
- 2HP Dust Collector
- 1 Micron bag
- Speed square
- 11″ Digital protractor
- Digital Angle Gauge
- Classic steel ruler (cork backed)
- Taper jig
- Flush cut saw
- 90˚ corner clamp (4 pack)
- Box Cutters (for eva foam)
Finishes & Adhesives
- Spray lacquer
- 100% pure tung oil
- Formby’s tung oil finished (tung oil/varnish)
- Danish oil
- CA Glue (medium)
- CA Activator
- Barge Contact Cement
- Critter Spray Gun
- Polycrylic
- Polyurethane
- Spar Urethane
3d Printing/CNC/Laser
- Glowforge (laser)
- X-Carve (CNC)
- Ultimaker 2 Extended 3D printer
- Ultimaker 3
- Original Prusa i3 MK 3
- Form1+ SLA 3D printer
- Silhouette Portrait (vinyl cutter)
- All filaments, 3d printing supplies from MatterHackers
Welding
- MIG welder *
- TIG welder
- Welding mask (auto darkening)
- Welding gloves
- Welding magnet
- Angle grinder *
- Cut off wheels
- Metal cutting bandsaw *
- 10″ Evolution Miter Saw for cutting Steel, Aluminum, Wood, etc.
Electronics
- Arduino Uno (just the Uno)
- Arduino Uno Kit
- Arcade buttons
- Raspberry Pi 3
- Multimeter
- Wire
- jumpers (Male to Female)
- Soldering iron
- Third hand kit
- Wire strippers (not the ones I have, but good ones)
- Thin solder
- Anti static mat
- Fiskars cutting mat
- Plastic parts cabinet (24 drawer)
- Plastic parts cabinet (64 drawer)
- Precision Screw driver kit