
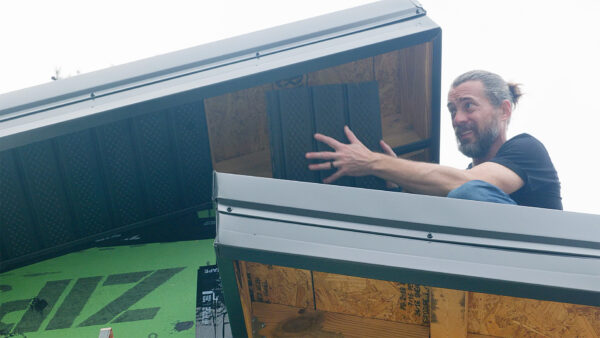
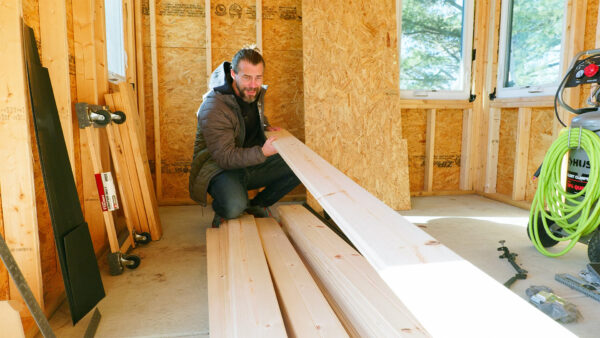
A couple weeks ago I was out in the snow putting up the roof, and now it was 64 degrees outside. That’s just how it goes sometimes. Before Christmas I had finished up the roof itself, then took a little break over the holidays, and now it was time to get back out there and finish up the underside. There were two sections that needed attention: the soffit area on the main structure and the ceiling over the pool equipment section. Both of these were new territory for me, but honestly, that’s pretty much every step of this build at this point.
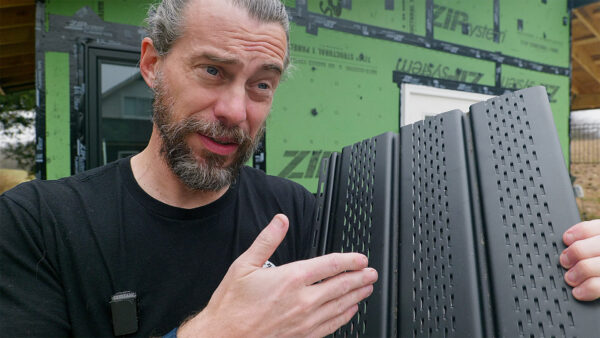
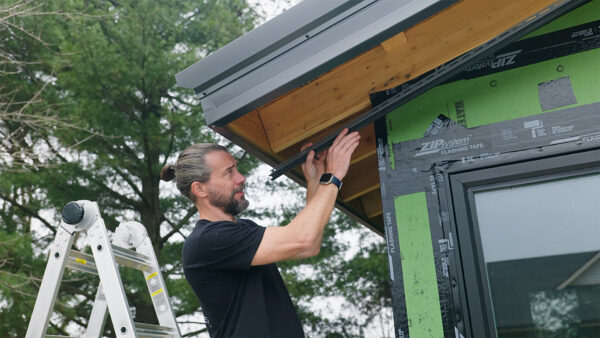
The soffit is the part underneath the roof overhang, and most people cover it up with vinyl or aluminum panels. I went with black vinyl because it was significantly cheaper than aluminum in that color, and I actually think the black looks better anyway. These panels have a bunch of little vent holes in them, and that’s on purpose. The idea is that air comes in through the soffit, travels up through the roof cavity, and vents out at the ridge. This keeps moisture from getting trapped in there and causing problems down the road. You can get panels without the vent holes too, and most people mix them, but I just bought all vented because it was simpler and it all works the same once it’s up there.
Before I could put up the soffit panels, I had to install something called F-channel. I assume it’s called that because it looks like the letter F when you flip it over, but I honestly have no idea if that’s the real reason. This piece mounts to the wall and gives the soffit panel something to tuck into on one side. The other side slides into a gap I had left behind the metal fascia when I installed it earlier. To get the F-channel positioned correctly, I needed to transfer a level line from the fascia over to the wall. My plan was to use a chalk line, which is usually a pretty simple tool. You hook one end, stretch it across, snap it, and you’ve got a nice straight line. Except my chalk line had other plans. Somehow there was a knot inside the housing, which meant the string wouldn’t come out far enough to reach. I have no idea how that even happens. So I ended up using regular string to mark my reference points instead. It took a little longer, but it worked. The F-channel ended up about an eighth of an inch higher than ideal, but nobody except me and whoever watches the video will ever notice that.
Installing the F-channel was a little awkward because it’s floppy and long, and I was working kind of overhead and behind it at the same time. I used leftover roofing nails, which may or may not be the right thing to use, but I had them on hand. One thing I learned is that you don’t want to nail these tight. You leave them a little loose so the material can expand and contract with temperature changes. I can see why some people use screws instead, because trying to swing a hammer in that tight space was not ideal. Once the channel was up, I cut the soffit panels to length using a circular saw with the blade installed backwards. That sounds weird, but apparently it keeps the vinyl from chipping and throwing pieces everywhere. It actually worked really well. One full panel gave me about nine pieces, so there was a lot of cutting involved, but the installation itself went smoothly after that.
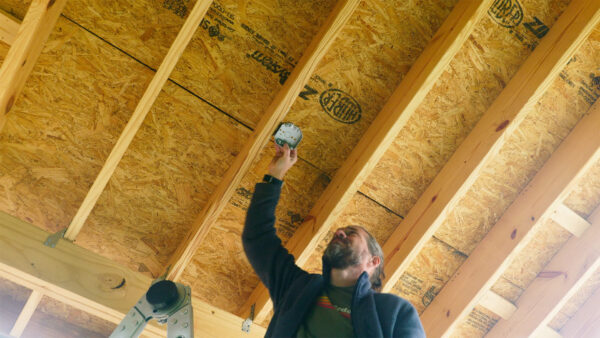
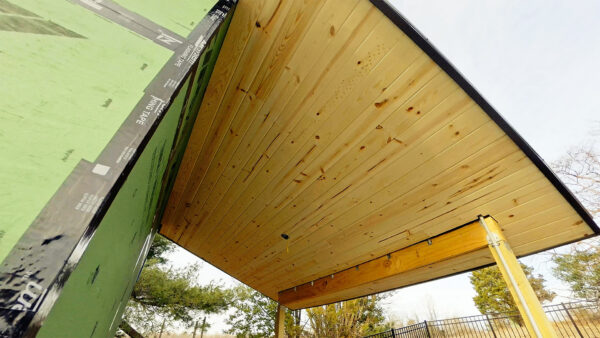
The other section I needed to deal with was the ceiling over the pool equipment area. Originally I had planned to put soffit there too, but I hadn’t really thought it through and it turned out I didn’t order enough material anyway. So I decided to go with tongue and groove pine boards instead. This area is kind of semi-outdoor since it’s really just there to cover the pool equipment, and eventually there will be some sort of screen on the sides so you don’t have to look at all the pumps and filters. Before I could start on the ceiling, I had to rough in an electrical box for a future light. I forgot to get the clips and connectors I needed for the conduit, but all I really had to do at this point was get the box and wire in place so I could work around it.
The tongue and groove boards I bought were unfinished pine with a bead detail on one side and a flat profile on the other. The span from one side to the other was about twelve and a half feet, but the boards only came in eight, ten, and sixteen foot lengths. That meant I either had way too much waste or I needed to plan for seams. I went with the eight foot boards and just tried to stagger the seams so they wouldn’t line up from row to row. The typical approach is to find the center, measure out, and make sure you don’t end up with a tiny sliver at the edge. But I ran into a problem almost immediately. I measured down the same distance from the high point on several rafters and tried to put boards across that line, but they didn’t line up straight. To get them visually aligned, I had to adjust their position, and then they looked tilted relative to everything else. I still don’t fully understand what caused it, but I decided to change my approach. Instead of starting in the middle, I started at the top edge where it would be most visible and worked my way down. That way any weirdness would end up at the bottom behind the header where nobody would really see it.

Working overhead at an angle is just awkward, and some of the seams between boards didn’t come together as cleanly as I would have liked. But overall it looked pretty good. When I got to the electrical box, I had to notch out a board to fit around it. I practiced on a scrap piece first to make sure I had the dimensions right before committing to a full-length board. Getting the pieces to wrap around the beam at the end took a little more planning, but nothing was as difficult as I kept expecting it to be. Once all the boards were up, I had to sand off pencil marks and some black marks from the mallet I was using. Then I applied spar varnish to protect the wood. This ceiling won’t get direct rain, but wind-blown rain is definitely going to hit it, so the finish is important. I’ll probably have to reapply it every few years, but that’s just part of the deal with exterior wood.
Both of these tasks made a huge difference in how the shed looks. It went from feeling like a construction zone to actually looking like a building. Neither one was particularly hard, just time-consuming and a little awkward in spots. Someone told me once that a construction project is basically about covering up the previous day’s work, and that really clicked for me on this one. The framing and sheathing disappear behind the soffit and the ceiling, and suddenly it all looks intentional. Next up is siding, and once that’s on, this thing is really going to come together. Thanks for following along with the build. Now, go make something awesome!
TOOLS
(purchasing via these affiliate links supports ILTMS)
Woodworking
- SawStop cabinet saw
- 8″ Dado stack
- Skil circular saw
- Dewalt 20v drill driver combo
- Dewalt Miter Saw
- Jet Wood Lathe 12×21
- Carbide lathe tool set
- Countersink drill bits
- Dewalt DW735 benchtop planer
- Orbital Sander
- Pancake compressor/nail gun combo
- Dremel tool
- Incra box joint jig
- 54″ Drywall T-Square
- Push Blocks
- Jigsaw
- Shop Fox 6″ Jointer
- Grizzly 14″ Bandsaw
- Grizzly Drill Press (WAAAAY overpriced (3x) on Amazon, buy from Grizzly directly.)
- Jet Drum Sander
- Kreg Rip Cut (circular saw guide)
- Kreg R3 pocket hole jig kit
- Shop Fox Hanging Air Filter
- 2HP Dust Collector
- 1 Micron bag
- Speed square
- 11″ Digital protractor
- Digital Angle Gauge
- Classic steel ruler (cork backed)
- Taper jig
- Flush cut saw
- 90˚ corner clamp (4 pack)
- Box Cutters (for eva foam)
Finishes & Adhesives
- Spray lacquer
- 100% pure tung oil
- Formby’s tung oil finished (tung oil/varnish)
- Danish oil
- CA Glue (medium)
- CA Activator
- Barge Contact Cement
- Critter Spray Gun
- Polycrylic
- Polyurethane
- Spar Urethane
3d Printing/CNC/Laser
- Glowforge (laser)
- X-Carve (CNC)
- Ultimaker 2 Extended 3D printer
- Ultimaker 3
- Original Prusa i3 MK 3
- Form1+ SLA 3D printer
- Silhouette Portrait (vinyl cutter)
- All filaments, 3d printing supplies from MatterHackers
Welding
- MIG welder *
- TIG welder
- Welding mask (auto darkening)
- Welding gloves
- Welding magnet
- Angle grinder *
- Cut off wheels
- Metal cutting bandsaw *
- 10″ Evolution Miter Saw for cutting Steel, Aluminum, Wood, etc.
Electronics
- Arduino Uno (just the Uno)
- Arduino Uno Kit
- Arcade buttons
- Raspberry Pi 3
- Multimeter
- Wire
- jumpers (Male to Female)
- Soldering iron
- Third hand kit
- Wire strippers (not the ones I have, but good ones)
- Thin solder
- Anti static mat
- Fiskars cutting mat
- Plastic parts cabinet (24 drawer)
- Plastic parts cabinet (64 drawer)
- Precision Screw driver kit