A few weeks ago, I faced a problem: I wanted a flexible way to mount my 360 camera around my workshop. Sure, I could have bought a pre-made solution or made due with a spring clamp, but where’s the fun in that? Like most of my projects, this was about solving a specific need and learning something in the process. I had a 360 camera that could capture video in every direction, and I wanted a mount that would let me position it anywhere on my shop’s exposed ceiling joists without hassling with complicated clamps or climbing on a ladder.
My first attempts were rough. I started with a basic prototype using rubber bands and some hand-cut pieces. It quickly became clear that my initial design had some major flaws. The spring tension wasn’t strong enough, the pieces didn’t move or grip how I wanted, and the whole thing felt like a janky, temporary solution. But that’s the beauty of prototyping — each failure teaches you something new. I realized I needed to think about two key things: the right spring force to hold the mount, and the best shape for keeping it in place without being difficult to remove.
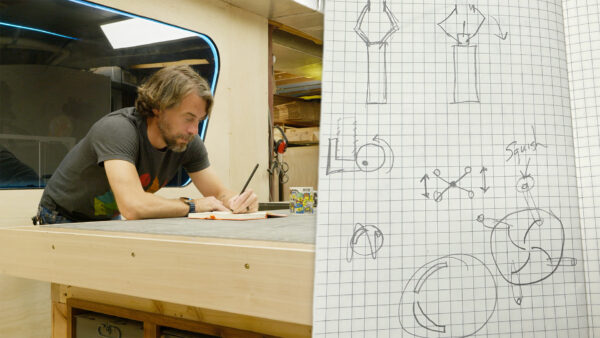
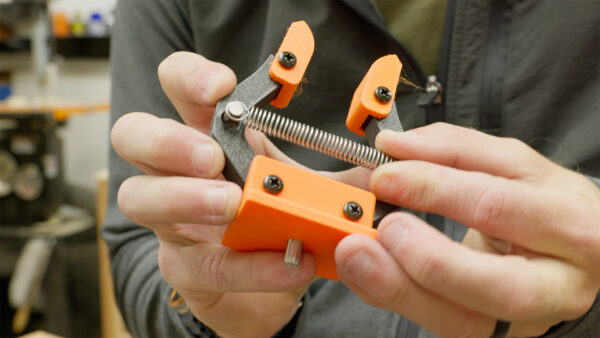
I considered several design concepts. One idea involved little fingers that would twist around the joists, but that seemed overly complicated. Another involved a cam mechanism that would clamp down, but that felt too complex. Ultimately, I settled on the simplest solution: a mount with spring tension that could spread around a joist and hold tight until deliberately pulled down. The beauty was in its simplicity, especially since the camera weighs almost nothing.
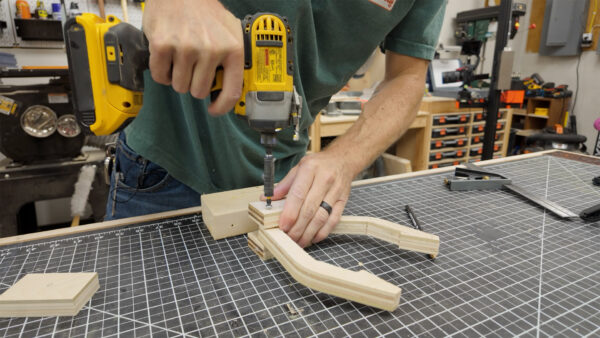
As I worked through different prototypes, I learned a lot about clamp design. I discovered that the geometry of each piece matters tremendously. The top needed to be wedge-shaped to allow forced entry and tightening. The ends needed to pivot, like traditional clamps, to create a better grip. I also had to figure out how to incorporate a quarter-twenty bolt to attach the camera mount, which added another layer of design complexity.
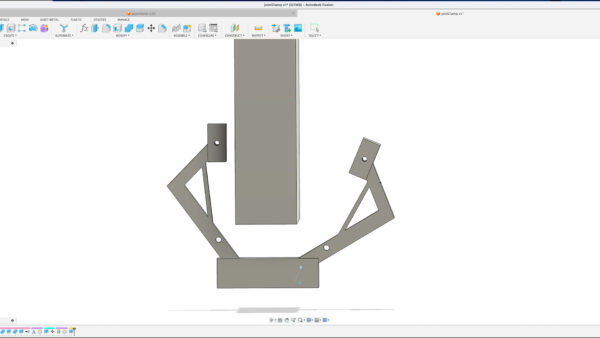
3D modeling became my secret weapon. Instead of just making something for myself, I started thinking about how I could design this in a way that might help other makers facing similar challenges. By turning my physical prototypes into a digital model, I could refine the design, make it more universally useful, and potentially share it with others. It’s something I always emphasize — being able to 3D model your ideas is like a superpower for problem-solving and sharing solutions.
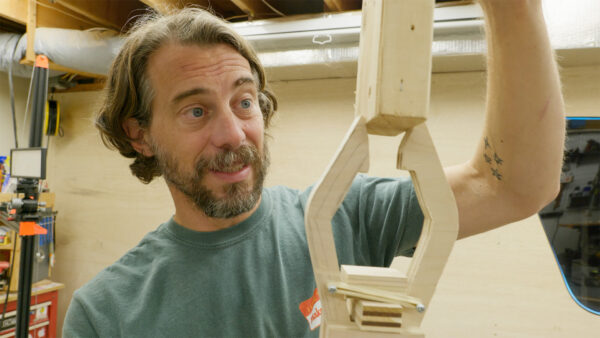
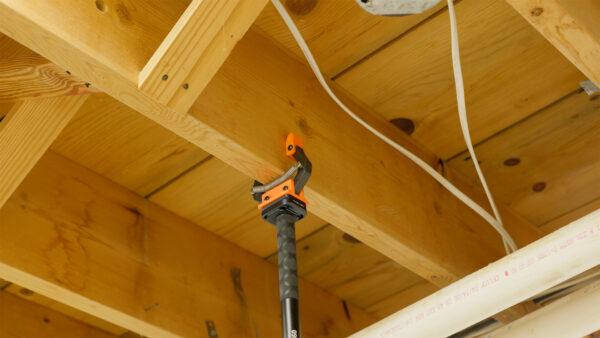
After multiple iterations and reprints, I finally nailed the design. I spent time testing different springs, drilling precise holes, and ensuring the mount could grip joists securely. The final test was crucial: Could I move this mount quickly around different parts of my shop? Absolutely. I could push it up to the ceiling in one spot, take it down, and immediately reposition it over my workbench or in another area of the workshop.
This project wasn’t just about creating a camera mount. It was about the process of iterating, learning, and solving a specific problem. Each prototype taught me something new about mechanical design, spring tension, and the importance of thoughtful iteration. What started as a simple need to mount a 360 camera became a mini-engineering journey that improved my understanding of how things work.
Would I have been better off buying a pre-made solution? Maybe. But that misses the point of making. For me, the joy isn’t just in the final product, but in the process of figuring things out, making mistakes, and ultimately creating something unique that solves exactly what I need. This camera mount might seem like a small thing, but it represents something bigger: the maker’s spirit of creativity, problem-solving, and the satisfaction of building something with your own hands. Thanks for being here with me. Now go make something awesome!
TOOLS
(purchasing via these affiliate links supports ILTMS)
Woodworking
- SawStop cabinet saw
- 8″ Dado stack
- Skil circular saw
- Dewalt 20v drill driver combo
- Dewalt Miter Saw
- Jet Wood Lathe 12×21
- Carbide lathe tool set
- Countersink drill bits
- Dewalt DW735 benchtop planer
- Orbital Sander
- Pancake compressor/nail gun combo
- Dremel tool
- Incra box joint jig
- 54″ Drywall T-Square
- Push Blocks
- Jigsaw
- Shop Fox 6″ Jointer
- Grizzly 14″ Bandsaw
- Grizzly Drill Press (WAAAAY overpriced (3x) on Amazon, buy from Grizzly directly.)
- Jet Drum Sander
- Kreg Rip Cut (circular saw guide)
- Kreg R3 pocket hole jig kit
- Shop Fox Hanging Air Filter
- 2HP Dust Collector
- 1 Micron bag
- Speed square
- 11″ Digital protractor
- Digital Angle Gauge
- Classic steel ruler (cork backed)
- Taper jig
- Flush cut saw
- 90˚ corner clamp (4 pack)
- Box Cutters (for eva foam)
3d Printing/CNC/Laser
- Glowforge (laser)
- X-Carve (CNC)
- Ultimaker 2 Extended 3D printer
- Ultimaker 3
- Original Prusa i3 MK 3
- Form1+ SLA 3D printer
- Silhouette Portrait (vinyl cutter)
- All filaments, 3d printing supplies from MatterHackers