I noticed something the other day that’s probably bugged you too. Almost every tool we buy comes with accessories, bits, and pieces that are essential to using it. But the manufacturers rarely give us a good way to store these items.

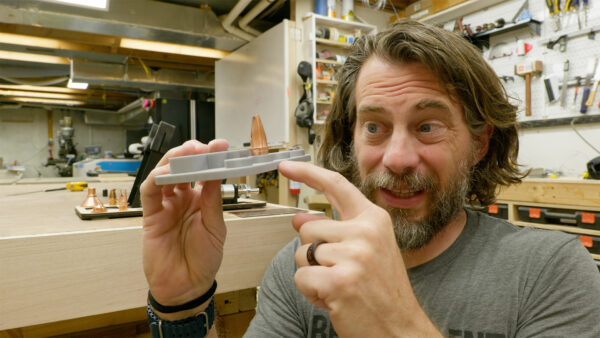
I recently picked up the new MetalFab from xTool, which is an awesome piece of equipment. It functions as a laser welder, laser cutter, laser cleaner, and CNC machine all in one. The problem was that it came with a bunch of different tips, nozzles, and attachments that I needed to keep track of. There are specific nozzles for the laser cutter, different tips for the cleaning function that attach to an extension piece, and another tip for welding. Plus, there’s this dust cap thing and safety goggles that are absolutely critical since we’re talking about a powerful laser that operates in open space. Losing any of these parts would be a major headache.
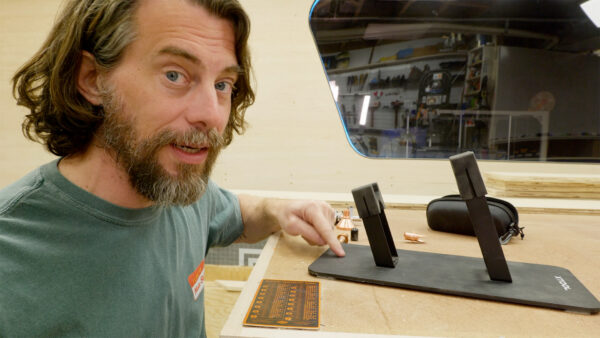
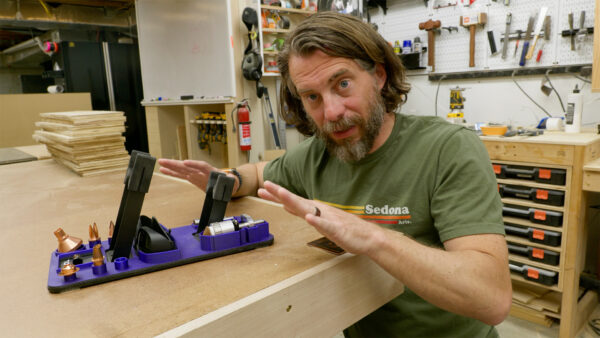
The tool itself is well designed and built solid, but it doesn’t have any storage compartments or drawers for all these parts. What it does have is a stand for the welding gun where it sits when not in use. Since every MetalFab owner has one of these stands, I figured instead of making a storage solution that just works for me, why not create something that could work for everyone with this tool? And even if you don’t have this specific tool, the process I’m going to walk through applies to organizing accessories for pretty much any tool in your shop.
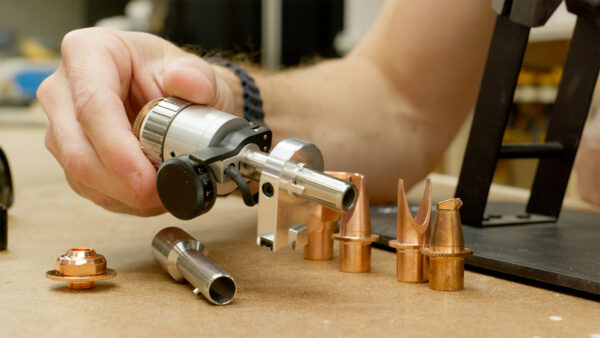
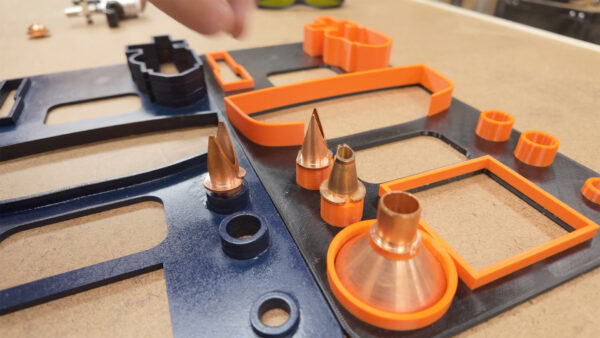
My plan was to create something that would attach to the existing gun stand, with storage spots arranged around the outside perimeter so the gun could still sit in the middle without interference. I needed to think about how to store each piece properly. Four of the pieces had the same diameter tube on the bottom, so they could all use the same style holder where they drop in and stand up for easy visibility. The extension tube was longer and made more sense laying down. One of the caps needed its own custom slot. And the cutting attachment was oddly shaped with no flat sides, making it tricky to store without them rolling around or falling over.
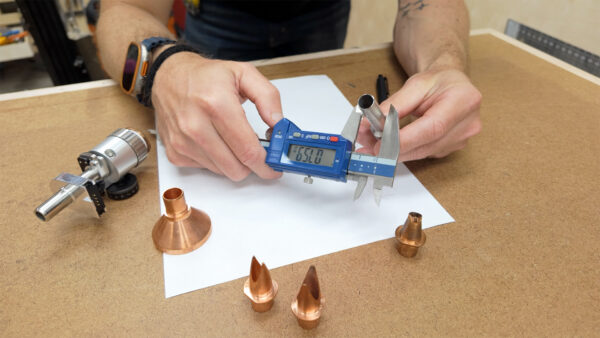
The first step was measuring everything carefully with calipers and writing down the dimensions. Then I designed my first prototype, knowing it wouldn’t be perfect. Instead of wasting time and material on a full 3D print, I laser cut a thin profile of the design to test the layout. This quick prototype showed me that my measurements were pretty close, but I learned a lot about how the pieces would interact. Some parts were too close together and would interfere with each other when being removed.
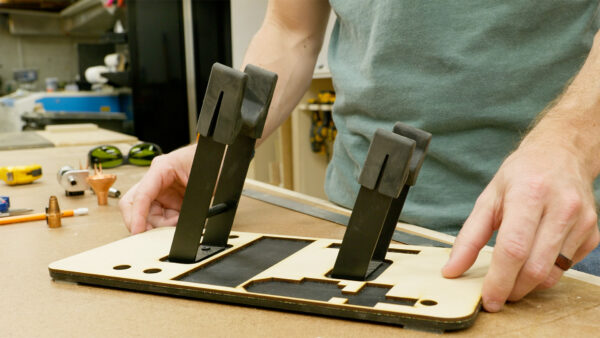
After rearranging the layout in Autodesk Fusion and testing with another laser-cut prototype, I got the profile right. But the three-dimensional part required more thought. Each piece needed to be captured somehow, either sitting down in something or having walls around it to hold it in place. Since all the parts were different heights, I couldn’t just make one uniform solution. What I needed was a thin base with custom “islands” or walls for each specific piece. Testing showed that simple collars worked for some parts but not others. The cutter head, for example, didn’t have a flat bottom surface, so it needed a custom-shaped recess that matched its profile to prevent it from toppling over.
When designing something like this, you have to consider the manufacturing method you’ll use to make it. I noticed that the laser-cut prototype and 3D printed version had slight but important differences in fit. With laser cutting, you have to account for the kerf (the width of material removed by the laser), while 3D printing deals with plastic expansion where the material might squeeze into spaces a bit differently than planned. This got me thinking about making this design available for people with different tools – some might have 3D printers, others might have laser cutters.
For the 3D printed version, I split the design down the middle so it could be printed as two separate pieces for those with smaller printers. Double-sided tape would attach it to the stand. For the laser-cut version, I created offset shapes that could be cut out, stacked, and glued together to make walls of the right height around each opening. The best part is that one 3D model led to two different manufacturing methods for the same storage solution.
Now all my MetalFab accessories have a home where they’re visible, organized, and secured. No more digging through sawdust-filled boxes or cups trying to find that one specific nozzle I need. If you’ve got tools with accessories that need organizing, I hope this gives you some ideas for your own shop. Taking measurements, creating a quick prototype, and refining your design based on real-world testing is a reliable approach for any organizational project. Thanks for following along with this build. Now, go make something awesome!
TOOLS
(purchasing via these affiliate links supports ILTMS)
Woodworking
- SawStop cabinet saw
- 8″ Dado stack
- Skil circular saw
- Dewalt 20v drill driver combo
- Dewalt Miter Saw
- Jet Wood Lathe 12×21
- Carbide lathe tool set
- Countersink drill bits
- Dewalt DW735 benchtop planer
- Orbital Sander
- Pancake compressor/nail gun combo
- Dremel tool
- Incra box joint jig
- 54″ Drywall T-Square
- Push Blocks
- Jigsaw
- Shop Fox 6″ Jointer
- Grizzly 14″ Bandsaw
- Grizzly Drill Press (WAAAAY overpriced (3x) on Amazon, buy from Grizzly directly.)
- Jet Drum Sander
- Kreg Rip Cut (circular saw guide)
- Kreg R3 pocket hole jig kit
- Shop Fox Hanging Air Filter
- 2HP Dust Collector
- 1 Micron bag
- Speed square
- 11″ Digital protractor
- Digital Angle Gauge
- Classic steel ruler (cork backed)
- Taper jig
- Flush cut saw
- 90˚ corner clamp (4 pack)
- Box Cutters (for eva foam)
Finishes & Adhesives
- Spray lacquer
- 100% pure tung oil
- Formby’s tung oil finished (tung oil/varnish)
- Danish oil
- CA Glue (medium)
- CA Activator
- Barge Contact Cement
- Critter Spray Gun
- Polycrylic
- Polyurethane
- Spar Urethane
3d Printing/CNC/Laser
- Glowforge (laser)
- X-Carve (CNC)
- Ultimaker 2 Extended 3D printer
- Ultimaker 3
- Original Prusa i3 MK 3
- Form1+ SLA 3D printer
- Silhouette Portrait (vinyl cutter)
- All filaments, 3d printing supplies from MatterHackers
Electronics
- Arduino Uno (just the Uno)
- Arduino Uno Kit
- Arcade buttons
- Raspberry Pi 3
- Multimeter
- Wire
- jumpers (Male to Female)
- Soldering iron
- Third hand kit
- Wire strippers (not the ones I have, but good ones)
- Thin solder
- Anti static mat
- Fiskars cutting mat
- Plastic parts cabinet (24 drawer)
- Plastic parts cabinet (64 drawer)
- Precision Screw driver kit