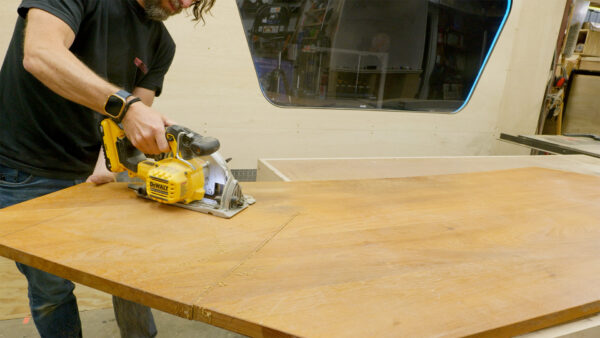
I had a problem. Not the kind where I’m out of ideas – I’ve got a huge list of projects I want to tackle. The real issue was that every single one of them was blocked. Some needed me to save up more money, others had to wait for the right season, and a few were stuck waiting for my wife and I to make decisions about what they should look like. This happens more often than I’d like to admit, but this time it was happening with everything at once.
Instead of sitting around waiting, I decided to flip my usual approach. Normally my projects start with something I want to have or a problem I need to solve. This time, I started with wanting to learn something new and built a project around that. Since I had access to a laser that could cut metal, I wanted to test whether I could cut an intricate metal shape and then engrave that same shape into wood to create a perfect inlay. Both pieces would use the same digital file, so theoretically it should work perfectly. But every time I say something like that, something goes wrong.
The project needed to be something useful, so I settled on a serving tray. Summer was coming up, and we like having people over for outdoor meals. A big serving tray seemed practical, and since trays aren’t particularly difficult to make, I could focus more on the technique and making it look interesting. That’s where the metal inlay would come in. The process would essentially be two colors – the wood and the metal – so I started looking for simple two-color line art that I could download. Star Wars designs, Lego graphics, nothing seemed quite right.
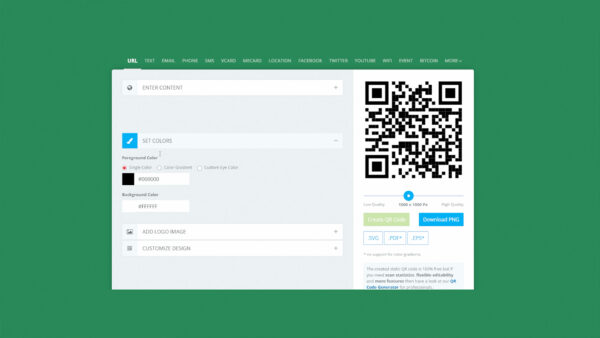
Then I thought about QR codes. There are websites where you can enter text like a URL, your social media handles, or even your Wi-Fi password, and they’ll generate a QR code for you. You can customize them by adding logos, changing colors, and even modifying the shapes within the code itself. Once you’ve got it customized, you can download it in different file formats. I went with SVG because it’s a vector format that scales without losing quality and imports easily into both xTools Creative Space and Lightburn software for the different lasers I’d be using.

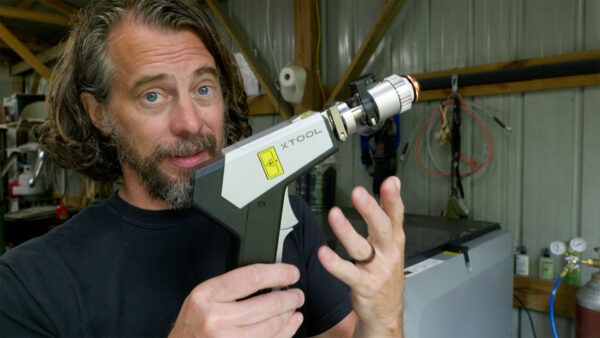
The metal cutting happened on the xTool Metal Fab, which I’d used recently for welding and cleaning but never for cutting. This machine can handle mild steel, stainless steel, brass, aluminum, and other metals up to about 5 millimeters thick. For this delicate inlay work, I needed thin material, so I went with thin brass and aluminum sheets to test both. The cuts came out incredibly clean – I just had to run a file over the back to remove a little slag so the pieces would fit properly into the wood.
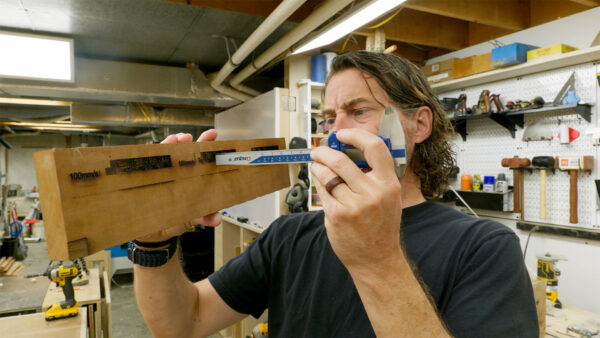
Before cutting the actual design, I made a test shape with inside curves, outside curves, complete cutouts, sharp corners, and straight lines. I wanted to make sure all these different elements would work when I engraved the matching shape in wood. The test confirmed that the metal cutting was working perfectly, so it was time to move to the wood side of the equation. Using Lightburn software with my Thunder laser, I ran test cards that engrave at different depths to find the perfect setting for the thickness of my brass.
I had to run a couple test boards to get the right ranges, but eventually I could use calipers to find a depth that matched the brass thickness exactly. Those settings were specific to cherry wood, but I wasn’t sure if cherry was what I wanted to use for the final piece. Walnut and brass always look great together, but I didn’t have any walnut on hand. Looking through my wood stash, I found a piece of teak left over from a desk I’d built years ago. Teak is expensive and hard to find where I live, but it’s one of my favorite woods – dark, dense, and naturally oily, which makes it perfect for outdoor use.
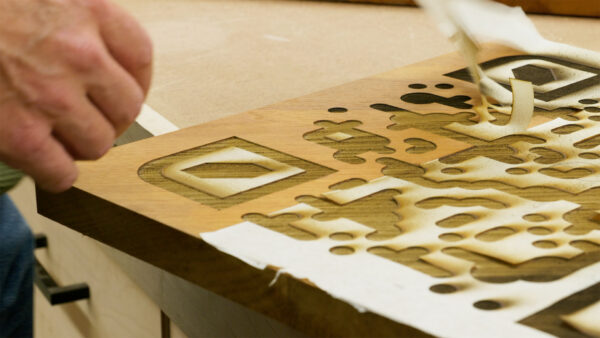
This was the last of my teak, so I had to be careful with my laser preparation. I used scraps to dial in my settings perfectly before moving to the good pieces. Once I had the depth figured out, I could finally cut the QR code pieces on the Metal Fab. The results were fantastic – the cuts were clean and precise. I could have used the fixture to hold the panels down better if I’d had more material around the edges, but even with a little buckling, everything worked perfectly.
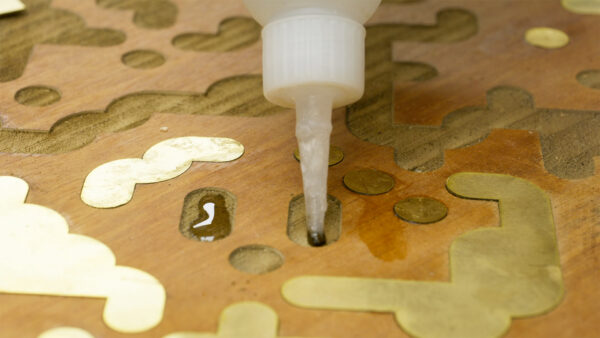
For assembly, I considered several adhesive options. Four-minute epoxy would be strong but has a short working time, requiring multiple small batches. Thixo mixes itself and gives you 25 minutes to work, but I’d never used it before. I ended up going with CA glue because while it’s not as strong as epoxy, it’s easy to replace if pieces pop off. The combination of glue and wedging the pieces into their engraved pockets with a mallet seemed to lock everything together solidly.

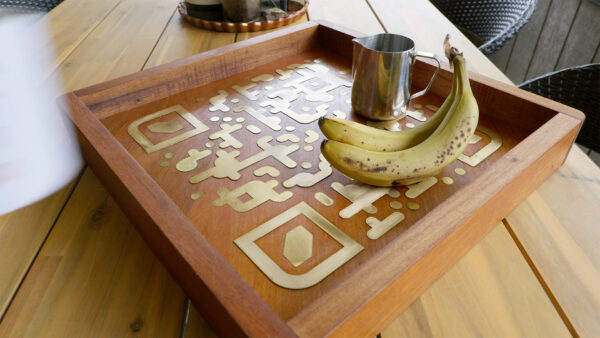
Most pieces sat flush with the wood surface, but a few stuck up slightly. This got me thinking about pouring a thin layer of epoxy over everything once the walls were in place. That would lock all the pieces together, create a uniform surface, and protect the wood from water. It also made me realize there’s probably an easier way to do this whole process using a cut-through template instead of individual pockets, but I tend to make things more complicated than they need to be.
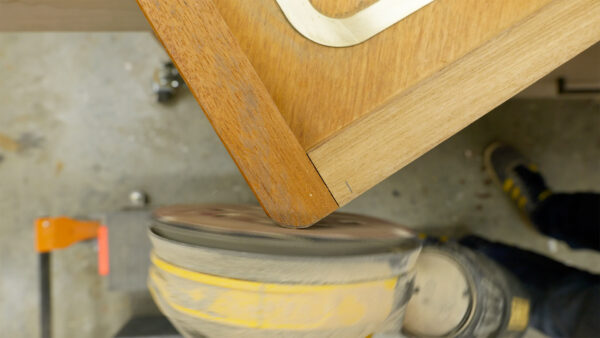
After everything was glued and dried, I added one final detail using a negative cutout piece from the design as a template to add a matching radius to the outside corners of the tray. The finishing process involved sanding and oiling, though I had to stab open my bottle of oil because it had gotten all gunked up. What started as a technique test turned into something I’m genuinely proud of – more artsy than most of my usual projects, which I actually liked. The coolest part is that when someone wants to get on our Wi-Fi, I can just hold up the tray and say “here you go.”
Thanks for following along with this build. The combination of metal cutting and wood engraving opened up a lot of possibilities I hadn’t considered before, and sometimes the best projects come from just wanting to learn something new rather than solve a specific problem. Now, go make something awesome!
TOOLS
(purchasing via these affiliate links supports ILTMS)
Woodworking
- SawStop cabinet saw
- 8″ Dado stack
- Skil circular saw
- Dewalt 20v drill driver combo
- Dewalt Miter Saw
- Jet Wood Lathe 12×21
- Carbide lathe tool set
- Countersink drill bits
- Dewalt DW735 benchtop planer
- Orbital Sander
- Pancake compressor/nail gun combo
- Dremel tool
- Incra box joint jig
- 54″ Drywall T-Square
- Push Blocks
- Jigsaw
- Shop Fox 6″ Jointer
- Grizzly 14″ Bandsaw
- Grizzly Drill Press (WAAAAY overpriced (3x) on Amazon, buy from Grizzly directly.)
- Jet Drum Sander
- Kreg Rip Cut (circular saw guide)
- Kreg R3 pocket hole jig kit
- Shop Fox Hanging Air Filter
- 2HP Dust Collector
- 1 Micron bag
- Speed square
- 11″ Digital protractor
- Digital Angle Gauge
- Classic steel ruler (cork backed)
- Taper jig
- Flush cut saw
- 90˚ corner clamp (4 pack)
- Box Cutters (for eva foam)
Finishes & Adhesives
- Spray lacquer
- 100% pure tung oil
- Formby’s tung oil finished (tung oil/varnish)
- Danish oil
- CA Glue (medium)
- CA Activator
- Barge Contact Cement
- Critter Spray Gun
- Polycrylic
- Polyurethane
- Spar Urethane
3d Printing/CNC/Laser
- Glowforge (laser)
- X-Carve (CNC)
- Ultimaker 2 Extended 3D printer
- Ultimaker 3
- Original Prusa i3 MK 3
- Form1+ SLA 3D printer
- Silhouette Portrait (vinyl cutter)
- All filaments, 3d printing supplies from MatterHackers
Welding
- MIG welder *
- TIG welder
- Welding mask (auto darkening)
- Welding gloves
- Welding magnet
- Angle grinder *
- Cut off wheels
- Metal cutting bandsaw *
- 10″ Evolution Miter Saw for cutting Steel, Aluminum, Wood, etc.
Electronics
- Arduino Uno (just the Uno)
- Arduino Uno Kit
- Arcade buttons
- Raspberry Pi 3
- Multimeter
- Wire
- jumpers (Male to Female)
- Soldering iron
- Third hand kit
- Wire strippers (not the ones I have, but good ones)
- Thin solder
- Anti static mat
- Fiskars cutting mat
- Plastic parts cabinet (24 drawer)
- Plastic parts cabinet (64 drawer)
- Precision Screw driver kit