
It was finally time to put a roof on this thing. If you’ve been following along with this pool house build, you know that I designed and built the whole structure over the last couple of months, and honestly, it worked out way better than I expected given that I had no idea what I was doing when I started. This is by far the biggest thing I’ve ever built, and my approach has been to learn just enough to do the next step, then figure out what comes after that. It sounds chaotic, but it’s actually worked pretty well. The roof, though, was both the scariest and most exciting part of the whole project. Exciting because I’d never done a metal roof before and I thought it would be cool to learn. Scary because I’d never done a metal roof before and I wasn’t totally sure I knew all the pieces involved.
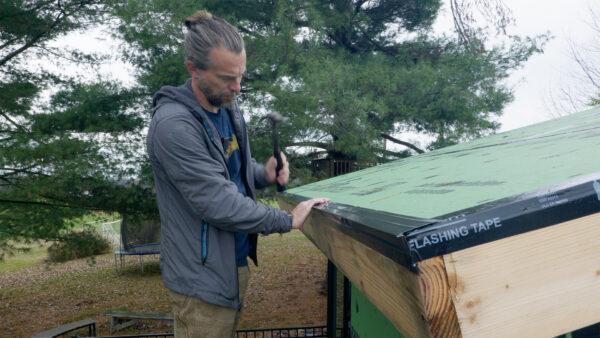
I did a ton of research before I even touched anything. I watched videos, read articles, and tried to figure out the exact order of operations for installing a standing seam steel roof. The problem is that depending on where you live, what kind of roof you have, and which tutorial you’re watching, the steps are all a little different. So I just had to pick a path and go. The one thing I knew for certain was that the drip edge goes on first. That’s the piece that sits at the bottom edge of the roof and makes sure water runs off instead of sneaking underneath. I got that installed and taped so water would flow over the tape and off the edge. After that, things got a little murkier. Some people install a rake edge along the sloped sides at this point, but based on the trim I planned to use, I decided to skip it and go straight to the roofing panels.
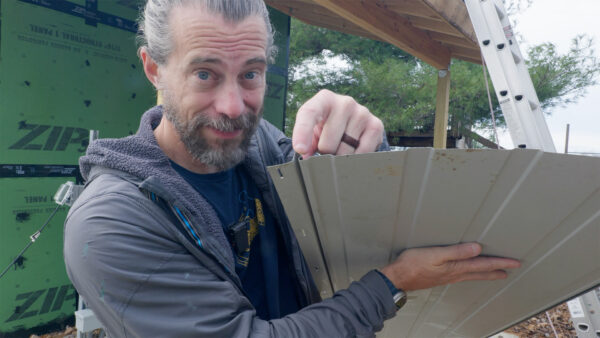
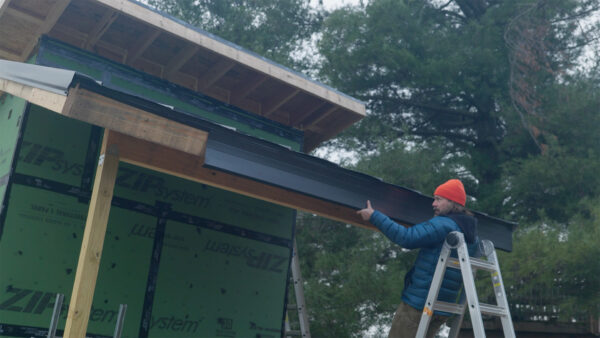
The metal I used is called standing seam steel. The profile is pretty clever. One end has a flange with holes for screws, then a small raised ridge. The other end has a taller raised part that snaps over the previous row, hiding the fasteners. It’s a pretty slick system. The tricky part for me was that I already had these panels from a project that never happened. They were 10-foot sections, which ended up being too long for the short side of the roof and too short for the long side. So I had to cut them down, which added an extra step. I decided to start with the shorter roof since it would be easier to handle and, if I made mistakes, they’d be less visible. You hide your learning curve on the back of the building where nobody looks.
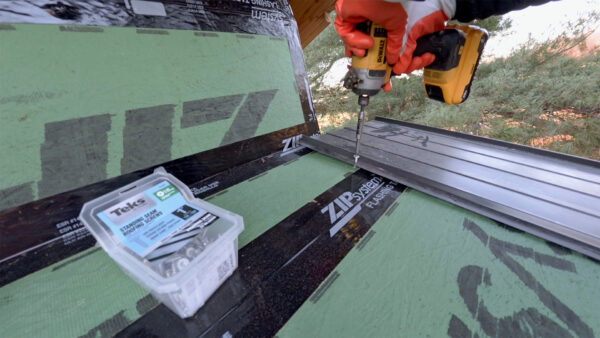
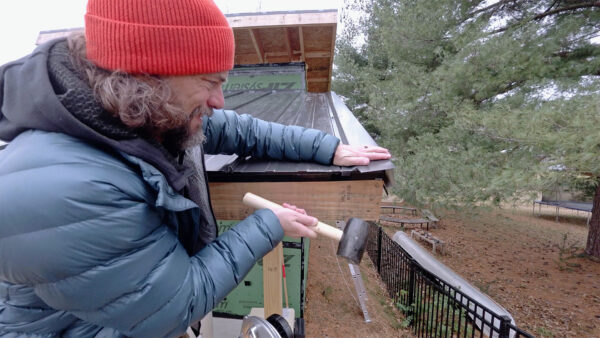
Installing the panels themselves was actually pretty straightforward. You screw down the flange on one side, then the next panel snaps onto that raised ridge, and you keep going across. The snapping part was oddly satisfying. You line it up and give it a good smack, and it just clicks into place. I remember complaining about how hot it was when I was doing the framing earlier in this project, and now here I was at 33 degrees with my hands hurting and struggling just to peel the protective plastic off the panels. That’s one thing I should have planned better. When you’re working on a project that spans weeks or months, you have to think about what stage you’ll be at during different seasons. Sweating during framing is annoying, but it’s manageable. Working on a roof when it’s icy and slick is genuinely dangerous. I probably should have started this whole build about a month earlier.
Once the metal panels were on, I moved to the trim, which is honestly the part that confused me the most. There are different names for all the pieces, and how they overlap and connect to each other wasn’t totally clear to me even after all my research. The first piece I tackled was the gable end trim, which wraps over the top of the roof edge and runs down the slope. Before installing it, I had to apply butyl tape, which is this weird non-drying tape that seals the gap between two pieces of metal. It’s sticky but not sticky at the same time. You get it into place, squish everything together, and then you leave it alone forever. The tricky part was cutting and folding the trim to wrap around the corners at the top and bottom of the roof, which required bending and notching and a lot of patience.
Working with this trim was difficult for several reasons. The material is slick, so nothing wants to stay where you put it. It was cold, my fingers hurt, and trying to hold something in place while marking it at the same time is just awkward when you’re alone. This is definitely one of those jobs where having a second person would make everything faster and easier. I made some mistakes on the first corner, but I learned enough that the second side went better. And since the rougher side faces the back of the building where nobody will ever see it, I made my peace with it. The important thing is that it does its job. It keeps water from going under the metal roof and directs it off the edge and down. That’s what matters.
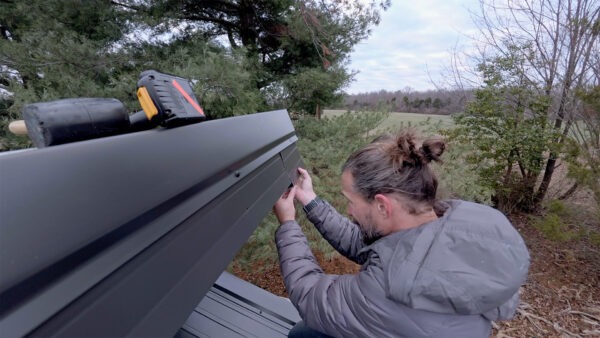
The last big piece was the fascia, which covers up the exposed wood along the eaves. The material is really floppy and doesn’t have much structure, so you’re basically trying to hold a long, wobbly piece of metal overhead while nailing it in with tiny finishing nails. The trick is that the bottom edge has to hang down a bit to act as a holder for the soffit material that slides in later. I used a spacer to make sure I left enough room before nailing everything in place. It’s not perfect. It might not even be good. But it’s covered in metal and it’s going to do its job. Toward the end, I remembered I’d bought this snipping attachment for an impact driver, and it made cutting the metal so much easier. I wish I’d remembered it earlier.
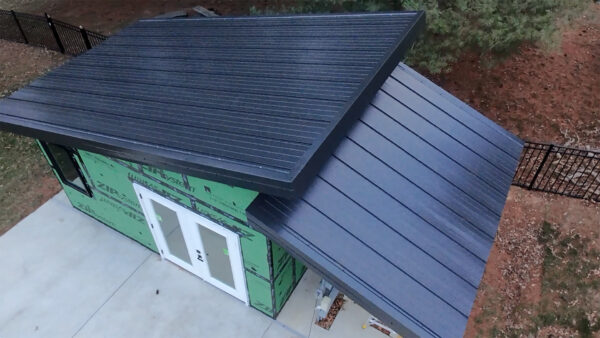
I can honestly say I don’t remember the last time I was so ready for something to be done. Between the cold weather, not really knowing what I was doing, and the general frustration of learning a new skill on a project this size, this was the least enjoyable part of the whole build. But I’ll also say that the more I did, the more I started to understand how the pieces overlap and how to cut them the way I actually wanted. It did get better as I went. For a first attempt at metal roofing, I think it turned out alright, and the next time I do this, it should go a lot smoother. Thanks for following along with the build. Now, go make something awesome!
TOOLS
(purchasing via these affiliate links supports ILTMS)
Woodworking
- SawStop cabinet saw
- 8″ Dado stack
- Skil circular saw
- Dewalt 20v drill driver combo
- Dewalt Miter Saw
- Jet Wood Lathe 12×21
- Carbide lathe tool set
- Countersink drill bits
- Dewalt DW735 benchtop planer
- Orbital Sander
- Pancake compressor/nail gun combo
- Dremel tool
- Incra box joint jig
- 54″ Drywall T-Square
- Push Blocks
- Jigsaw
- Shop Fox 6″ Jointer
- Grizzly 14″ Bandsaw
- Grizzly Drill Press (WAAAAY overpriced (3x) on Amazon, buy from Grizzly directly.)
- Jet Drum Sander
- Kreg Rip Cut (circular saw guide)
- Kreg R3 pocket hole jig kit
- Shop Fox Hanging Air Filter
- 2HP Dust Collector
- 1 Micron bag
- Speed square
- 11″ Digital protractor
- Digital Angle Gauge
- Classic steel ruler (cork backed)
- Taper jig
- Flush cut saw
- 90˚ corner clamp (4 pack)
- Box Cutters (for eva foam)
Finishes & Adhesives
- Spray lacquer
- 100% pure tung oil
- Formby’s tung oil finished (tung oil/varnish)
- Danish oil
- CA Glue (medium)
- CA Activator
- Barge Contact Cement
- Critter Spray Gun
- Polycrylic
- Polyurethane
- Spar Urethane
3d Printing/CNC/Laser
- Glowforge (laser)
- X-Carve (CNC)
- Ultimaker 2 Extended 3D printer
- Ultimaker 3
- Original Prusa i3 MK 3
- Form1+ SLA 3D printer
- Silhouette Portrait (vinyl cutter)
- All filaments, 3d printing supplies from MatterHackers
Welding
- MIG welder *
- TIG welder
- Welding mask (auto darkening)
- Welding gloves
- Welding magnet
- Angle grinder *
- Cut off wheels
- Metal cutting bandsaw *
- 10″ Evolution Miter Saw for cutting Steel, Aluminum, Wood, etc.
Electronics
- Arduino Uno (just the Uno)
- Arduino Uno Kit
- Arcade buttons
- Raspberry Pi 3
- Multimeter
- Wire
- jumpers (Male to Female)
- Soldering iron
- Third hand kit
- Wire strippers (not the ones I have, but good ones)
- Thin solder
- Anti static mat
- Fiskars cutting mat
- Plastic parts cabinet (24 drawer)
- Plastic parts cabinet (64 drawer)
- Precision Screw driver kit