
The pool house structure is done — siding, roof, the works — and there’s even a light fixture hanging up there. But it’s just for show because there’s no actual electrical running to the building yet. I had originally planned to do all the electrical work off-camera because I’m not an electrician, and showing electrical work done incorrectly on video can genuinely send people down a dangerous path. But then a comment on a recent video changed my mind. I had run some Romex through a conduit as a placeholder, and someone pointed out that you’re actually not supposed to do that per code. I looked it up, and they were absolutely right. That one comment shifted my whole approach to this project.
It got me thinking about the whole reason I started making stuff in the first place. I’ve always believed that skills and trades aren’t some locked box — they’re knowable. You just have to be willing to learn, make mistakes, and try again. So instead of wiring everything off-camera and potentially doing it wrong without ever knowing, I decided to do it on-camera where people who know more than me can actually help me get it right. The deal I made with myself and the audience was simple: I’ll show everything I do, I won’t glue anything in place, and if someone spots a mistake, they can leave a comment so I can fix it before I button everything up. It felt like the right call, and honestly, it made the whole process more fun knowing it was a collaborative learning experience.
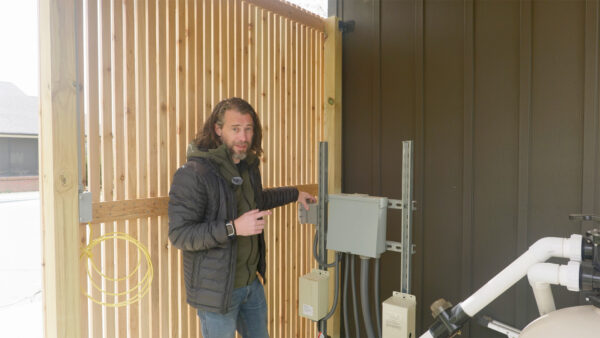
The starting point was a sub-panel that the pool company had installed right next to where I eventually built the pool house. They had actually set up two 20-amp circuits specifically for me to tie into — one for receptacles and one for LED lighting. Nothing heavy-duty, just enough to get some plugs and lights working out there. The challenge was figuring out how to get those two sets of wires out of the existing box, through conduit, and into the building in a way that was actually up to code. I also needed to keep power running to an existing outlet and a light switch on the outside, so it wasn’t as simple as just running a couple of wires from point A to point B.

I made a trip to the store and grabbed what I thought I’d need: two pieces of PVC conduit (half-inch for the light switch run and three-quarter-inch for the two-wire run into the building), four receptacle boxes, a ceiling box, and a bunch of THHN stranded wire that’s rated for running through conduit. I also grabbed PVC fittings, junction boxes, and connectors. As it turns out, you can’t always find boxes with holes exactly where you need them, so you end up drilling your own holes and adding connectors with lock nuts. It’s not complicated, but it’s one of those things you don’t realize until you’re standing in the aisle wondering why none of the boxes match your plan.
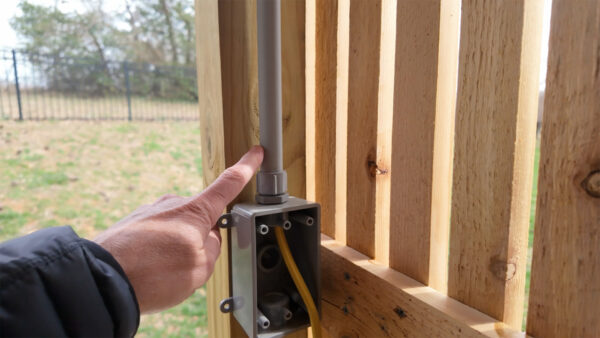
The first real task was fixing the Romex situation from the earlier video. That should have been straightforward, but the existing conduit ran up behind the ceiling, took a turn through some joists, and made a left before coming out at the box. There was no way I was pulling new wire through all of that. So I cut a small section of ceiling that I can patch later and installed a metal junction box right at the top of the conduit. That gave me a clean transition point — Romex terminates in the metal box above, and the new THHN wire runs down through the conduit to the switch below. I also had to move the switch up a bit because the screen was now in the way, and I wanted to hide the incoming line behind it for a cleaner look from the outside.
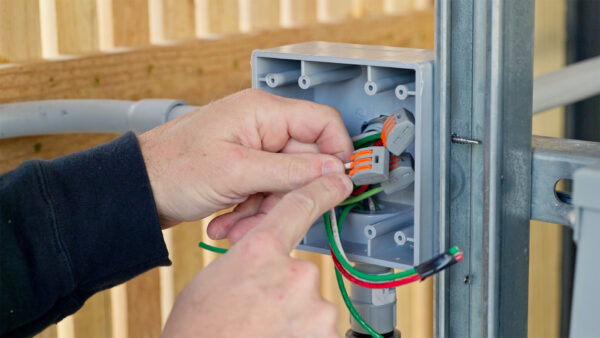
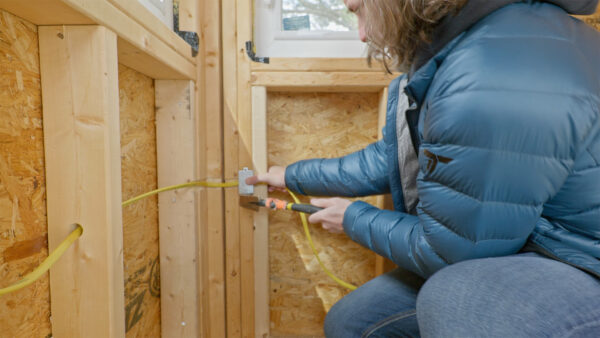
When I pulled out the THHN wire I’d bought, I realized I hadn’t thought about color coding at all. I just grabbed green, white, and red because they were the right gauge and type. Turns out the National Electrical Code does specify which colors can be used for what, and luckily the ones I picked were fine. But it’s one of those details that’s easy to overlook when you’re focused on getting the right gauge and wire type. After getting the wires pulled, I started making connections and running things to the outside receptacle and switch. For the switch, I found a neat waterproof decorator-style switch that has a paddle behind a sealed cover plate. The switches on the outside push the paddle on the inside, and the whole thing stays weather-tight. I thought that was a pretty clever design.
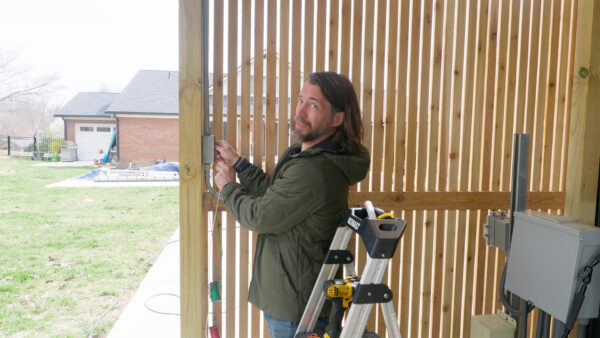
Inside the building, I had to rethink my receptacle layout a bit. My original plan was to run boxes around the perimeter, but one wall didn’t need any outlets, so running wire across it just to get to the other side was a waste. Instead, I brought everything up to the ceiling box and over the door to the first receptacle, then continued from there. Mounting the boxes and drilling through the framing was mostly straightforward until I hit a corner with seven studs stacked together. There was no way to drill through the center of all that, so I looked up the code and found that if you can’t keep the wire hole one and a quarter inches from the outside face of the stud, you can notch the edge and protect the wire with a steel nailing plate. These little plates have pegs to hammer them into place and they prevent any future nails or screws from hitting the wire. Problem solved, and it felt good to find the right answer in the code instead of just winging it.
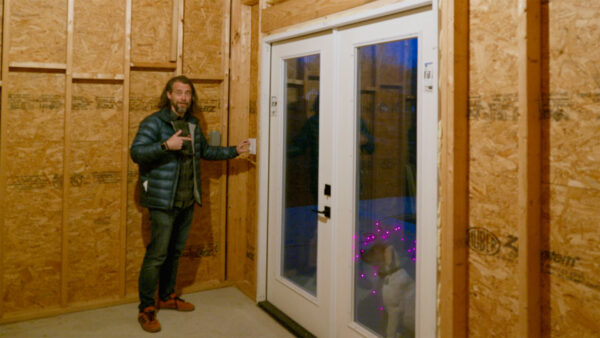
With all the wiring done, it was time to test everything. I flipped the main breaker on the sub-panel and used an outlet tester — one of those little plug-in devices with three lights that tells you if your wiring is correct. Both outlets came back with the right light pattern, which was a relief. I also want to mention a tool called a voltage detector, which is a pen-shaped device that beeps when it’s near a live wire. It’s a great secondary check, but don’t rely on it as your only source of truth since it’s battery-powered and could give you a false reading if the battery is low. Always control the power at the breaker first and use the detector to verify. The lights worked, the outlets tested good, and the whole building finally has real, functional electrical. If you’re thinking about tackling something like this yourself, do your research first — find out if you need a permit and whether your area requires a licensed electrician. This stuff is absolutely learnable, and you don’t need to be a pro to get it done safely. Thanks for following along with the build — I really do appreciate it. Now, go make something awesome!
TOOLS
(purchasing via these affiliate links supports ILTMS)
Woodworking
- SawStop cabinet saw
- 8″ Dado stack
- Skil circular saw
- Dewalt 20v drill driver combo
- Dewalt Miter Saw
- Jet Wood Lathe 12×21
- Carbide lathe tool set
- Countersink drill bits
- Dewalt DW735 benchtop planer
- Orbital Sander
- Pancake compressor/nail gun combo
- Dremel tool
- Incra box joint jig
- 54″ Drywall T-Square
- Push Blocks
- Jigsaw
- Shop Fox 6″ Jointer
- Grizzly 14″ Bandsaw
- Grizzly Drill Press (WAAAAY overpriced (3x) on Amazon, buy from Grizzly directly.)
- Jet Drum Sander
- Kreg Rip Cut (circular saw guide)
- Kreg R3 pocket hole jig kit
- Shop Fox Hanging Air Filter
- 2HP Dust Collector
- 1 Micron bag
- Speed square
- 11″ Digital protractor
- Digital Angle Gauge
- Classic steel ruler (cork backed)
- Taper jig
- Flush cut saw
- 90˚ corner clamp (4 pack)
- Box Cutters (for eva foam)
Finishes & Adhesives
- Spray lacquer
- 100% pure tung oil
- Formby’s tung oil finished (tung oil/varnish)
- Danish oil
- CA Glue (medium)
- CA Activator
- Barge Contact Cement
- Critter Spray Gun
- Polycrylic
- Polyurethane
- Spar Urethane
3d Printing/CNC/Laser
- Glowforge (laser)
- X-Carve (CNC)
- Ultimaker 2 Extended 3D printer
- Ultimaker 3
- Original Prusa i3 MK 3
- Form1+ SLA 3D printer
- Silhouette Portrait (vinyl cutter)
- All filaments, 3d printing supplies from MatterHackers
Welding
- MIG welder *
- TIG welder
- Welding mask (auto darkening)
- Welding gloves
- Welding magnet
- Angle grinder *
- Cut off wheels
- Metal cutting bandsaw *
- 10″ Evolution Miter Saw for cutting Steel, Aluminum, Wood, etc.
Electronics
- Arduino Uno (just the Uno)
- Arduino Uno Kit
- Arcade buttons
- Raspberry Pi 3
- Multimeter
- Wire
- jumpers (Male to Female)
- Soldering iron
- Third hand kit
- Wire strippers (not the ones I have, but good ones)
- Thin solder
- Anti static mat
- Fiskars cutting mat
- Plastic parts cabinet (24 drawer)
- Plastic parts cabinet (64 drawer)
- Precision Screw driver kit