
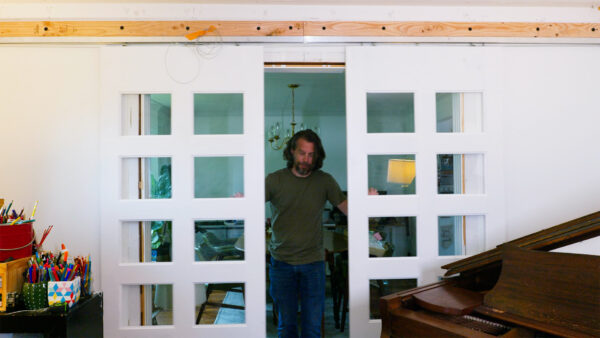
I had been putting off renovating two rooms in our house for way too long, and it all came down to one thing: our piano. If you’ve never dealt with moving a piano, let me tell you, they’re incredibly heavy and awkward to work with. But we weren’t getting rid of it because we use that thing constantly. Pretty much everyone in the family plays, and it gets used multiple times every single day. The problem was the noise. When someone was practicing, it echoed through the entire house. So I came up with a plan to build glass panel sliding doors that would close off the piano room while still letting light through.

The opening I needed to cover was 72 inches wide, which meant I could make two 36-inch doors that would slide behind the wall and meet in the middle when closed. I wanted these new doors to match the folding glass doors we already had on the other side of the room, but those were built completely differently and were totally different sizes. So I had to take the same concept but figure out how to build them from scratch using different materials and methods.

To keep things consistent with the existing doors, I decided to use the same number of glass panels with similar dimensions. But since my doors were a different size overall, I had to adjust all the wood dimensions around the glass. The pieces needed to be four inches wide, which created an immediate problem. Normally, you’d build doors like this using two-by-fours for the frame pieces, just trim off the rounded edges to make them square, and assemble everything. But four inches wasn’t wide enough for a standard two-by-four, and jumping up to a two-by-six would mean cutting off a bunch of extra material.
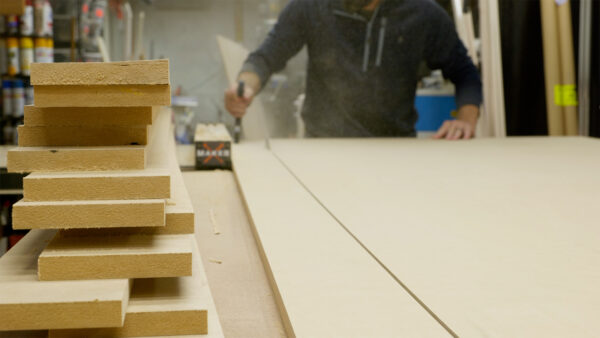
Instead, I decided to make the entire frame out of MDF. Yes, I knew it was going to be heavy, but it would give me exactly the dimensions I needed. My plan was to cut three-quarter-inch MDF into four-inch strips, then glue those strips together to create pieces that were about one and a half inches thick by four inches wide. Basically, I was manufacturing my own lumber to get the exact size I needed for this project.
Working with MDF is incredibly messy. The dust gets everywhere, and I mean everywhere. It was even stuck to my eyelashes by the time I finished cutting. But once I had all the strips cut, I glued them up into double-thickness pieces that I could use just like dimensional lumber. I cut some of the longer pieces down into 12-inch sections for the horizontal cross pieces, and suddenly I was at the same point I would have been if I’d started with regular lumber.
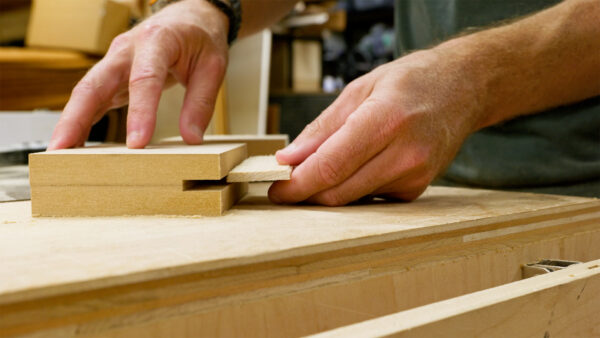
The tricky part was connecting all these pieces without any visible fasteners. For that, I used splines, which are basically rectangular pieces of wood that fit into matching slots cut in the pieces you want to join. You’ve probably seen biscuit joints before, where you cut a slot and insert an oval wooden piece. Splines work on the same principle, but they’re much stronger because you can make them thicker and longer. I cut some scrap two-by-fours and two-by-twos into quarter-inch strips on the table saw, then used a dado stack to cut matching slots in all the frame pieces.
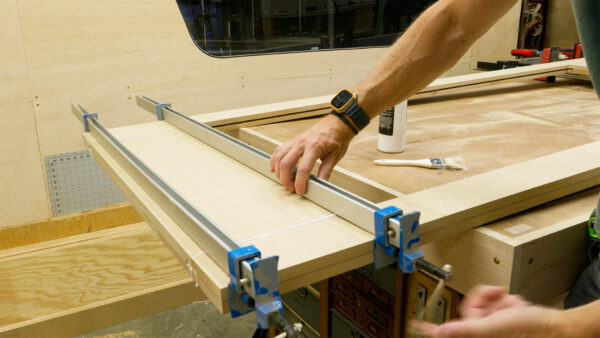
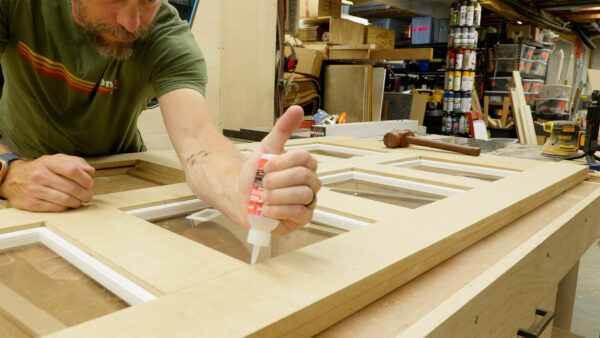
Assembly was interesting because I hadn’t really thought through the clamping process ahead of time. I ended up using large clamps on the four outer pieces of each door, figuring that if I got good pressure on the top and bottom, the interior pieces would automatically align. It mostly worked, though I realized partway through that I’d forgotten to cut slots for the center divider, so that piece had to be glued and clamped in a much less elegant way.

Once both door frames were assembled and dried, I moved on to the glass mounting system. The original doors upstairs used separate glass panes held in place by trim pieces that had a specific profile cut into them. I assumed I’d be able to find similar trim at the big box stores, but I was completely wrong. The closest thing I could find wouldn’t work at all, and I was running short on time to get this project finished.
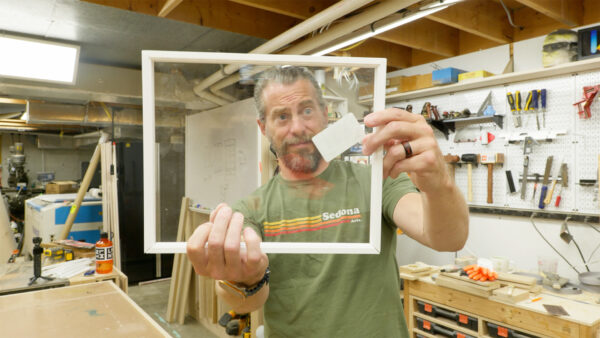
So I made what might have been a questionable decision: I decided to 3D print the trim pieces. I know it sounds crazy, but think about it. These pieces just need to hold glass in place, they’ll be painted so appearance doesn’t matter, and they don’t need to bear any structural load. Each door had ten windows, each window needed four pieces of trim, and each piece needed two miter cuts. That’s 160 miter cuts total. I had enough wood for maybe half of them, and as I started doing the math, I realized printing them all made perfect sense.
The downside of 3D printing is time. Three windows worth of trim pieces took almost nine hours to print. But that’s the beauty of digital manufacturing – the machines work while you do other things. Plus, I knew every piece would be exactly the same length with perfect 45-degree miters. No room for human error, and no need to measure and cut each piece individually.
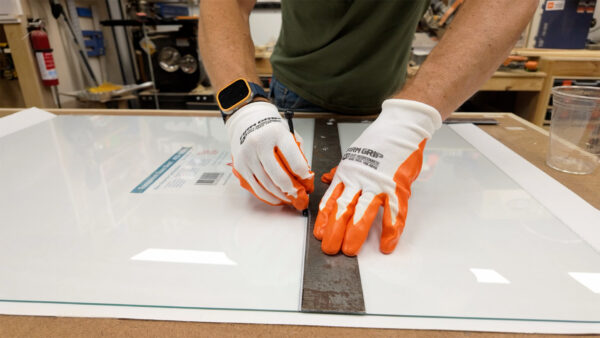
Cutting the glass was another adventure entirely. I’d done a little glass cutting before, but not much, and it showed. My first piece came out with a nice big curve that I definitely didn’t intend. I managed to snap off the bad section and salvage most of it, but I lost a decent chunk. Out of curiosity, I called a local glass shop to get a quote for having them cut all the pieces. It would have cost about $6.80 per piece compared to the $5.50 it cost me to do it myself, but their results would definitely have been better, and it would have taken about a week.
I learned some things about glass cutting as I went. My original plan was to buy big sheets and cut them down to size, thinking it would be cheaper. It wasn’t. I found that 10-by-12 pieces at Lowe’s were actually less expensive per square inch than the big sheets, and all I had to do was trim half an inch off two sides. Out of 18 pieces I cut this way, only one cracked. Lowe’s will even cut glass for you, though I felt bad asking them to do that many pieces.
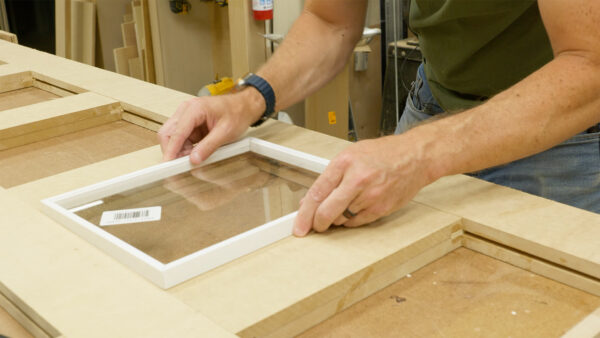
The moment of truth came when I tried to install the first glass and trim assembly. I made some spacers to position everything correctly, then slid the frame into place. It was incredibly close – almost too close – and I was terrified of breaking the glass. But it worked perfectly on the first try. The glass had no movement, was completely captured, and all the miters lined up perfectly. At that point, I officially decided that 3D printing the trim wasn’t a dumb idea after all.
The tight fit meant the trim pieces stayed in place on their own, but I wanted to secure them properly while still making them removable in case a piece of glass ever broke. I used CA glue in the corners to hold everything together, then ran a bead of caulk around both sides of each frame. If I ever need to remove a glass panel, I’ll just need to cut through the caulk.

For the sliding hardware, I found several companies that made similar-looking products, but then I came across something called “Slid Up” by a company called Mansion. What made this kit special was that it synchronized both doors so they move together. You don’t need synchronized doors at all, but I’d been thinking about how to make that happen myself with 3D printed pulleys and such. When I found this kit for 50 bucks, it seemed worth it. To be clear, the 50 dollars was just for the synchronization mechanism, not the complete hardware kit.
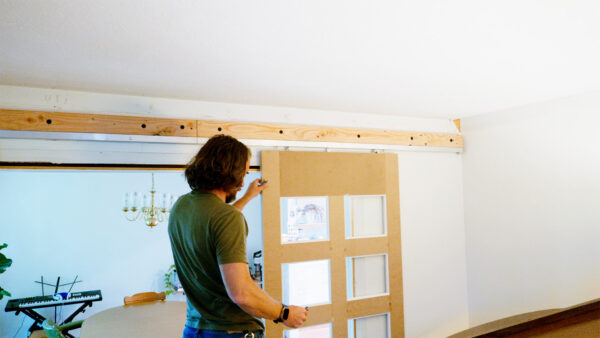
The doors are definitely heavy because of the MDF construction, but I’d planned for that. After hanging them and doing the first coat of paint, they still looked pretty rough, but that’s because the final step involves covering up all the hardware and making everything look seamless.
Thanks for following along with this build. The combination of traditional woodworking, 3D printing, and problem-solving made this project more interesting than I expected. Now, go make something awesome!
TOOLS
(purchasing via these affiliate links supports ILTMS)
Woodworking
- SawStop cabinet saw
- 8″ Dado stack
- Skil circular saw
- Dewalt 20v drill driver combo
- Dewalt Miter Saw
- Jet Wood Lathe 12×21
- Carbide lathe tool set
- Countersink drill bits
- Dewalt DW735 benchtop planer
- Orbital Sander
- Pancake compressor/nail gun combo
- Dremel tool
- Incra box joint jig
- 54″ Drywall T-Square
- Push Blocks
- Jigsaw
- Shop Fox 6″ Jointer
- Grizzly 14″ Bandsaw
- Grizzly Drill Press (WAAAAY overpriced (3x) on Amazon, buy from Grizzly directly.)
- Jet Drum Sander
- Kreg Rip Cut (circular saw guide)
- Kreg R3 pocket hole jig kit
- Shop Fox Hanging Air Filter
- 2HP Dust Collector
- 1 Micron bag
- Speed square
- 11″ Digital protractor
- Digital Angle Gauge
- Classic steel ruler (cork backed)
- Taper jig
- Flush cut saw
- 90˚ corner clamp (4 pack)
- Box Cutters (for eva foam)
Finishes & Adhesives
- Spray lacquer
- 100% pure tung oil
- Formby’s tung oil finished (tung oil/varnish)
- Danish oil
- CA Glue (medium)
- CA Activator
- Barge Contact Cement
- Critter Spray Gun
- Polycrylic
- Polyurethane
- Spar Urethane
3d Printing/CNC/Laser
- Glowforge (laser)
- X-Carve (CNC)
- Ultimaker 2 Extended 3D printer
- Ultimaker 3
- Original Prusa i3 MK 3
- Form1+ SLA 3D printer
- Silhouette Portrait (vinyl cutter)
- All filaments, 3d printing supplies from MatterHackers
Welding
- MIG welder *
- TIG welder
- Welding mask (auto darkening)
- Welding gloves
- Welding magnet
- Angle grinder *
- Cut off wheels
- Metal cutting bandsaw *
- 10″ Evolution Miter Saw for cutting Steel, Aluminum, Wood, etc.
Electronics
- Arduino Uno (just the Uno)
- Arduino Uno Kit
- Arcade buttons
- Raspberry Pi 3
- Multimeter
- Wire
- jumpers (Male to Female)
- Soldering iron
- Third hand kit
- Wire strippers (not the ones I have, but good ones)
- Thin solder
- Anti static mat
- Fiskars cutting mat
- Plastic parts cabinet (24 drawer)
- Plastic parts cabinet (64 drawer)
- Precision Screw driver kit