
I have a problem that probably sounds familiar to anyone who loans out tools. My friends borrow stuff from my shop, and then I completely forget who took what and when they took it. It’s not that anyone is trying to steal from me or anything like that. I just have a terrible memory for this kind of thing. A drill disappears for three weeks and I have no idea if it’s at Mike’s house or if I left it in my truck. I needed a better system, something that would actually keep track of where my tools were going. So I decided to build a tool library system that works just like checking out a book, except it’s for impact drivers and table saw blades.
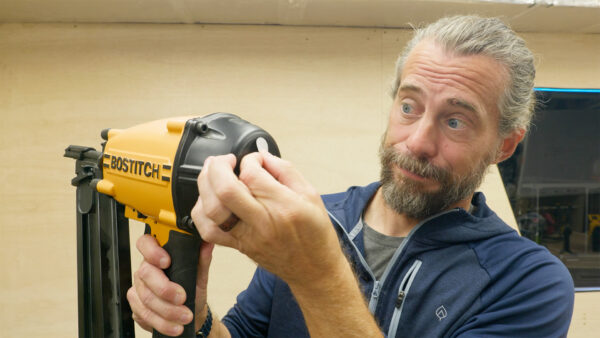
The whole system started with these little RFID stickers. These things are actually pretty cool when you think about what they can do. Each sticker has a tiny chip inside that stores a unique ID number. You can stick one on anything, and when you hold it near a reader, it picks up that ID. I stuck one on a framing nailer to test it out. Now obviously, someone could just peel the sticker off if they really wanted to, but that’s not the point here. My friends aren’t trying to get away with my tools. I just need to know where they went. The sticker gives each tool its own identity in the system, which is the first step in being able to track it.
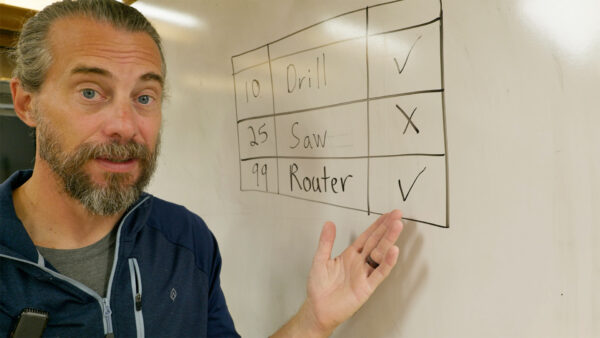
Once I had the stickers figured out, I needed a way to read them and store that information somewhere. That meant building a database, which sounds more complicated than it actually turned out to be. The idea was simple enough. I needed a table with rows, and each row would represent one tool with its unique ID and whether it was currently checked in or checked out. The tricky part was figuring out where to put that database and how to access it. That’s where things could have gotten messy, but I found a solution that made everything way easier than I expected.

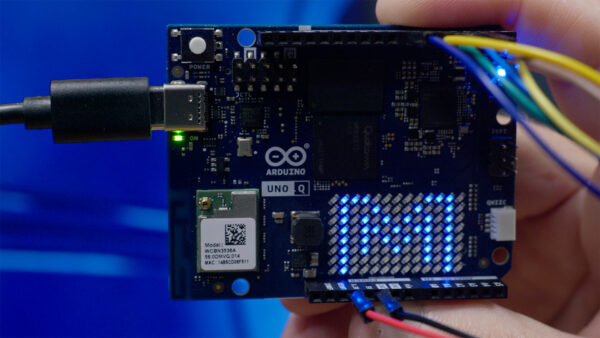
Arduino sent me their brand new Arduino Uno Q to work with. If you’ve ever messed around with Arduinos before, you probably know the regular Uno. It’s basically the standard microcontroller that everyone thinks of when they hear Arduino (and if you want to learn how to use one, we have an online course to show you how). But this Uno Q is actually really different, even though it looks almost identical. The big difference is that it has wireless connectivity, an LED matrix on the front, and here’s the crazy part—it has a full Linux computer built right into it. The thing runs Debian Linux and has a microcontroller all in one board. That meant I could run a database directly on the Arduino without needing a separate server or computer. I could also hook up a webcam, send emails, and do all the other stuff I needed for this project.
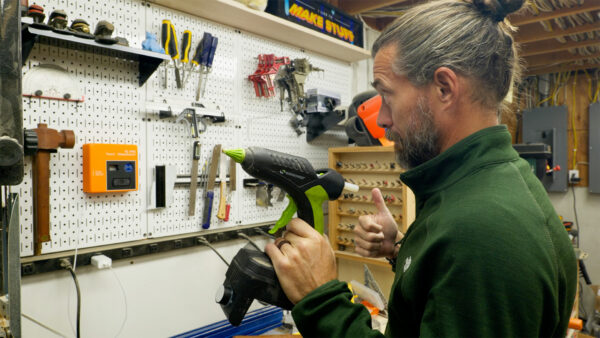
My plan was to connect the RFID reader to the Uno Q and read the sticker IDs into the database. When someone came to borrow a tool, they’d scan the sticker and the system would check if the tool was currently in or out. If it was already out, the system would just check it back in with no fuss. But if it was in and someone was taking it, that’s when things got interesting. I wanted the system to automatically take a photo of whoever was holding the tool and then email that photo to me. That way I’d have a record of exactly who took what and when they took it. It sounds like a lot, but breaking it down into steps made it manageable.

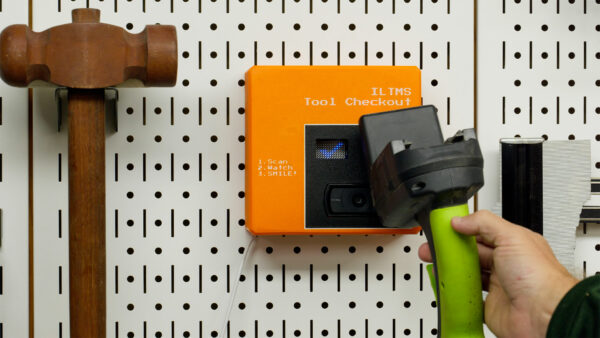
I ran into a learning curve pretty quick because I don’t actually know Python. The Uno Q uses a development environment called App Lab that lets you write Python code for the Linux side and Arduino sketches for the microcontroller side. I figured I could just learn enough Python as I went along, which honestly is a pretty good way to pick up a new language when you have a specific goal. I only needed to know how to read and write to a database, send an email automatically, and trigger a webcam to take a photo. I also had to figure out how to use that LED matrix on the front as visual feedback, since I didn’t want to hook up a whole monitor just to see if a scan worked. I broke the project down into tiny pieces and worked through them one at a time until I had all the parts working.
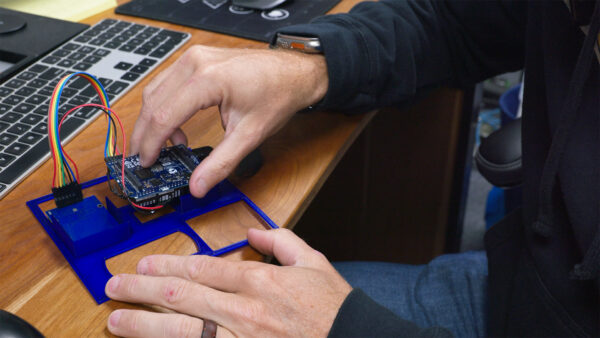
The physical assembly was actually weirder than the coding in some ways. I had a USB webcam that needed to point forward, a USB dongle that connected everything, the Arduino itself with its little LED screen that needed to be visible, and the RFID reader that had to be accessible for scanning tools. The wires were all over the place. I needed to figure out how to package all of this into something that could actually sit on my shop wall and be useful. I jumped into Autodesk Fusion to design an enclosure that would hold everything in the right spots. The first test print taught me something I hadn’t thought about. Not every tool has a flat surface that can get close enough to the reader. Some tools are curved or have handles in weird spots. I ended up having to design little 3D printed standoffs that stick to the tools and hold the RFID stickers out in free space where they can get close enough to the reader to scan properly. If you want to learn how to design practical parts like this, I’d recommend checking out our online course called Fusion for Makers. It covers exactly this kind of problem solving.
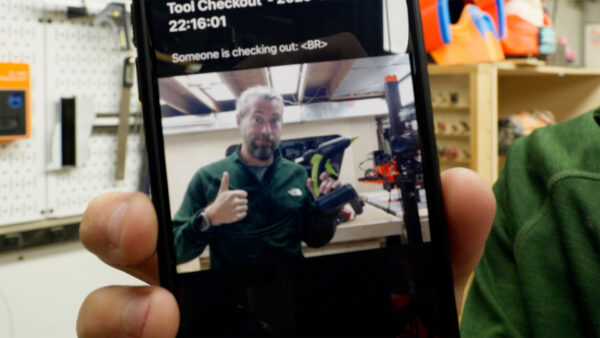
After I got the enclosure sorted out and all the code working together, it was time to test the whole system. I scanned a tool to check it out, and the system counted down on the LED matrix. Then I checked my phone to see if I got an email from myself with a photo of myself holding the tool. It worked perfectly. The email showed up almost instantly with the photo attached, and the Arduino automatically deleted the photo from its storage so it wouldn’t eat up space over time.
Then I tested checking the tool back in, which went just as smoothly. The whole thing actually worked, which felt pretty great after putting all those pieces together. This is still just a proof of concept, and there are definitely some bugs I need to work out. I could add a web interface that shows the status of all my tools on my phone. I could set up notifications. There’s a lot of room to expand this into something even more useful, not just for my shop but for other people’s shops too.
The Uno Q is a really solid piece of hardware for what it can do. Having a full Linux computer with a microcontroller on the same board opens up a ton of possibilities. People are going to build some seriously cool stuff with these once they get into more hands. If you want to make stuff like this, check out the Uno Q. It’s available to order now and should be shipping very soon. Thanks for following along with the build. Now, go make something awesome!
TOOLS
(purchasing via these affiliate links supports ILTMS)
Woodworking
- SawStop cabinet saw
- 8″ Dado stack
- Skil circular saw
- Dewalt 20v drill driver combo
- Dewalt Miter Saw
- Jet Wood Lathe 12×21
- Carbide lathe tool set
- Countersink drill bits
- Dewalt DW735 benchtop planer
- Orbital Sander
- Pancake compressor/nail gun combo
- Dremel tool
- Incra box joint jig
- 54″ Drywall T-Square
- Push Blocks
- Jigsaw
- Shop Fox 6″ Jointer
- Grizzly 14″ Bandsaw
- Grizzly Drill Press (WAAAAY overpriced (3x) on Amazon, buy from Grizzly directly.)
- Jet Drum Sander
- Kreg Rip Cut (circular saw guide)
- Kreg R3 pocket hole jig kit
- Shop Fox Hanging Air Filter
- 2HP Dust Collector
- 1 Micron bag
- Speed square
- 11″ Digital protractor
- Digital Angle Gauge
- Classic steel ruler (cork backed)
- Taper jig
- Flush cut saw
- 90˚ corner clamp (4 pack)
- Box Cutters (for eva foam)
Finishes & Adhesives
- Spray lacquer
- 100% pure tung oil
- Formby’s tung oil finished (tung oil/varnish)
- Danish oil
- CA Glue (medium)
- CA Activator
- Barge Contact Cement
- Critter Spray Gun
- Polycrylic
- Polyurethane
- Spar Urethane
3d Printing/CNC/Laser
- Glowforge (laser)
- X-Carve (CNC)
- Ultimaker 2 Extended 3D printer
- Ultimaker 3
- Original Prusa i3 MK 3
- Form1+ SLA 3D printer
- Silhouette Portrait (vinyl cutter)
- All filaments, 3d printing supplies from MatterHackers
Welding
- MIG welder *
- TIG welder
- Welding mask (auto darkening)
- Welding gloves
- Welding magnet
- Angle grinder *
- Cut off wheels
- Metal cutting bandsaw *
- 10″ Evolution Miter Saw for cutting Steel, Aluminum, Wood, etc.
Electronics
- Arduino Uno (just the Uno)
- Arduino Uno Kit
- Arcade buttons
- Raspberry Pi 3
- Multimeter
- Wire
- jumpers (Male to Female)
- Soldering iron
- Third hand kit
- Wire strippers (not the ones I have, but good ones)
- Thin solder
- Anti static mat
- Fiskars cutting mat
- Plastic parts cabinet (24 drawer)
- Plastic parts cabinet (64 drawer)
- Precision Screw driver kit