
I’ve been putting off gutters for a while, partly because I’d never done them before and partly because it kept raining. But honestly, the rain was a blessing in disguise because it gave me time to do some research. And by “research,” I mean I walked outside and stared at my house. I looked at how the gutters and downspouts were put together, took some mental notes, and then went to the store and bought essentially the same stuff. Sometimes the best teacher is the thing that’s already working ten feet away from you. I grabbed some long aluminum gutter sections, downspouts, end caps, brackets, clips, some curved pieces for routing, pop rivets, self-tapping screws, and sealant. It all seemed pretty straightforward, at least in theory.

Before I could get started on gutters though, there was something else bugging me about the outside of the pool house. One of the main reasons I built this thing was to cover and protect the pool equipment, and it was technically covered now, but it still looked like a mess. The rest of the building looked really nice, and then you’d glance over and see this ugly cluster of pool gear right out front. The plan was to build some kind of screen out of cedar slats to hide it all—something that would contrast nicely against the dark siding. I hadn’t totally figured out the design yet, but the weather was keeping me inside anyway, so I had time to think it through.

When it finally dried up enough to start on the gutters, I ran into a problem almost immediately. Turns out my earlier design decisions came back to haunt me. On my house, the gutters hang parallel to the ground because they’re attached to fascia boards that are perpendicular to the ground. On the pool house, I’d made things perpendicular to the rafters instead, because at the time I didn’t think it would matter. But it absolutely mattered. If I just slapped the gutter up there as-is, water would roll right off the roof and overshoot it completely. After a quick search I found out there’s a thing called gutter wedges that angle the gutter back to where it needs to be. I didn’t have any of those, but I did have a 3D printer. Problem-solving at its finest.
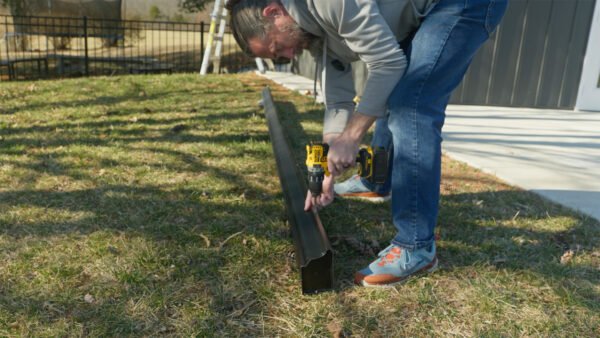
While the wedges were printing, I kept working on other parts of the gutter assembly. The outlet—basically a hole that connects to the downspout—needed to be cut into the bottom of the gutter in the right spot. You cut the hole, drop the outlet piece in with some seam sealer around the edge, and lock it down with pop rivets. Same deal with the end caps: seam sealer, press them onto the profile, and crimp them in place. There’s apparently a special crimping tool for that, which I definitely did not have, so I used pliers and pop rivets instead. Worked just fine. I also prepped the gutter screws, which are these long screws that go through the front edge of the gutter and through a little ferrule that keeps the gutter from getting crushed, then into the wood behind it. Each of my 3D printed wedges lined up with one of those screw locations.
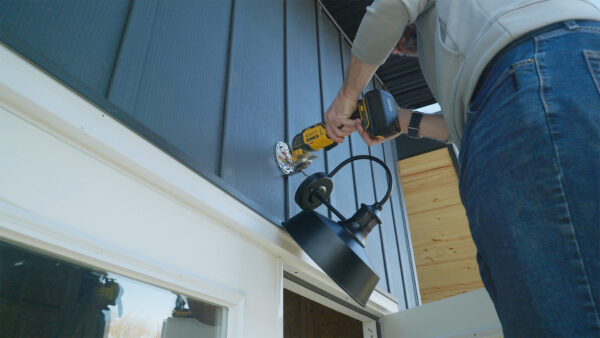
While I waited on the printer to finish, I pivoted to the exterior light. We’d picked out a light to go above the door, but there was no electrical box because there was no electrical anything in the building yet. To make things more interesting, there was a batten almost dead center above the door. I thought cutting into it would be a big deal, but after looking it up, it really wasn’t. That’s also when I discovered pancake boxes, which are these super thin metal electrical boxes that sit on top of the sheathing instead of being built into the framing. I’d never used one before, so I took my time figuring out the approach. I found the center point for the light, scored and cut an opening in the siding to match the box, and then mounted it. The light fixture itself was bigger than the box, so I had to notch into the batten a bit to make it all fit. I can’t test the light yet since there’s no electrical run to the building, but it looks great up there. I’ll need to seal around it with liquid flashing and caulk to keep water out, but that’s a job for another day.

Once the wedges finished printing, I got back to the gutters. The self-tapping screws went through the wedges and into the fascia to set the right angle, and then I could finally mount the gutter with the long gutter screws. It all came together really well. For the downspouts, it was honestly the simplest part of the whole job. You connect a few angled pieces to route from the gutter outlet over to the side of the building, run a straight downspout section down the wall with some straps, and then aim the bottom piece out into the grass. I measured the downspout length by marking about an inch up into the top connector and an inch down from the bottom, cut to fit, and screwed everything together. Based on my very limited experience, gutters are the kind of thing I’m never going to pay someone else to do again. You can totally knock it out in an afternoon.
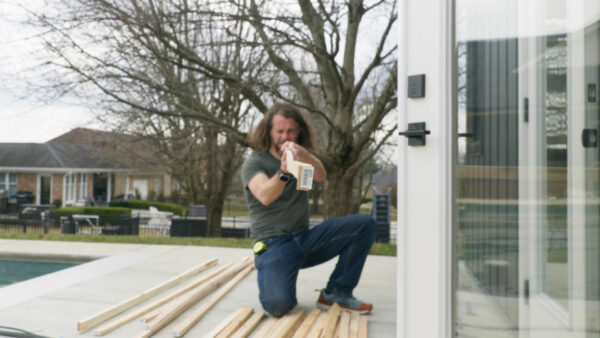
With the gutters done, I moved on to the cedar screen. I needed a second post next to the building to anchor the screen, so I drilled a hole, added a base plate, and set the post the same way I did the first one. There was a minor issue with the bracket being so close to the building that I could only use screws on the outside, but since the post is just holding a decorative screen and not anything structural, it wasn’t a real concern. At the store, I grabbed cedar 1x4s and a bunch of 1x2s, but the boards that the store employees picked for my online order were hilariously bad. One of them had so many curves it would’ve made a better Hot Wheels track than a fence slat. I returned the whole lot and went back to hand-pick my own lumber. Pro tip: always pick your own boards. I ended up buying all 1x4s and ripping them down the middle at the table saw, which was actually cheaper than buying 1x2s separately and looked way better.
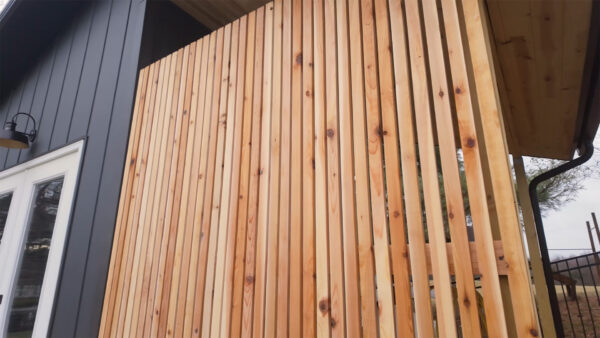
I attached the slats vertically with half-inch spacers between them, screwing from the back side so there’d be no visible fasteners on the front. Cedar is flexible enough that each piece needed to be leveled at both the top and bottom, which took some patience—especially in the rain. But the rain actually made the cedar look incredible, bringing out the warm color that’ll show up once I put spar varnish on it. Without a finish, cedar eventually turns gray, and nobody wants that. The varnish will have to wait until everything dries out. With the screen up, the light mounted, and the gutters working, I kind of have to admit the outside of the pool house is done. That’s a little bittersweet, honestly. The last seven months of building this thing have been incredibly gratifying, and I’ve learned a ridiculous amount along the way. Thanks for following along with this whole process—now we get to move to the inside, and that’s going to be a blast. Now, go make something awesome!
TOOLS
(purchasing via these affiliate links supports ILTMS)
Woodworking
- SawStop cabinet saw
- 8″ Dado stack
- Skil circular saw
- Dewalt 20v drill driver combo
- Dewalt Miter Saw
- Jet Wood Lathe 12×21
- Carbide lathe tool set
- Countersink drill bits
- Dewalt DW735 benchtop planer
- Orbital Sander
- Pancake compressor/nail gun combo
- Dremel tool
- Incra box joint jig
- 54″ Drywall T-Square
- Push Blocks
- Jigsaw
- Shop Fox 6″ Jointer
- Grizzly 14″ Bandsaw
- Grizzly Drill Press (WAAAAY overpriced (3x) on Amazon, buy from Grizzly directly.)
- Jet Drum Sander
- Kreg Rip Cut (circular saw guide)
- Kreg R3 pocket hole jig kit
- Shop Fox Hanging Air Filter
- 2HP Dust Collector
- 1 Micron bag
- Speed square
- 11″ Digital protractor
- Digital Angle Gauge
- Classic steel ruler (cork backed)
- Taper jig
- Flush cut saw
- 90˚ corner clamp (4 pack)
- Box Cutters (for eva foam)
Finishes & Adhesives
- Spray lacquer
- 100% pure tung oil
- Formby’s tung oil finished (tung oil/varnish)
- Danish oil
- CA Glue (medium)
- CA Activator
- Barge Contact Cement
- Critter Spray Gun
- Polycrylic
- Polyurethane
- Spar Urethane
3d Printing/CNC/Laser
- Glowforge (laser)
- X-Carve (CNC)
- Ultimaker 2 Extended 3D printer
- Ultimaker 3
- Original Prusa i3 MK 3
- Form1+ SLA 3D printer
- Silhouette Portrait (vinyl cutter)
- All filaments, 3d printing supplies from MatterHackers
Welding
- MIG welder *
- TIG welder
- Welding mask (auto darkening)
- Welding gloves
- Welding magnet
- Angle grinder *
- Cut off wheels
- Metal cutting bandsaw *
- 10″ Evolution Miter Saw for cutting Steel, Aluminum, Wood, etc.
Electronics
- Arduino Uno (just the Uno)
- Arduino Uno Kit
- Arcade buttons
- Raspberry Pi 3
- Multimeter
- Wire
- jumpers (Male to Female)
- Soldering iron
- Third hand kit
- Wire strippers (not the ones I have, but good ones)
- Thin solder
- Anti static mat
- Fiskars cutting mat
- Plastic parts cabinet (24 drawer)
- Plastic parts cabinet (64 drawer)
- Precision Screw driver kit