

Our climbing wall at home has been getting a ton of use from me, my kids, and their friends. Some weeks we had multiple nights with five or six people out there climbing, and there was nowhere for any of them to sit. The only seat was a camping chair I’d dragged over. I could have bought a few more, but I didn’t love the idea of putting money into something that was only meant to be temporary. So I decided to make the seating myself, with a few rules. It had to be fast, cheap, and easy, and it could only use a couple of tools.
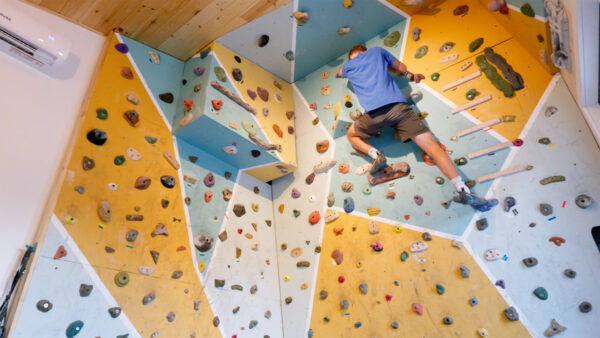
I’ll be honest, building something probably wasn’t going to save me much over a few more chairs. But I like to make stuff, so making a solution for the space made more sense to me than buying one. Plus, seating wasn’t the only problem. Everybody kicked their climbing shoes off in the same spot, so they ended up in a pile. There were holds that needed a home, along with tape and chalk and all the other little stuff that comes with climbing. The idea for the fix came from crash pads. Some of the companies that make them also make little knockdown couches that use the crash pad itself as the cushion. That’s a great idea if you already own a crash pad. I don’t, and they aren’t cheap.
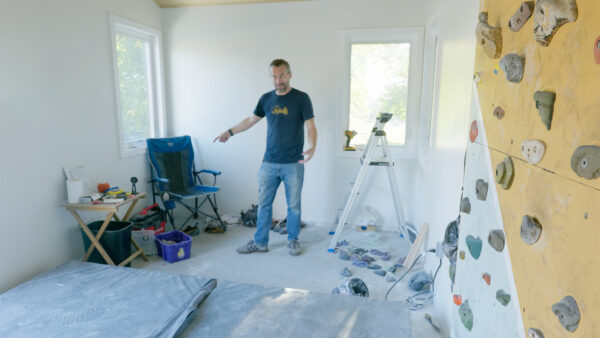
So I figured I’d make my own version. Something that could sit right by the wall, seat a couple of people, use a regular cushion instead of a crash pad, and leave room underneath for shoes and gear. I wanted it easy to put together and easy to take apart, because I fully expect to change my mind about that space at some point. I also gave myself a tool limit. I figured I could get away with a drill, a jigsaw, and maybe a circular saw. The idea was to keep it simple enough that you could build one for a dorm room or a garage and not feel bad about tearing it apart later and using the wood for something else.
My first stop was looking up knockdown furniture, which is usually plywood panel furniture with slots that lock the pieces together. When you want to take it apart, you just lift the pieces out of each other. There’s usually no glue or fasteners, which sounded perfect, except that getting those joints right takes a lot more time and probably more precise tools than I wanted to use. So I only borrowed a little bit of it. The seat and backrest were just 2x4s cut in half to four feet long, screwed in from the outside into two plywood side panels. On its own, that would be pretty weak. The rest of the structure was a shelf and a vertical back piece, each with little tabs on the ends that stick through slots in the side panels and lock everything together.
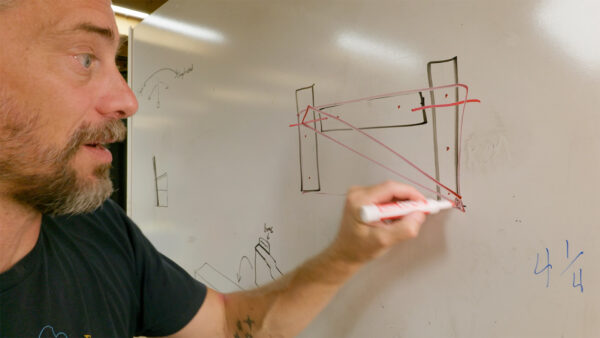
Those tabs are there because of racking, which matters for pretty much anything you build. If you just screw a couple of boards between two side panels, the whole thing folds over as soon as you push on it sideways. One of the simplest fixes is a full panel running from corner to corner, which locks all the pieces in place so they can’t lean. A diagonal brace helps too, just not quite as much. My shelf and back piece act like those panels, and as long as the tabs fit tight in their slots, they keep the bench from racking left and right. That doesn’t mean you can’t break it if you really try, but it stabilizes things quite a bit.
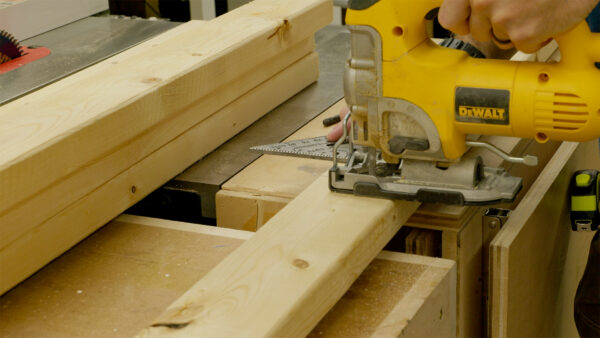
The material list was short. I bought six 2x4s, which was one more than I needed just in case. It was October, so outdoor stuff was on clearance, and I grabbed two four-foot outdoor cushions with covers that come off for washing. The color options were limited, but that’s the trade-off. The last piece was half-inch plywood. I used a nice sheet I already had, but cheaper half-inch ply that doesn’t look as good would work just as well. Then I cut the 2x4s with the jigsaw. A circular saw would have been the better tool, but I was trying to make a point. It worked, mostly. I hit a knot and the blade really struggled, and by the end it had changed color from the heat, which also dulls it. Keep a few extra blades around. Use a sharp one and take it slow, because if you push too hard the blade deflects and the cut won’t be flat. Battery tools are nice, but this kind of cutting chews through batteries fast, and the corded ones are cheaper anyway.
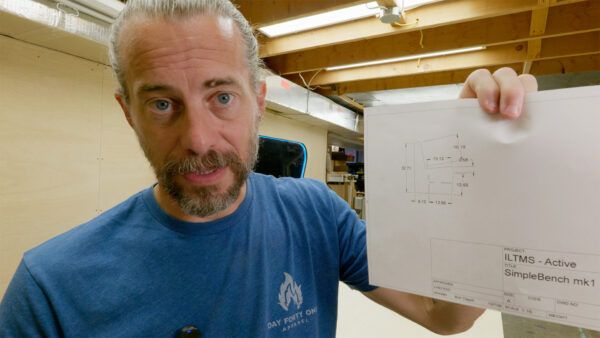
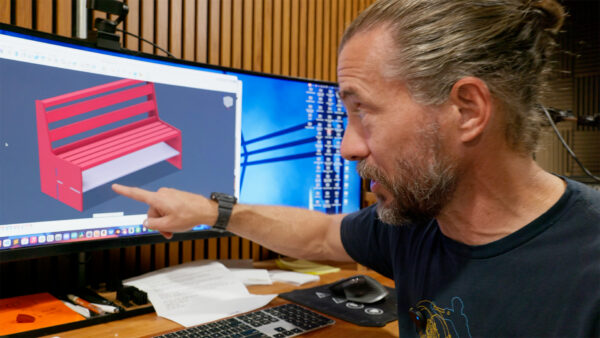
For the side panels, I had already drawn the bench up in Fusion, so I printed a drawing of the side panel with all the dimensions on it and laid it out on the plywood with a ruler. If you want to get comfortable drawing up your own projects like this, that’s exactly what my Fusion For Makers course is for. Honestly, the drawing was more of a rough guide than a strict plan, and it only took a couple of minutes to get the basic shape and the slot locations marked. I traced around a can to round over all the little inside corners so nothing would be sharp or uncomfortable, then cut it out with the jigsaw. After that I traced the first side onto the plywood to make the second one. There was a little waste because it’s an odd shape, but there’s not much of a way around that.
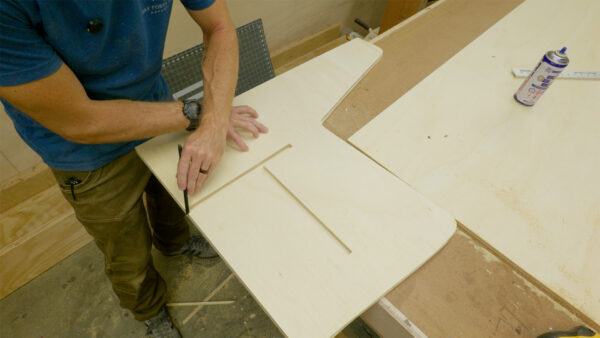
The slots were the fussy part. I wanted them sized so the half-inch plywood would slide in nice and tight, so I cut just inside the line and cleaned it up from there. This is where I noticed the jigsaw tearing up the top layer of the plywood. The blade moves up and down, so it drags the fibers in both directions instead of slicing through like a circular blade does. One way to help is to go over your line with a razor blade first, which breaks those surface fibers so they’re less likely to pull up outside the cut. I obviously thought of that after I’d already made the mess. There was another gotcha on the second panel. I had traced it from the inside of the first panel’s slots, so on that one I needed to cut right on the line instead of inside it. A test scrap slid in snug, which was good enough for me.
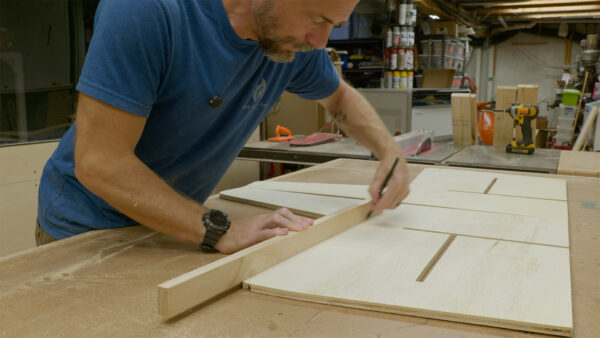
Next were the pieces that tie the two sides together. The shelf and the back piece are cut an inch longer than the 2x4s so their tabs pass through both half-inch side panels. You can cut these with a jigsaw, but your lines probably won’t be straight, so use a circular saw if you’ve got one. It doesn’t matter much either way, since the only edge you’ll really see is the front of the shoe shelf, and that can just be the factory edge of the plywood. Before assembly I marked where the 2x4s would go. I didn’t want them flush with the top edges of the sides. I wanted them set down a bit so the cushion would have a little cradle to sit in and wouldn’t slide off. I held a piece of three-quarter-inch material against the top edge, traced along it, and used that line to place the 2x4s, which left a three-quarter-inch lip to hold the cushion.
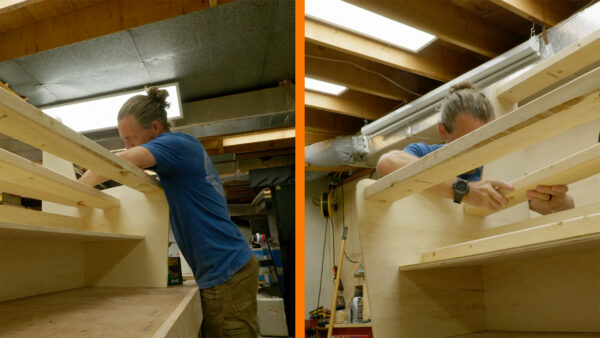
I’ll admit I hadn’t really thought through the assembly. My first plan was to put the shelf and back piece into one side, add some 2x4s, and then set the other side on top. That was awkward, and it left me with a side I couldn’t screw into. Laying it down and putting the second side on first worked much better, because then the 2x4s were sandwiched between the two panels and I could drive construction screws in from the outside. I also used glue, which means this one isn’t really knocking down anymore, and I was fine with that. I added one tool to the list here, a single cheap Harbor Freight clamp, which held up the far end of each 2×4 while I attached the other side. Partway through, I also added one more 2×4 standing on edge. A 2×4 lying flat bends a lot more easily, and with two people, or one heavier person, sitting in the middle, that extra stiffness helps. I’m pretty sure my model had all of the seat boards that way for exactly that reason. I just didn’t think about it when I started screwing them on.
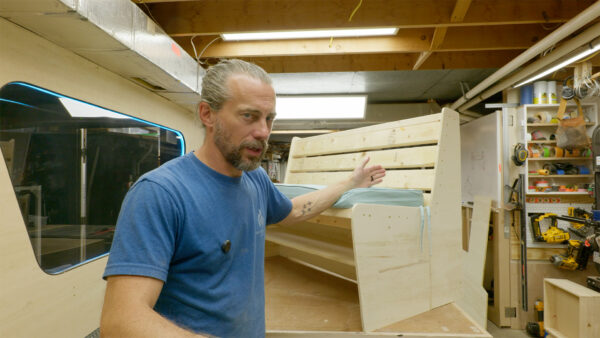
With the seat on, it was technically a bench! Honestly, it was better than I expected, not that I expected it to be bad. It did rock a little, though. The plywood piece running across the middle wasn’t flat, and it had a high spot right in the center that the whole bench was pivoting on. A quick pass with the jigsaw took the high spot off and the wobble was gone. I think it’s comfortable enough without any cushion at all, but I tried them anyway. The seat cushion fit really well and was the right depth. Adding the second one on the back was just too much, so that one is going back to the store. If a cushion was going on this thing, though, the rest of it needed to look at least a little nicer. I skipped edge banding, even though it was kind of killing me not to, and just went with paint.
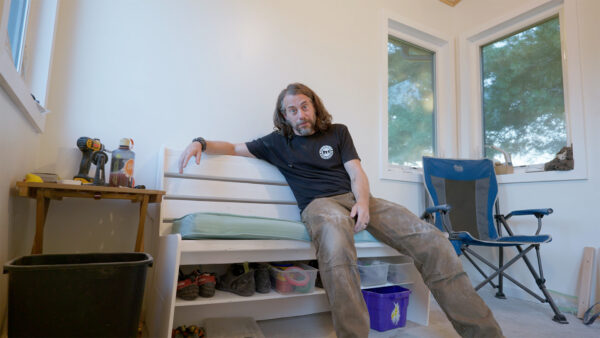
I’d also been wanting a spot where everyone who climbs on the wall could sign their name and be a part of it, and the bench turned out to be a great place for that. So now there’s a rule. When somebody new comes over and finishes a climb for the first time, they get to sign the couch. Bonus, I don’t have to paint it anymore. Getting it into place was a reminder that this thing is not light, since there’s roughly a tree’s worth of 2x4s in it.
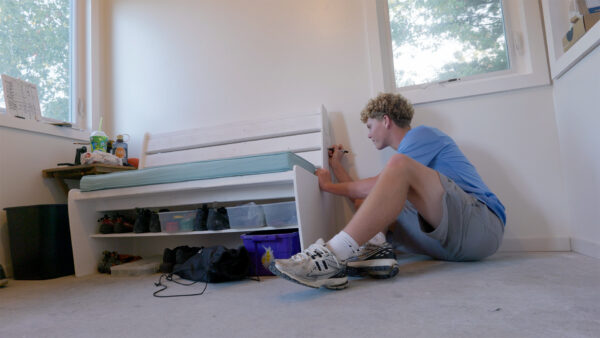
Then, while I was out there filming, my son and his friends showed up to climb, so we had a little session. They really liked having somewhere to sit while they put their shoes on, and we got the first four signatures on the bench. It was supposed to be cheap, fast, and easy, and it ended up being all three while actually doing its job. Thanks for hanging out and following along with the build. Now, go make something awesome!
TOOLS
(purchasing via these affiliate links supports ILTMS)
Woodworking
- SawStop cabinet saw
- 8″ Dado stack
- Skil circular saw
- Dewalt 20v drill driver combo
- Dewalt Miter Saw
- Jet Wood Lathe 12×21
- Carbide lathe tool set
- Countersink drill bits
- Dewalt DW735 benchtop planer
- Orbital Sander
- Pancake compressor/nail gun combo
- Dremel tool
- Incra box joint jig
- 54″ Drywall T-Square
- Push Blocks
- Jigsaw
- Shop Fox 6″ Jointer
- Grizzly 14″ Bandsaw
- Grizzly Drill Press (WAAAAY overpriced (3x) on Amazon, buy from Grizzly directly.)
- Jet Drum Sander
- Kreg Rip Cut (circular saw guide)
- Kreg R3 pocket hole jig kit
- Shop Fox Hanging Air Filter
- 2HP Dust Collector
- 1 Micron bag
- Speed square
- 11″ Digital protractor
- Digital Angle Gauge
- Classic steel ruler (cork backed)
- Taper jig
- Flush cut saw
- 90˚ corner clamp (4 pack)
- Box Cutters (for eva foam)
Finishes & Adhesives
- Spray lacquer
- 100% pure tung oil
- Formby’s tung oil finished (tung oil/varnish)
- Danish oil
- CA Glue (medium)
- CA Activator
- Barge Contact Cement
- Critter Spray Gun
- Polycrylic
- Polyurethane
- Spar Urethane
3d Printing/CNC/Laser
- Glowforge (laser)
- X-Carve (CNC)
- Ultimaker 2 Extended 3D printer
- Ultimaker 3
- Original Prusa i3 MK 3
- Form1+ SLA 3D printer
- Silhouette Portrait (vinyl cutter)
- All filaments, 3d printing supplies from MatterHackers
Welding
- MIG welder *
- TIG welder
- Welding mask (auto darkening)
- Welding gloves
- Welding magnet
- Angle grinder *
- Cut off wheels
- Metal cutting bandsaw *
- 10″ Evolution Miter Saw for cutting Steel, Aluminum, Wood, etc.
Electronics
- Arduino Uno (just the Uno)
- Arduino Uno Kit
- Arcade buttons
- Raspberry Pi 3
- Multimeter
- Wire
- jumpers (Male to Female)
- Soldering iron
- Third hand kit
- Wire strippers (not the ones I have, but good ones)
- Thin solder
- Anti static mat
- Fiskars cutting mat
- Plastic parts cabinet (24 drawer)
- Plastic parts cabinet (64 drawer)
- Precision Screw driver kit