

My family plays a lot of card games. Uno shows up constantly, in pretty much every flavor they make, and so does Dutch Blitz, which is a lot of fun if you’ve never tried it. The trouble is that nearly every game like this has the same weak spot. They come in cardboard boxes, and every time you open one to play, it tears a little more. The more you play, the worse the packaging gets, until cards start going missing and the game quietly stops coming off the shelf. So the games we love most are the ones falling apart the fastest.

Of course, you can find 3D models online for little printed card boxes, and plenty of them even come with the game logos already on them. They’re great, honestly. I could have printed a pile of them and moved on with my life. But where’s the fun in that? I wanted to come up with my own way to repackage each game. All the pieces for a given game should stay together, and all the games should stay together too, easy to get to whether they ended up in a container on the table or put away in a cabinet.

That left me with a bit of a conundrum. Any time you design something, you’re working somewhere on a spectrum, whether you realize it or not. One end is the bare-bones version, the minimum that gets the job done. The other end is way too much, with lots of mechanism and lots of looks. I usually live pretty close to the simple end. I think a lot more about function than form, and as long as a thing does what it’s supposed to do, I don’t worry much about how it looks. But this was literally a box for cards. There isn’t a ton of function to work with, so for once the looks were going to have to carry it.
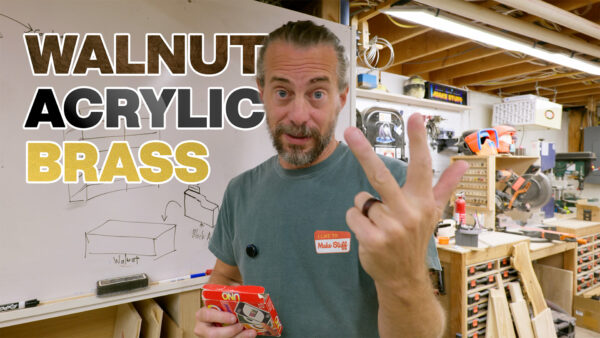
I’d already sketched a bunch of ideas in Autodesk Fusion, with different ways to hold the cards, get them out, and label them, and every single one had its own little issue. If you’ve been meaning to learn Fusion for exactly this kind of early sketching, my Fusion For Makers course is a good place to start. I spent a long time chasing a clever way to store everything in a cabinet before finally giving up on it. These were going on a table. So clever was out, and nice-looking was in. Function went all the way to the simple end. Cards go in a box, those boxes go in another box, and so on. Boxes all the way down. The looks went to the other extreme, with three materials I don’t usually put together: walnut, black acrylic, and brass.
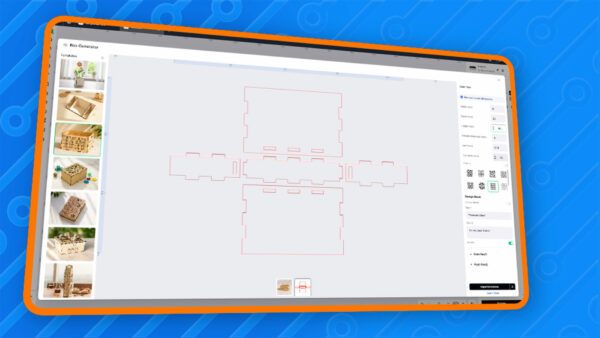
The inner boxes were black acrylic, and each one needed to hold a game. Some of our games have two decks, so those needed a box that could fit two. Another can use as many as eight decks, though you might only need two depending on how many people are playing, so those decks each needed a box of their own. That worked out to two sizes, one for a single deck and one for a double, which covered every game we were dealing with. I used an xTool X1 which has a box generator built right into the software. You put in the dimensions you need, it lays out the flat pattern for whatever material you specify, and you send it straight to the laser. I also added a little finger pinch cutout, since digging cards out of a tight box is exactly how the cardboard ones got wrecked in the first place.
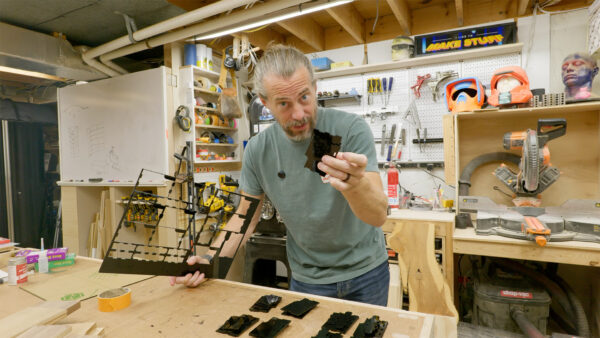
I cut them from eighth inch cast acrylic, which is easy to find, easy to work with, and a good thickness for this. Not too thick, but enough to hold the cards and give your fingers something to grab. I used the 55 watt CO2 laser on the X1, which cut the acrylic super smoothly, and the exhaust ran straight into an air filter instead of anywhere else. Each sheet fit two of the large boxes and three of the small ones, so three sheets gave me everything I needed. Or so I thought. The pieces lock together with tabs and slots, and the thickness of the material tells the software how deep those slots need to be. It nailed that part.
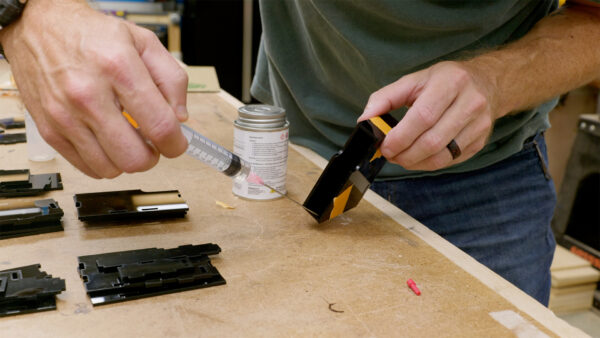
To lock everything together I used acrylic cement, and you barely need any. It isn’t really glue. It’s a chemical reaction that bonds the two pieces of plastic together, so it works right away and there’s no waiting for anything to dry. I’ve always used those little square squeeze bottles for it, and they have a pressure problem. You squeeze to get some out, then when you let go, air rushes back in and it keeps spilling, so you end up with way more than you need. Someone recommended a syringe last time, so I gave that a try. It still dripped a bit, and my needle was probably a little big, but it was a lot more controllable. Black acrylic doesn’t make it easy to see how much you’re putting down, either. Still, a big improvement, so thanks to whoever that was.
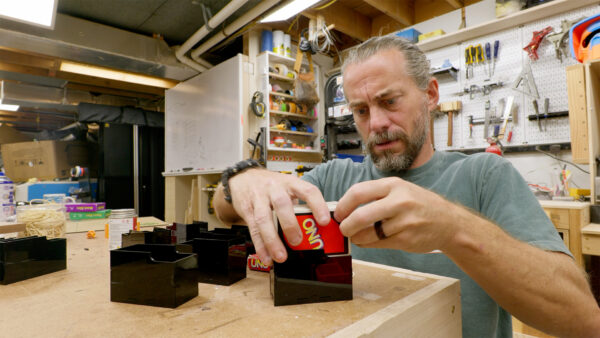
Then I tried to slide an Uno card into one of the finished boxes, and it didn’t fit. That’s when I realized the cards in these games aren’t all the same size, which is the kind of thing you’d hope to notice before cutting a stack of boxes instead of after. Half of my boxes were wrong. Luckily, this is one of the nicer mistakes to make with a laser. I tweaked the file, recut the bad ones, and glued them up again. The only real cost was a little more acrylic and a slightly bruised ego.
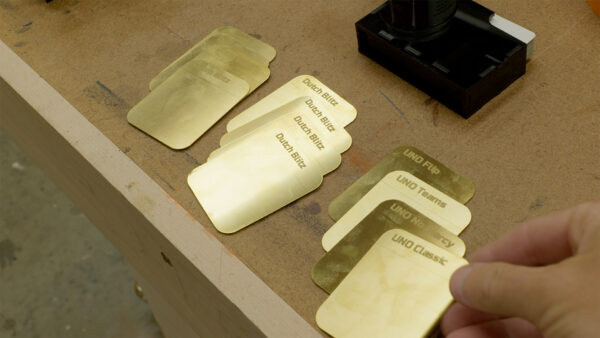
With every box black and basically identical, I needed a way to tell them apart. Each Dutch Blitz player picks a deck, and the decks have different pictures on them. For the Uno games it matters even more, since each deck is a separate game. So every box got a little brass tab on the back that sticks up above the top as a label. I cut the brass pieces on my MetalFab, which handles metals like brass, aluminum, and steel, and then engraved them on the X1. The laser modules on that machine are swappable, so I traded the CO2 for a MOPA laser. I’d already experimented with the MOPA after hearing it could engrave color onto stainless steel (it can), but different lasers react very differently with different materials, so I ran some tests on the brass before engraving the real ones.
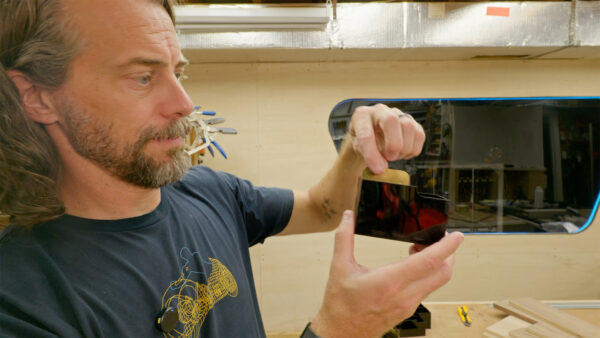
The tabs came out way bigger than they needed to be. I didn’t know what shape to make them, and I’d never tried gluing brass to plastic, so more surface area felt like cheap insurance. I have glued brass to wood with CA glue, so that’s what I tried first, and it worked super well. With every game in its own labeled box, it was time to build the boxes that hold the boxes. I sat with all the pieces for a while trying to come up with something more interesting than a basic square tray, and what I landed on was, if I’m being honest, only slightly more interesting.
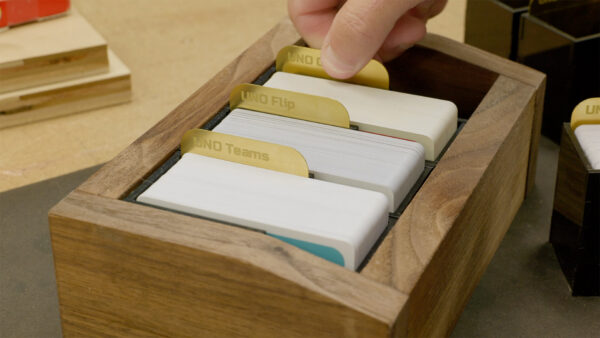
The plan was walnut, with straight walls everywhere except one corner, where a diagonal runs from the high point down to the low point. With eight single boxes and eight doubles, I had enough to fill three walnut boxes, and since the two sizes were close to the same depth, one design worked for all of them. I cut the walls, worked out exactly where an inset bottom needed to sit so the tops of the acrylic boxes would end up flush with the top of the walnut, and cut a dado on every piece to hold it. Everything came out the right size, which is always a relief. Then came the diagonal, which I almost skipped. I held a box up to the saw and nearly talked myself out of it, since square would at least look okay. It’s a tiny detail and totally unnecessary, but so is a walnut box for Uno cards. I’m really glad I made the cut. Next to a plain square one, it looks like somebody took an extra step, and that’s an extra step I skip in a lot of my projects.
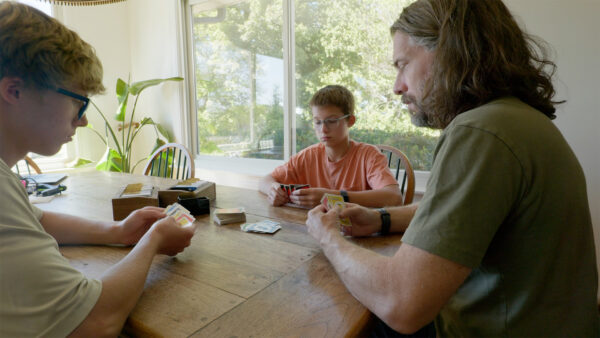
The finished set looks great on the table, and it looks fine in a cabinet or on a shelf too. More importantly, it’s easy to grab a game, pull the cards out, play, and put it all back, which is a huge deal when you have kids. Acrylic doesn’t tear the way cardboard does, and the brass tabs tell you what’s in each box before you pull it out. This project had me spending a lot more time on looks than I’m used to, and I’m glad I let myself. Thanks for following along with the build, and maybe go dig out a card game this weekend.
Now, go make something awesome!
TOOLS
(purchasing via these affiliate links supports ILTMS)
Woodworking
- SawStop cabinet saw
- 8″ Dado stack
- Skil circular saw
- Dewalt 20v drill driver combo
- Dewalt Miter Saw
- Jet Wood Lathe 12×21
- Carbide lathe tool set
- Countersink drill bits
- Dewalt DW735 benchtop planer
- Orbital Sander
- Pancake compressor/nail gun combo
- Dremel tool
- Incra box joint jig
- 54″ Drywall T-Square
- Push Blocks
- Jigsaw
- Shop Fox 6″ Jointer
- Grizzly 14″ Bandsaw
- Grizzly Drill Press (WAAAAY overpriced (3x) on Amazon, buy from Grizzly directly.)
- Jet Drum Sander
- Kreg Rip Cut (circular saw guide)
- Kreg R3 pocket hole jig kit
- Shop Fox Hanging Air Filter
- 2HP Dust Collector
- 1 Micron bag
- Speed square
- 11″ Digital protractor
- Digital Angle Gauge
- Classic steel ruler (cork backed)
- Taper jig
- Flush cut saw
- 90˚ corner clamp (4 pack)
- Box Cutters (for eva foam)
Finishes & Adhesives
- Spray lacquer
- 100% pure tung oil
- Formby’s tung oil finished (tung oil/varnish)
- Danish oil
- CA Glue (medium)
- CA Activator
- Barge Contact Cement
- Critter Spray Gun
- Polycrylic
- Polyurethane
- Spar Urethane
3d Printing/CNC/Laser
- Glowforge (laser)
- X-Carve (CNC)
- Ultimaker 2 Extended 3D printer
- Ultimaker 3
- Original Prusa i3 MK 3
- Form1+ SLA 3D printer
- Silhouette Portrait (vinyl cutter)
- All filaments, 3d printing supplies from MatterHackers
Welding
- MIG welder *
- TIG welder
- Welding mask (auto darkening)
- Welding gloves
- Welding magnet
- Angle grinder *
- Cut off wheels
- Metal cutting bandsaw *
- 10″ Evolution Miter Saw for cutting Steel, Aluminum, Wood, etc.
Electronics
- Arduino Uno (just the Uno)
- Arduino Uno Kit
- Arcade buttons
- Raspberry Pi 3
- Multimeter
- Wire
- jumpers (Male to Female)
- Soldering iron
- Third hand kit
- Wire strippers (not the ones I have, but good ones)
- Thin solder
- Anti static mat
- Fiskars cutting mat
- Plastic parts cabinet (24 drawer)
- Plastic parts cabinet (64 drawer)
- Precision Screw driver kit