

I made a mistake on this one. I spent a good chunk of time designing a solution to a problem, then found out the problem didn’t exist. I’d love to say that’s rare for me. It isn’t. I’m not an engineer in any real sense, but engineers follow a process that works for the rest of us too. First you define the problem and write down everything that needs solving. Then you research and brainstorm with no guardrails. Only after that do you get to the fun part, where you design something, test it, change it, and repeat as many times as it takes. I tend to skip straight to the fun part.
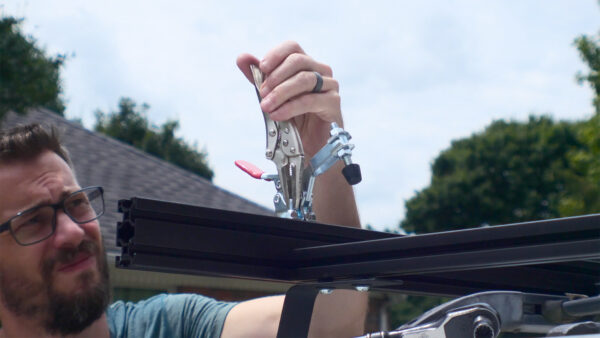
This whole thing started with my 1992 Land Cruiser, which I love (now that I have it back). Years ago I built a custom roof rack for it out of aluminum extrusion. That rack came off when the truck went to the shop, and I replaced it with a store-bought one made of heavy steel tubing that I never warmed up to. Eventually I bought another rack, also built from aluminum extrusions, and that one’s great. I use it all the time. I throw 2x4s up there, run straps around them, and head home. The only annoyance is the ratchet strap routine of hooking over the steel plate at the end, wrapping the load, twisting around the bars, and cranking it down. It works. It’s just kind of a pain every time.
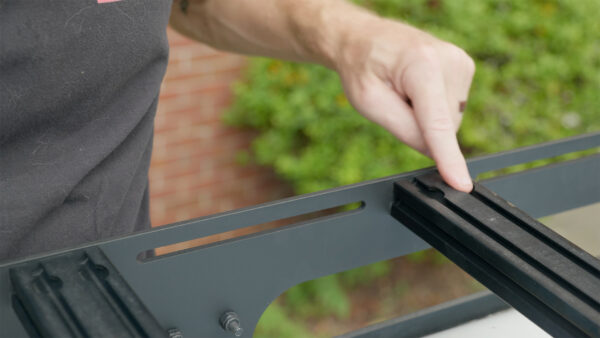
So I decided to make something that mounts to those bars and makes tying down a load faster. That’s where I went wrong. Instead of walking out to the truck and looking at the rack I actually own, I designed everything in my head based on the rack I built years ago. That old extrusion had no access slots, so I spent my time working out a bracket that could clamp around it, loosen, and slide. The new rack has those slots built right in. Bolts drop in, slide to wherever you want them, and tighten down without anything being permanent. Half an afternoon of design work, undone by a feature that had been sitting on my roof the whole time.

Once I defined the problem properly, it got a lot simpler. I wanted something I could put on the rack any time and take off just as easily. Once it was tight, I wanted to lay lumber up there, strap it down quickly (maybe even one-handed), and get on the road. That turned out to be easier than I’d expected, so I gave myself a few extra problems to solve along the way. Version one was an L bracket that mounts to the extrusion with a big black knob, with slots in the part that sticks up. Put two on the same bar, lay the lumber between them, and run a strap around the bundle.
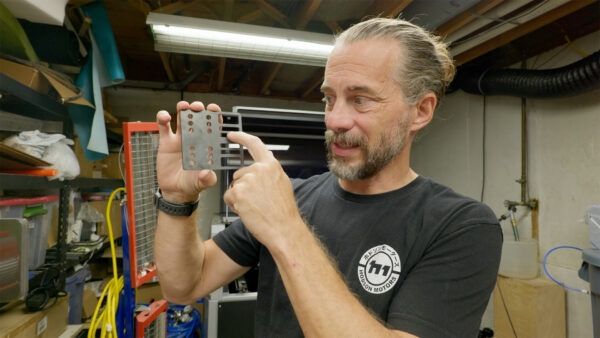
I wanted to make that bracket from a single flat piece of steel and bend it, so I drew it up in Fusion with the sheet metal tools, which let you model a 3D part and then unfold it into a flat pattern. In the flat view I doubled up the slots, added a bunch of holes for bolting other things on later, and mirrored everything so both legs had the same features. That way the bracket works facing either direction. If you’ve wanted to start turning your own ideas into 3D models like this, my Fusion For Makers course was made for people starting with no experience at all. I was pretty sure this first design would change once I cut one out and tried bending it.
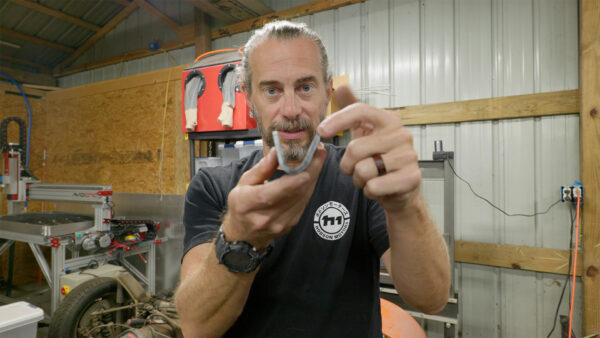
The first one came out of quarter inch steel looking great, but I could already see an issue. The gap in the middle where the fold needed to happen looked too narrow, and I figured the sections around it would distort. So before heading to the hydraulic press, I made another with more room in the middle. Then I pressed it and found the problem I hadn’t seen coming. All those slots and holes had weakened the flanges, so they bent before the fold did. The main bend landed somewhere around 90 degrees, but both flanges curled right along with it, and the whole thing looked like a metal taco. Obvious in hindsight, which is when most things are.
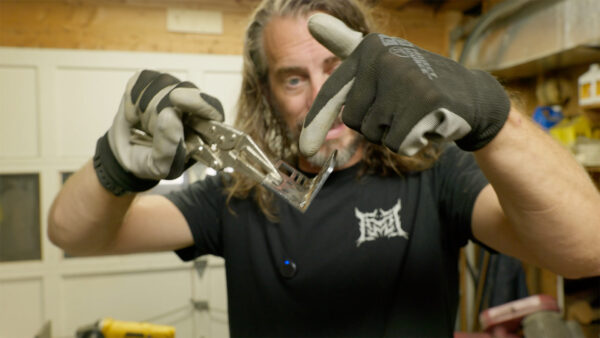
The simplest fix was to stop fighting the bend. I cut the bracket as two pieces and welded them together at 90 degrees, which was a lot easier than bending. My welder wasn’t cooperating that day and I thought about switching to the laser welder, since it’s great at inside seams, but either way I ended up with a first prototype. Next was hardware. I’d bought knobs and bolts made to fit the rack’s slot, and of course the bolt heads were too thick to drop in. I ground them thinner, and since the slot isn’t square, I tapered the heads to match the taper at the bottom. After that, I could loosen the knob, slide the bracket, and lift it right out without taking anything apart.
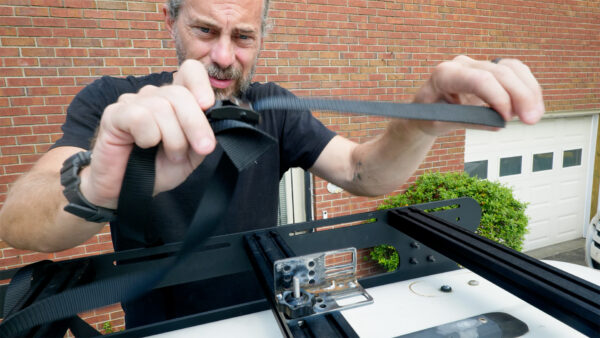
For tie-downs, I’d planned on a strap that feeds back through itself, with a little tensioner, so you just pull the tail to snug it up. It’s plenty strong for a stack of 2x4s. Any of the slots can take that strap, the big opening fits a hook, and the holes are there for bolting on whatever I think of next. Both legs match, so it’s reversible too. I was mostly trying to keep it flexible. It was also about a thousand degrees outside, so I went in and made three more exactly like the first. I hadn’t planned on leaving them on the rack full time, but I decided to powder coat them anyway, mostly because it had been a long time since I’d done it.
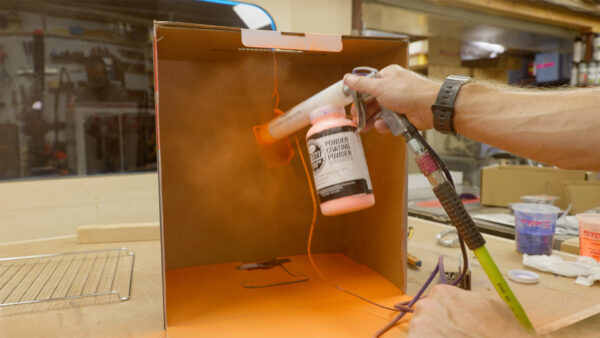
I bought an Eastwood powder coating setup a long time ago, and the dust on it made that pretty clear. I went with orange. If you haven’t tried powder coating, here’s the short version. A clip attached to the gun goes on the part and gives it a charge, the powder is drawn to that charge as you spray, and then the part goes in an oven where the powder melts together into a hard coating. That’s the theory, anyway. I’ve only done it a couple of times. I built a little spray booth to keep the powder contained, and it still made more of a mess than I remembered. The brackets went in the oven, and I went looking for a broom.

While they baked, I started on a second accessory, a grab handle, and I wanted to see if a 3D printed part could survive outdoors on the rack long term. A regular FDM printer running PETG or ASA would probably be strong enough, but I printed it on my Form 4 in Tough 1500 Resin, which I hadn’t used before. I asked the folks at Formlabs what to use for this, and that was their pick. After a rinse, support removal, and a trip through the UV curing chamber, it looked fantastic. The fit was right too. There was room to get my hand behind it, it was thick enough to grip, and I could move the whole Land Cruiser just by pulling on it.
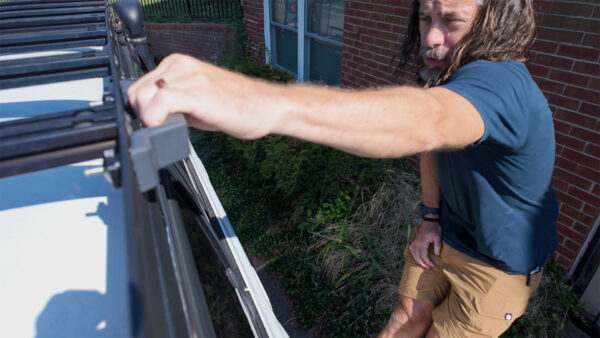
It did shift a little in the slot, though, and that was my fault. I’d made the hex pocket slightly too big for the bolt head, so tightening the knob just spun the bolt. A quick tweak in Fusion fixed it. I also swapped the knob on the back for a lock nut, since a knob would rattle itself loose, and added a second handle up front so I could pull myself up to the roof. Then the orange brackets went on, each with a single bolt so it can pivot a little for oddly shaped loads. I didn’t actually need lumber that day, so I used what I had lying around, sliding the brackets inward to clamp it before strapping. I put the first strap on upside down, naturally, and then realized feeding it the other way made tightening much easier.
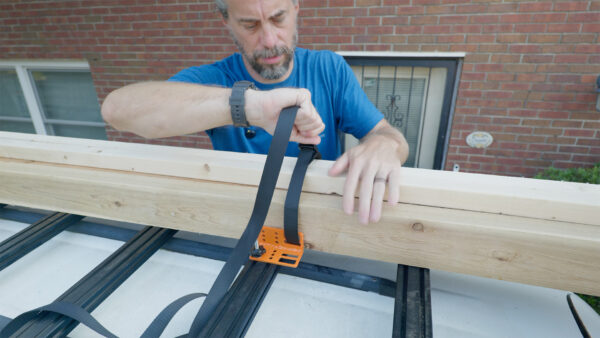
Once it was cinched, I could rock the whole truck by pushing on the load, and nothing shifted in the brackets or the straps. I’m calling that a win, though I still need lock washers under the knobs before any road trips. To be fair, none of this was necessary. A plain strap around the load and the extrusion works fine.
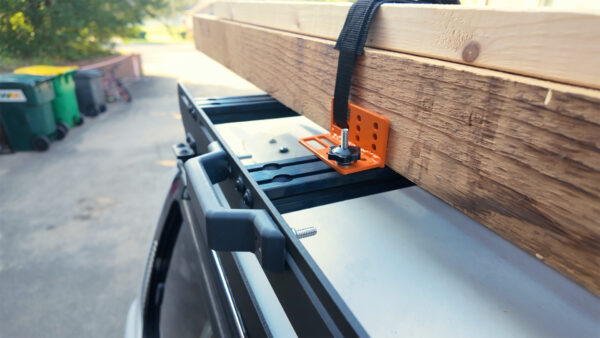
But now that the brackets are powder coated and running stainless hardware, I can leave them on and just drop in a strap when I need one. The handle ended up being my favorite part. You can already buy plenty of overlanding attachments for shovels and jacks, but I’m more interested in everyday stuff, so if you’ve got ideas, I’d like to hear them. Thanks for following along with the build. Now, go make something awesome!
TOOLS
(purchasing via these affiliate links supports ILTMS)
Woodworking
- SawStop cabinet saw
- 8″ Dado stack
- Skil circular saw
- Dewalt 20v drill driver combo
- Dewalt Miter Saw
- Jet Wood Lathe 12×21
- Carbide lathe tool set
- Countersink drill bits
- Dewalt DW735 benchtop planer
- Orbital Sander
- Pancake compressor/nail gun combo
- Dremel tool
- Incra box joint jig
- 54″ Drywall T-Square
- Push Blocks
- Jigsaw
- Shop Fox 6″ Jointer
- Grizzly 14″ Bandsaw
- Grizzly Drill Press (WAAAAY overpriced (3x) on Amazon, buy from Grizzly directly.)
- Jet Drum Sander
- Kreg Rip Cut (circular saw guide)
- Kreg R3 pocket hole jig kit
- Shop Fox Hanging Air Filter
- 2HP Dust Collector
- 1 Micron bag
- Speed square
- 11″ Digital protractor
- Digital Angle Gauge
- Classic steel ruler (cork backed)
- Taper jig
- Flush cut saw
- 90˚ corner clamp (4 pack)
- Box Cutters (for eva foam)
Finishes & Adhesives
- Spray lacquer
- 100% pure tung oil
- Formby’s tung oil finished (tung oil/varnish)
- Danish oil
- CA Glue (medium)
- CA Activator
- Barge Contact Cement
- Critter Spray Gun
- Polycrylic
- Polyurethane
- Spar Urethane
3d Printing/CNC/Laser
- Glowforge (laser)
- X-Carve (CNC)
- Ultimaker 2 Extended 3D printer
- Ultimaker 3
- Original Prusa i3 MK 3
- Form1+ SLA 3D printer
- Silhouette Portrait (vinyl cutter)
- All filaments, 3d printing supplies from MatterHackers
Welding
- MIG welder *
- TIG welder
- Welding mask (auto darkening)
- Welding gloves
- Welding magnet
- Angle grinder *
- Cut off wheels
- Metal cutting bandsaw *
- 10″ Evolution Miter Saw for cutting Steel, Aluminum, Wood, etc.
Electronics
- Arduino Uno (just the Uno)
- Arduino Uno Kit
- Arcade buttons
- Raspberry Pi 3
- Multimeter
- Wire
- jumpers (Male to Female)
- Soldering iron
- Third hand kit
- Wire strippers (not the ones I have, but good ones)
- Thin solder
- Anti static mat
- Fiskars cutting mat
- Plastic parts cabinet (24 drawer)
- Plastic parts cabinet (64 drawer)
- Precision Screw driver kit