
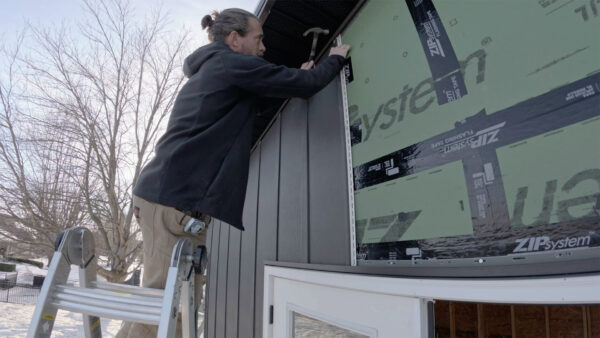
It was time to put siding on the pool house. This is part six of the build, and up to this point the structure has been fully framed, sheathed, and roofed, but it still looked like a construction project sitting in the yard. Adding siding is the step that turns a pile of framing into something that actually looks like a building. I knew I wanted vertical board and batten, but figuring out which product to use turned out to be a much bigger decision than I expected. Between materials, styles, price points, and a design constraint I created for myself, narrowing it down took a while. And then once I started installing, I learned a few things the hard way — including a measurement oversight that almost derailed the whole plan.
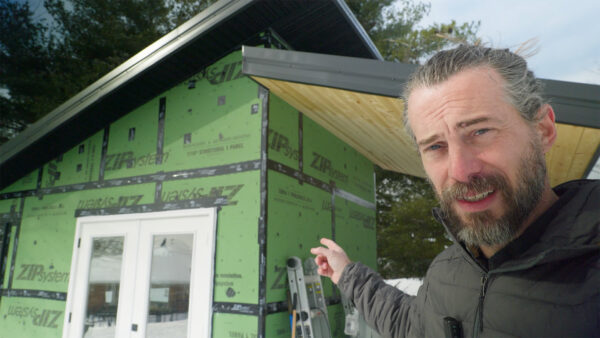
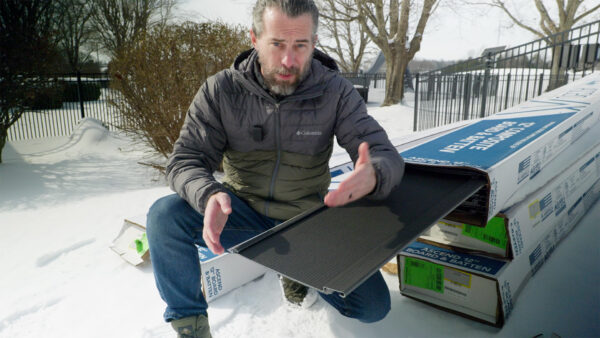
The main challenge with choosing siding was the height of the building. This section of the pool house is 12 feet tall, and I wanted panels that could cover the full height without a visible horizontal seam. That meant I needed material available in at least 12-foot sections, which immediately cut down my options. I priced out engineered wood, vinyl, metal, and composite. After comparing everything, I landed on composite board and batten panels from a company called Ascend. This was not sponsored — I just found them online and they fit the project well. Composite was appealing because it’s pre-colored, so you don’t have to paint it. You’re actually not supposed to paint it. The color is built into the material and rated to last at least 15 years. It’s also lighter than wood or metal, which matters when you’re installing solo. And cost was a big factor — LP siding, the engineered wood you see on sheds and outbuildings all the time, came in at almost twice the price, requires painting, and creates more waste during installation.
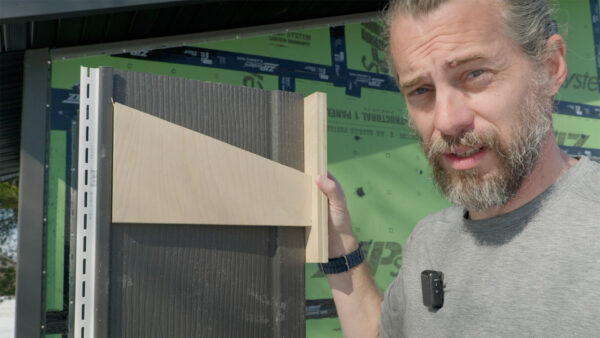
Board and batten style means you have wide panels side by side, and the seam between them gets covered by a narrow strip called a batten. With this product, one side nails in and the other hooks over, similar to how vinyl siding works. Before any panels could go up though, I had to install all the trim. That includes corner trim with slots on both sides for panels to slide into from each direction, J channel that goes around windows and doors to give the panel ends somewhere to land, and specialty trim pieces that handle cut edges and transitions. The installation rules are straightforward: don’t nail anything down too tight so the material can move with temperature changes, and leave expansion gaps at the top and bottom. If you’re installing in cold weather like I was, you need a larger gap at the bottom — I used a half-inch spacer along the base to account for expansion when things warm up.
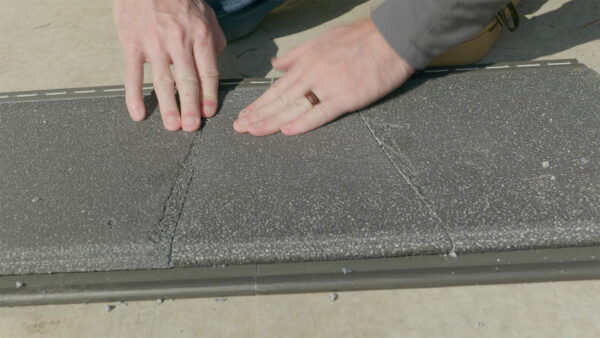
I started with the tall back wall because it’s just a big rectangle — no doors, no windows, no angles. Every other wall on the building has at least one of those things. The corner trim only comes in 10-foot sections even though the panels come in 12-foot lengths, so I had to splice two pieces together to cover the full wall height. The top piece also needed to be cut at an angle to match the roofline and notched around some roof framing. Connecting two corner pieces is simple if it’s a straight extension — you trim back the flanges and slide one over the other. But fitting the top piece around the roof angles took careful measuring and a few test fits. One cutting tip that helped a lot: you need to flip the saw blade backwards to cut this stuff cleanly because it’s very flexible. You can also score it with a knife and snap it along the line, which worked well for straight cuts. Once the corners were set and the top and bottom trim was in place, I punched weep holes in the bottom trim every couple of feet so any moisture behind the panels could drain out.

Hanging the actual panels on the back wall went faster than I expected. Each panel has a 12-inch exposed face. You hook the bottom edge onto the previous panel, push it up until it locks, and nail it along the top. I measured out from the center of the wall first to make sure none of the batten strips would end up awkwardly close to either corner. The last piece had to be ripped down to a narrower width, and the thinner edge going into the corner needed something to hold it in place. That’s where accessory trim comes in — it’s basically a narrow J channel with a small flexible lip that holds the cut edge firm. It hides inside the corner piece and you’d never know it’s there. That first wall came out looking really clean and gave me a solid feel for the rhythm of the install before moving on to the harder stuff.
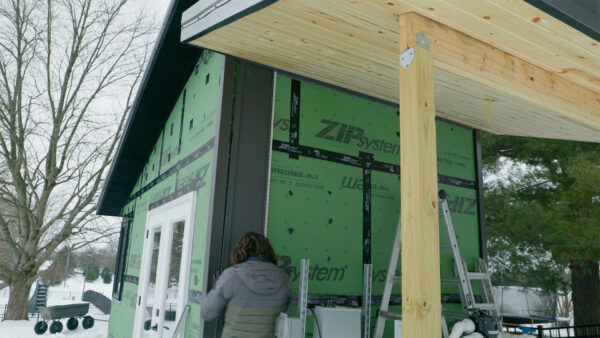
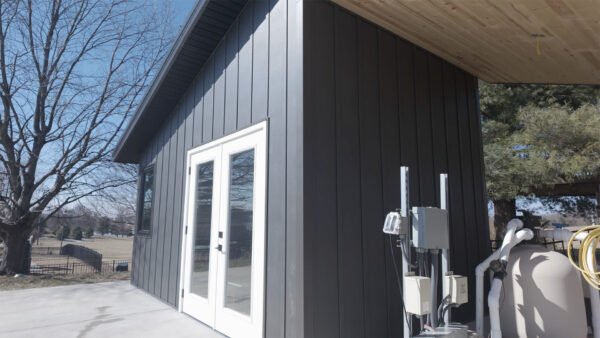
The front wall has both a window and a door, so there was a lot more trim work before any panels could go up. Ascend has a PDF on their website that walks through how to trim out openings — how to cut the pieces, how to overlap them, and in what order so that water runs down and away from the frame. Everything goes on from the bottom up. The process was repetitive but not difficult once I understood the sequence. The first siding panel on the front was probably the hardest single piece of the whole project because it had to fit into channels on multiple sides and have an angle cut on top to match the roof pitch. I made a simple jig out of scrap that matched the roofline angle so I could mark and cut consistently on every piece. It works in both directions — just set it against the panel, trace the line, and cut. That jig ended up being one of the most useful things I made during the entire build.
With only a few pieces left, I ran into a problem I should have caught much earlier. I’d been thinking of the tall wall as a 12-foot wall because the studs are 12 feet long. But once you account for the bottom plate, the two top plates, and the space below the rafters, the actual dimension from bottom trim to top trim is about 12 feet and one and a half inches. The siding panels are exactly 12 feet. So for the final piece at the very top, I was short by about an inch and a half. The manufacturer doesn’t have an approved method for seaming two pieces together — you’re simply not supposed to need one.

In hindsight, I could have avoided this entirely by adding a small trim board along the bottom of the wall before starting, something like a 1×4. It would have looked nice, kept water off the base of the building, and raised all the siding up enough to clear the gap at the top. But by the time I realized the issue, that option was long gone.
My fix was to create a small seam at the very top of the wall. The seam ended up being only about four or five inches wide, tucked up in the corner under the shade of the roof. I used a scrap piece of the panel’s insulation backing as a backer behind where the two pieces meet, glued it with spray adhesive after testing it on the foam to make sure it wouldn’t dissolve the material, and sealed everything with neoprene sealant — the same stuff I used on the base of the building.
It’s not a manufacturer-approved method, but it’s solid, sealed against water, and practically invisible unless you’re looking for it. The lesson is a simple one: measure the actual space your material needs to fill, not just the lumber that frames it. Account for plates, gaps, and anything else that changes the final dimension.
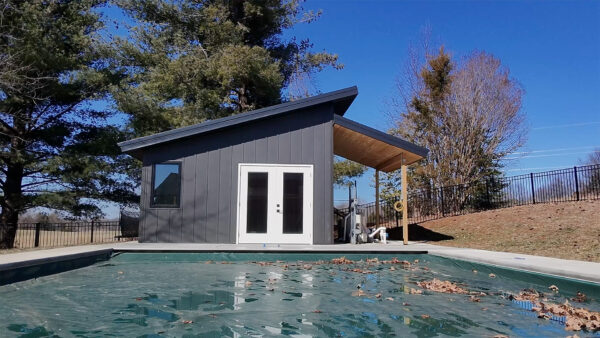
With all the siding installed, the pool house finally looks like a real structure instead of a framed-up project sitting in the yard. It’s not done yet — I still need to install a screen in front of the pool equipment, put up exterior lights, add gutters, and do the entire interior. But getting the outside closed up is a big milestone, and this composite siding turned out to be a solid choice for a solo install. Thanks for following along with the build. Now, go make something awesome!
TOOLS
(purchasing via these affiliate links supports ILTMS)
Woodworking
- SawStop cabinet saw
- 8″ Dado stack
- Skil circular saw
- Dewalt 20v drill driver combo
- Dewalt Miter Saw
- Jet Wood Lathe 12×21
- Carbide lathe tool set
- Countersink drill bits
- Dewalt DW735 benchtop planer
- Orbital Sander
- Pancake compressor/nail gun combo
- Dremel tool
- Incra box joint jig
- 54″ Drywall T-Square
- Push Blocks
- Jigsaw
- Shop Fox 6″ Jointer
- Grizzly 14″ Bandsaw
- Grizzly Drill Press (WAAAAY overpriced (3x) on Amazon, buy from Grizzly directly.)
- Jet Drum Sander
- Kreg Rip Cut (circular saw guide)
- Kreg R3 pocket hole jig kit
- Shop Fox Hanging Air Filter
- 2HP Dust Collector
- 1 Micron bag
- Speed square
- 11″ Digital protractor
- Digital Angle Gauge
- Classic steel ruler (cork backed)
- Taper jig
- Flush cut saw
- 90˚ corner clamp (4 pack)
- Box Cutters (for eva foam)
Finishes & Adhesives
- Spray lacquer
- 100% pure tung oil
- Formby’s tung oil finished (tung oil/varnish)
- Danish oil
- CA Glue (medium)
- CA Activator
- Barge Contact Cement
- Critter Spray Gun
- Polycrylic
- Polyurethane
- Spar Urethane
3d Printing/CNC/Laser
- Glowforge (laser)
- X-Carve (CNC)
- Ultimaker 2 Extended 3D printer
- Ultimaker 3
- Original Prusa i3 MK 3
- Form1+ SLA 3D printer
- Silhouette Portrait (vinyl cutter)
- All filaments, 3d printing supplies from MatterHackers
Welding
- MIG welder *
- TIG welder
- Welding mask (auto darkening)
- Welding gloves
- Welding magnet
- Angle grinder *
- Cut off wheels
- Metal cutting bandsaw *
- 10″ Evolution Miter Saw for cutting Steel, Aluminum, Wood, etc.
Electronics
- Arduino Uno (just the Uno)
- Arduino Uno Kit
- Arcade buttons
- Raspberry Pi 3
- Multimeter
- Wire
- jumpers (Male to Female)
- Soldering iron
- Third hand kit
- Wire strippers (not the ones I have, but good ones)
- Thin solder
- Anti static mat
- Fiskars cutting mat
- Plastic parts cabinet (24 drawer)
- Plastic parts cabinet (64 drawer)
- Precision Screw driver kit